Elements
Size
Age
Levels
Note: Map location may not be exact. Click to open in Google Maps.

They say that adversity makes us stronger, and when it comes to container houses, we think that’s just as true. It’s a special treat to share Kathy’s story of building a container home near the beach in Queensland, Australia. Kathy was actually the second container home in her community of Bushland Beach, and that came with pros and cons of its own that we’ll discuss later.
Kathy hired a builder to design and build her beautiful two-story container home, but the process was anything but straightforward. On top of the difficulties of managing a construction project, she was also diagnosed with cancer mid-way through the project (Spoiler: She’s recovered and feeling great now!) You’ll be inspired by her perseverance, learn from how she navigated a tricky situation and be amazed by the final product she now calls home.
Without further introduction, let’s hear from Kathy!
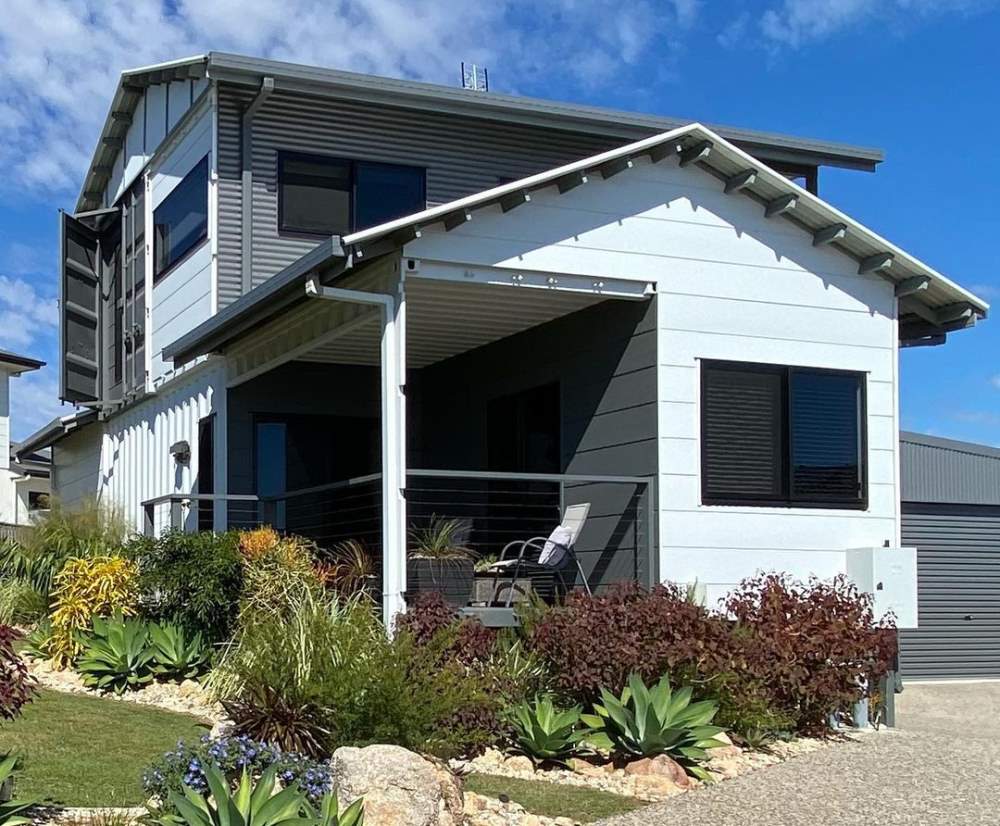
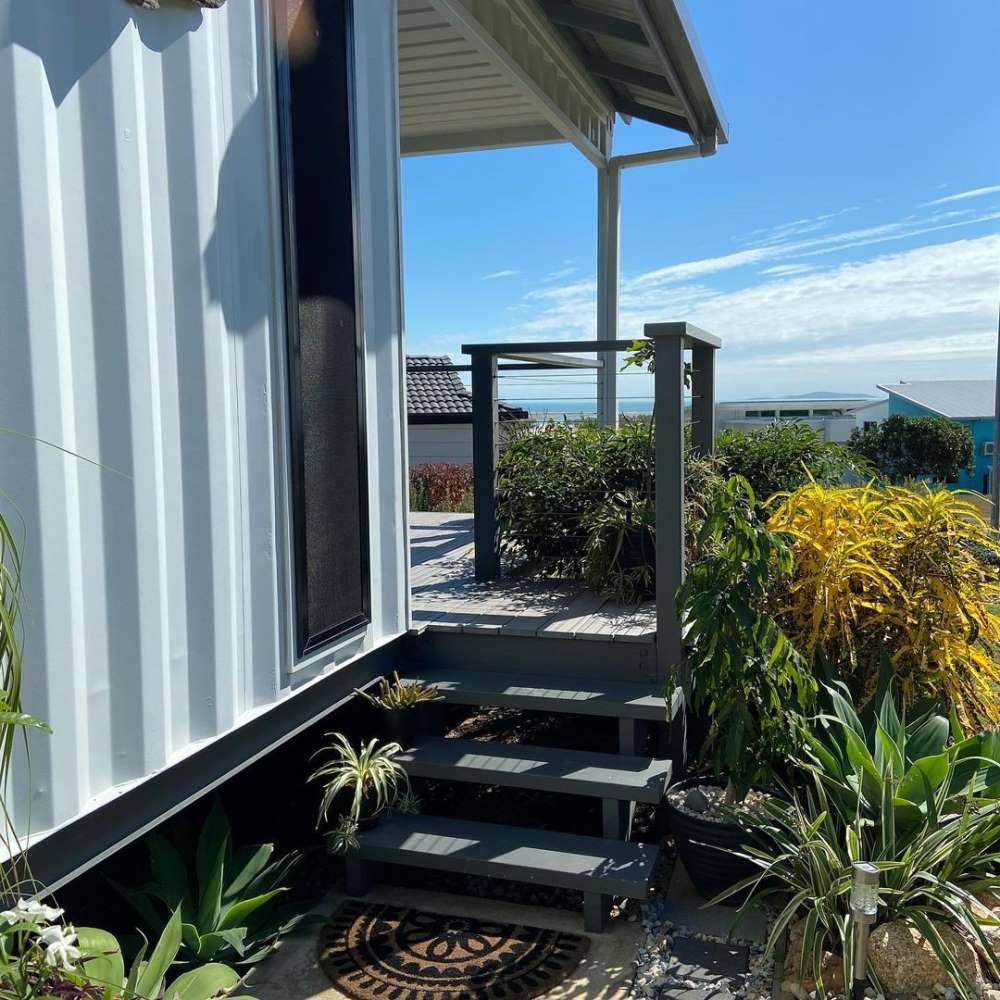
My attraction to using shipping containers comes from the fact that I love the idea of ‘homes with a difference’ and wanting something funky and unique. I built in North Queensland Australia, high on a hill overlooking the ocean. Due to this location, I definitely needed a strong home and using containers was the perfect solution.
I have an addiction to the TV show Grand Designs and other shows of the like which was where I first discovered container homes. I did months of research before commencing the process and was so excited by the many many different looks you can achieve with a container build.
My last build was a kit home, which I designed myself and was quite hands-on with a lot of the aspects concerning the build. This experience gave me more confidence as I contemplated building with cargo containers. This time around I was wanting to try something totally different and I am over the moon with the results…although the journey it took to complete my home was a bit tricky!
I knew I wanted a container home, but I also knew it wasn’t a project I had the time to handle myself. So, I determined pretty quickly that I was going to need to find a builder to work with (which is a separate discussion I’ll touch on later).
I was heavily involved in the front-end design and later partnered with the builder to evolve and tweak things as the build matured. Finding the right relationship between builder and owner was critical to the success of my project: the team understood my vision and was open to all of my ideas.
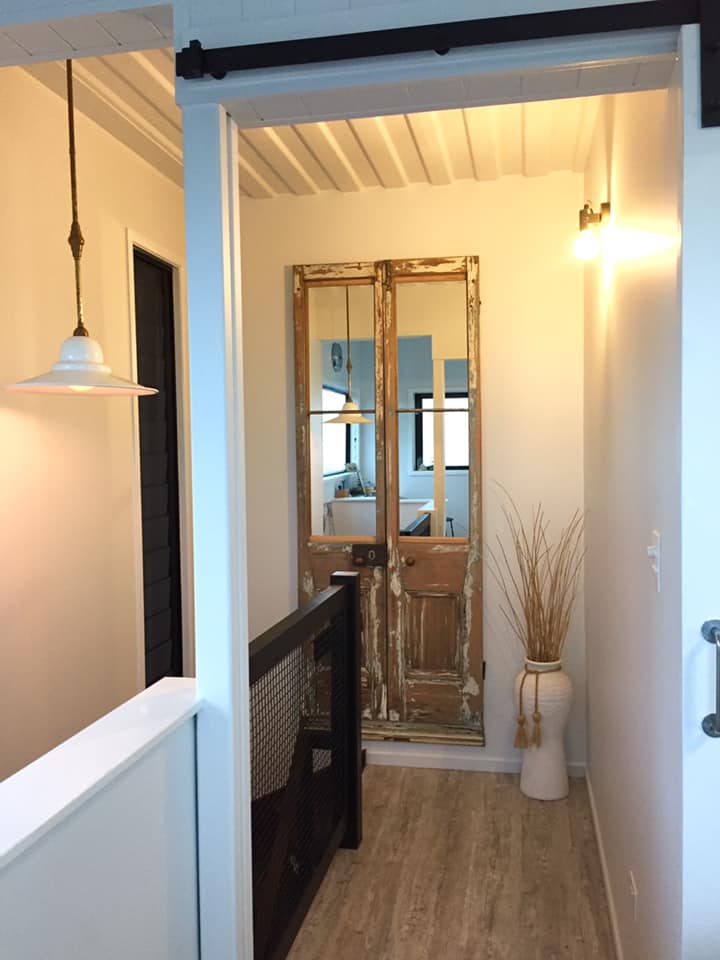
Additionally, I shopped around for and provided loads of bargains from the local demolition shop: brand new ceramic vanity basins for AU$10 each, an old hospital door, beautiful old lights, and many more upcycled pieces all which give my home loads of character.
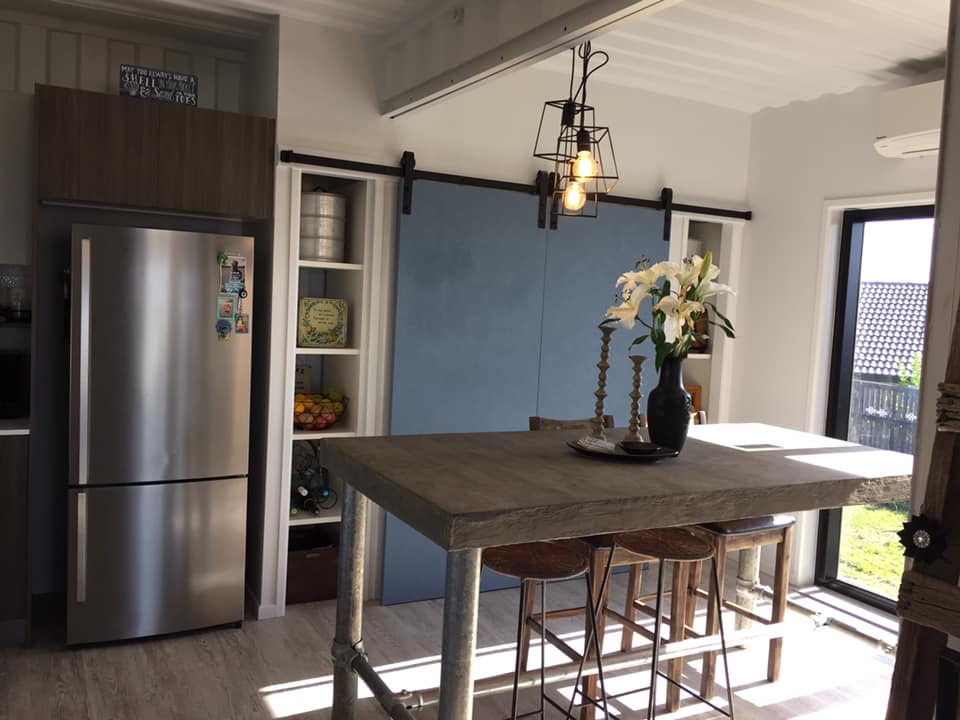
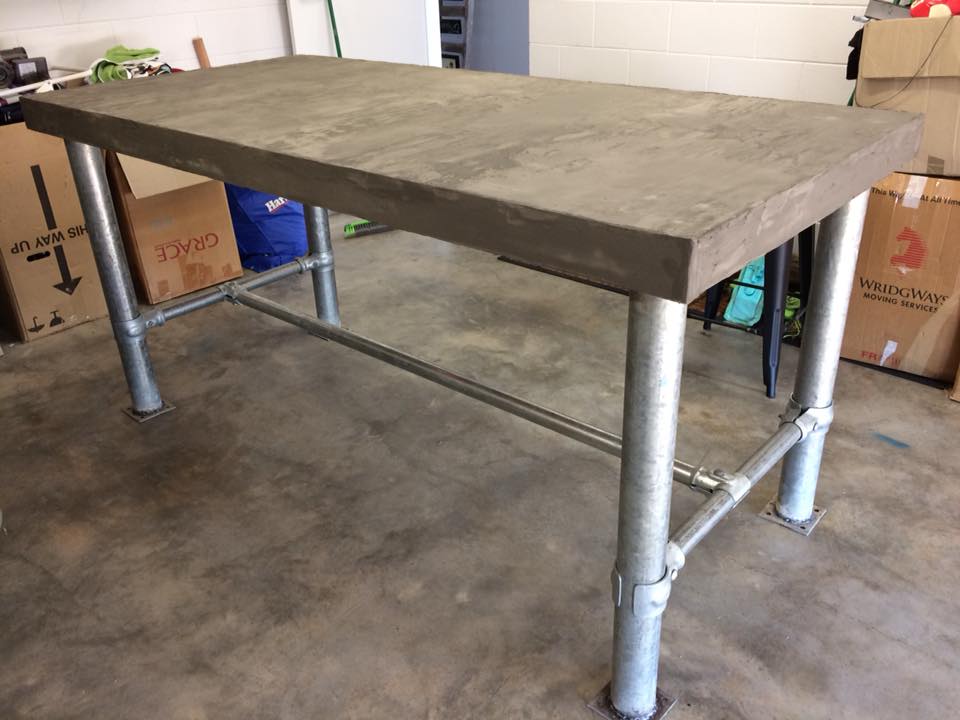
The one part of the house that was a major do-it-yourself project was the kitchen island. My son-in-law and I teamed up to build the roughly 1m wide x 2m long concrete island with thick galvanized pipe as the structural base.
By building the island ourselves, I’m estimated that I saved myself about AU$2000. And the strong metal and thick concrete are durable in appearance and function while looking very cool too!
My home was designed for my personal use as my primary residence. However, I have plans to build another, smaller container home on the property and could rent out this larger home on Airbnb in the future if I want. Therefore, I’ve been mindful about keeping most of the styling ‘not so personal’ just in case.
The builder I hired contracted with an architect to develop the conceptual floor plan. I handled most of the details and the final design until I was happy with the interior layout.
An engineer provided structural design including the foundations, connections between containers, and steel reinforcement to replace where the containers were cut open in places.
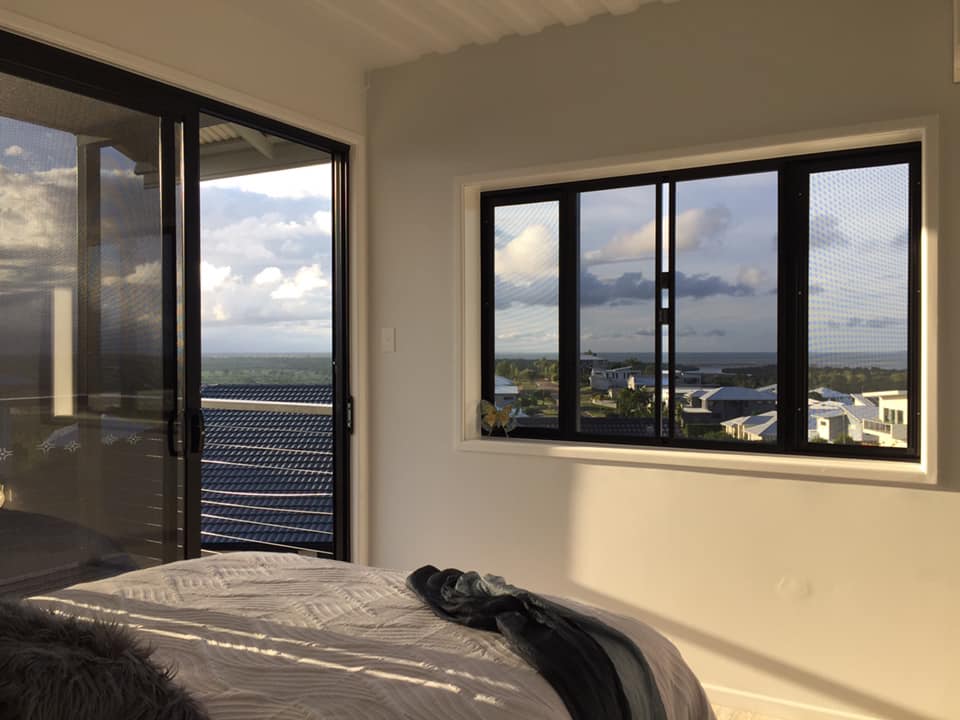
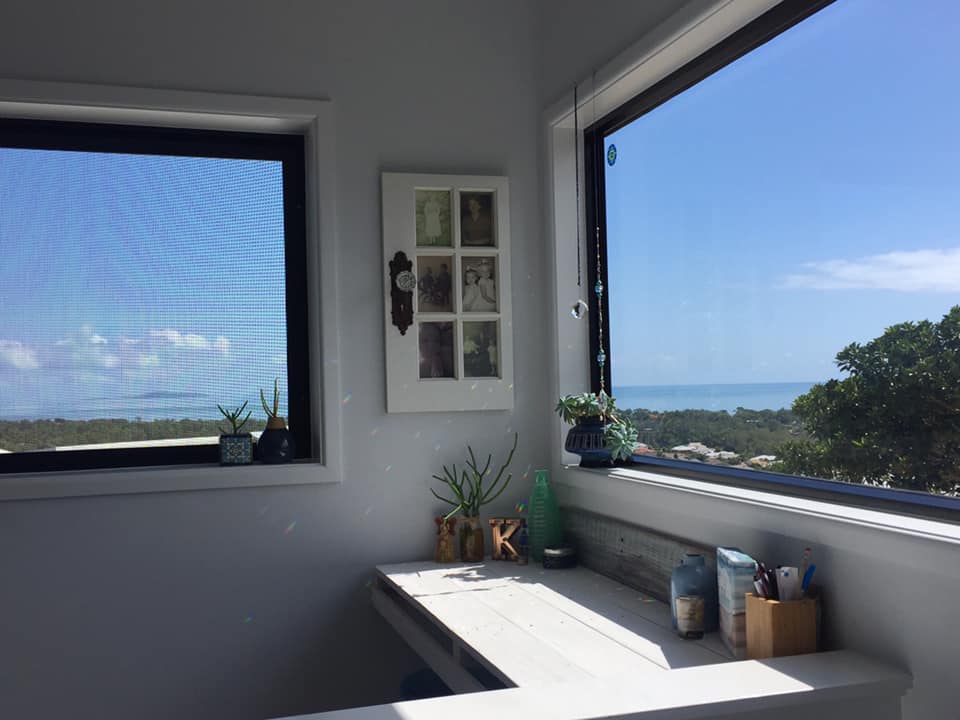
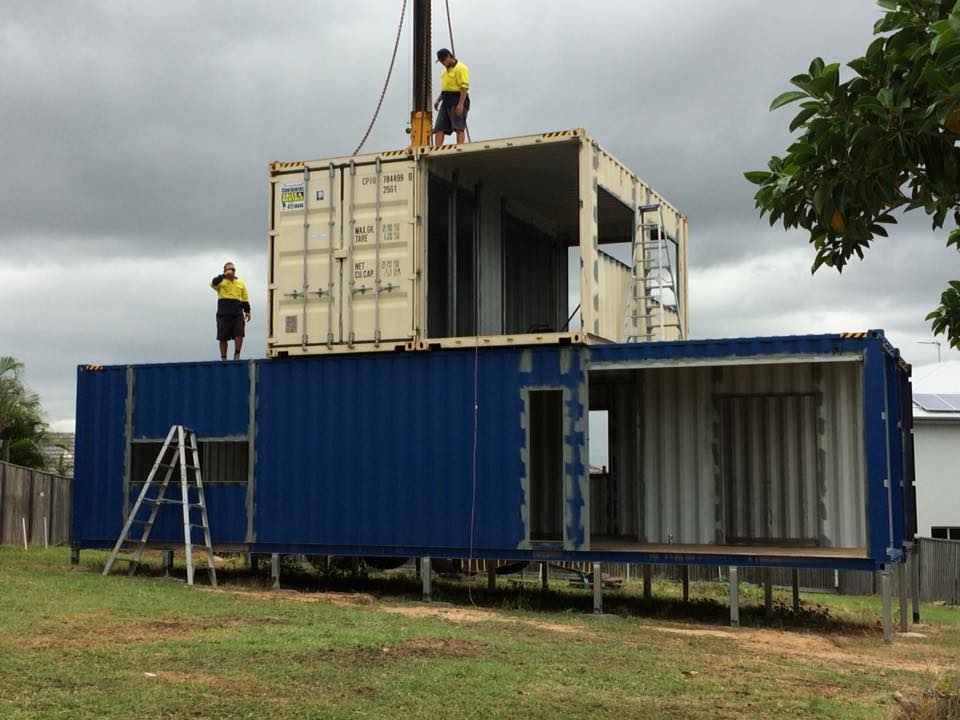
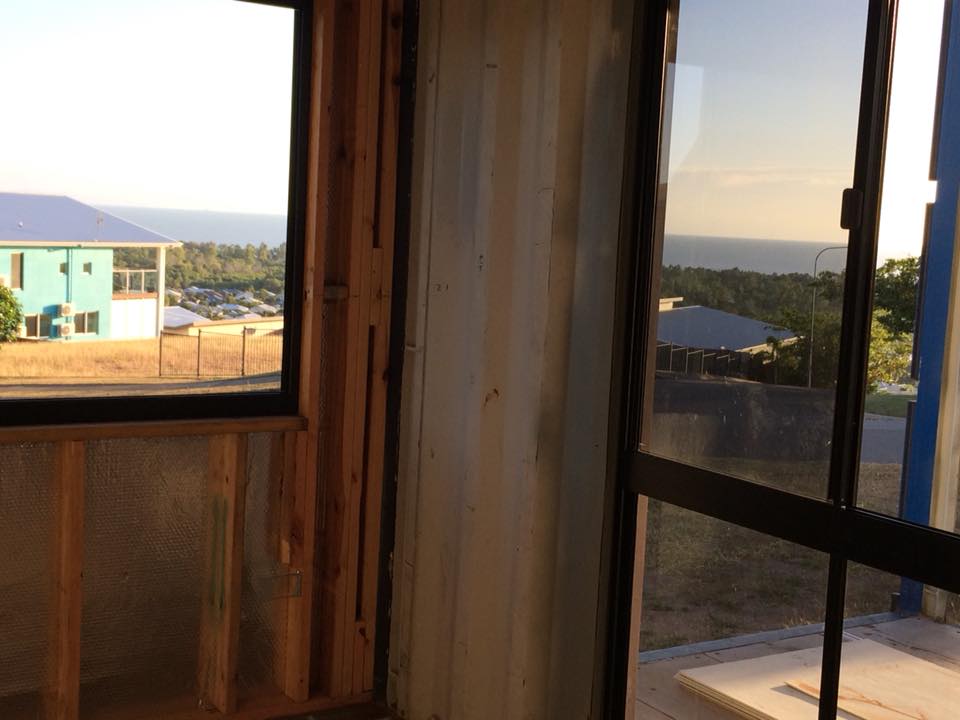
This home is built from four high-cube containers: Two 40-foot containers sit side-by-side on the lower level and two 20-foot containers sit side-by-side on the upper level, stacked perpendicular to the lower level. Together, they form a two-bedroom, two-bathroom home with an open-plan living area downstairs. All rooms have ocean views except the bathrooms.
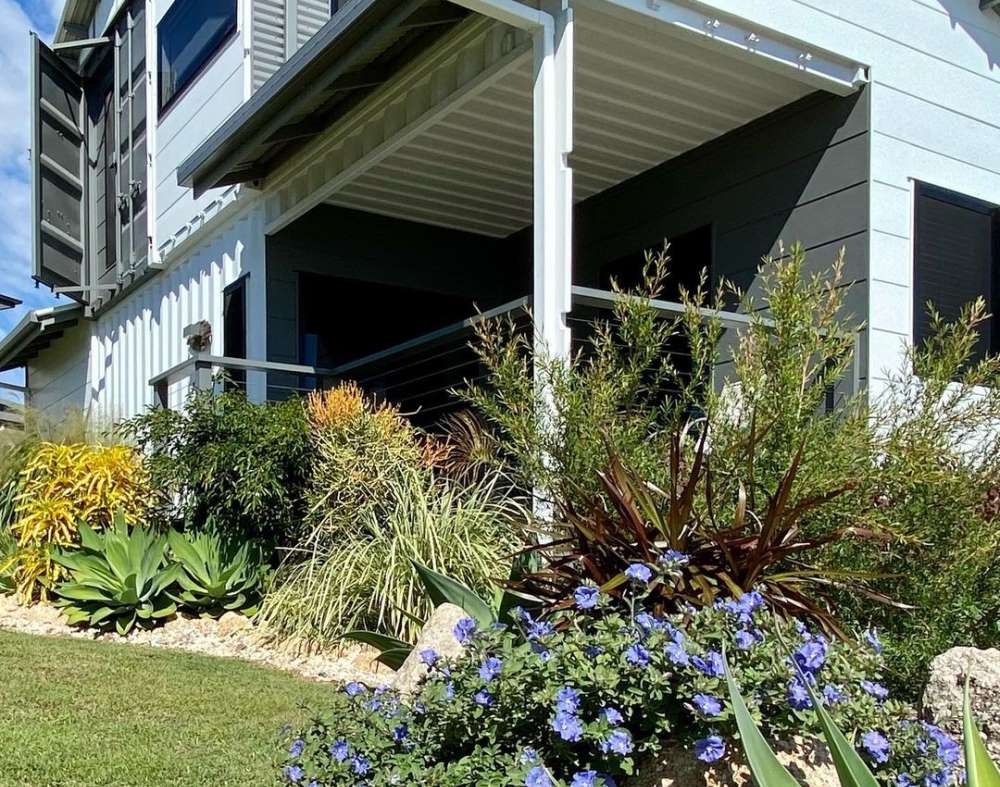
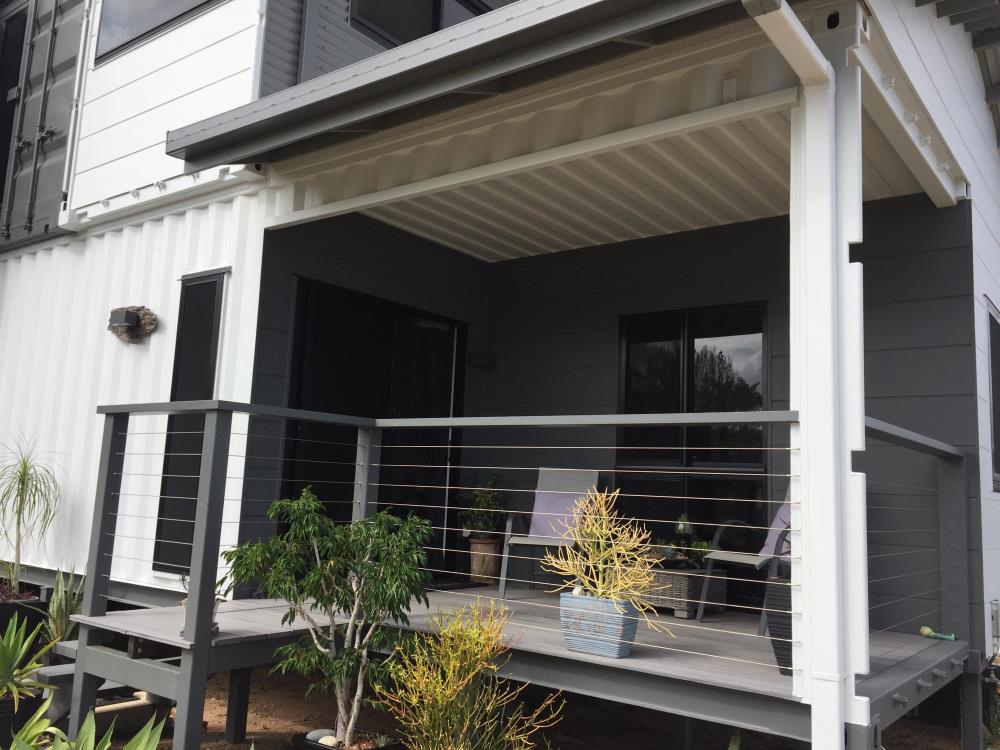
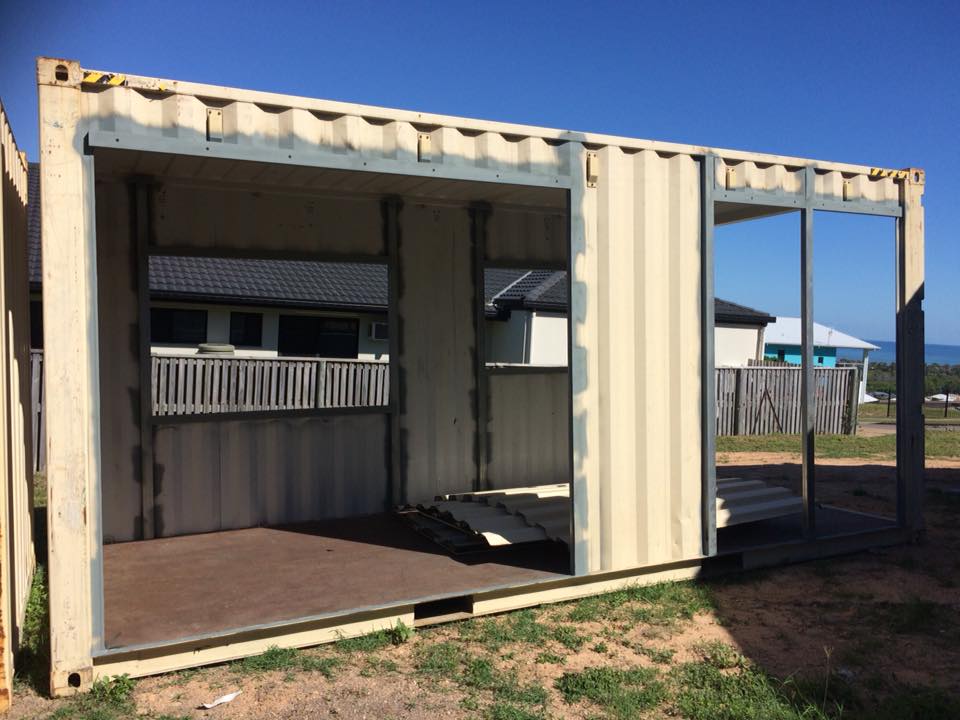
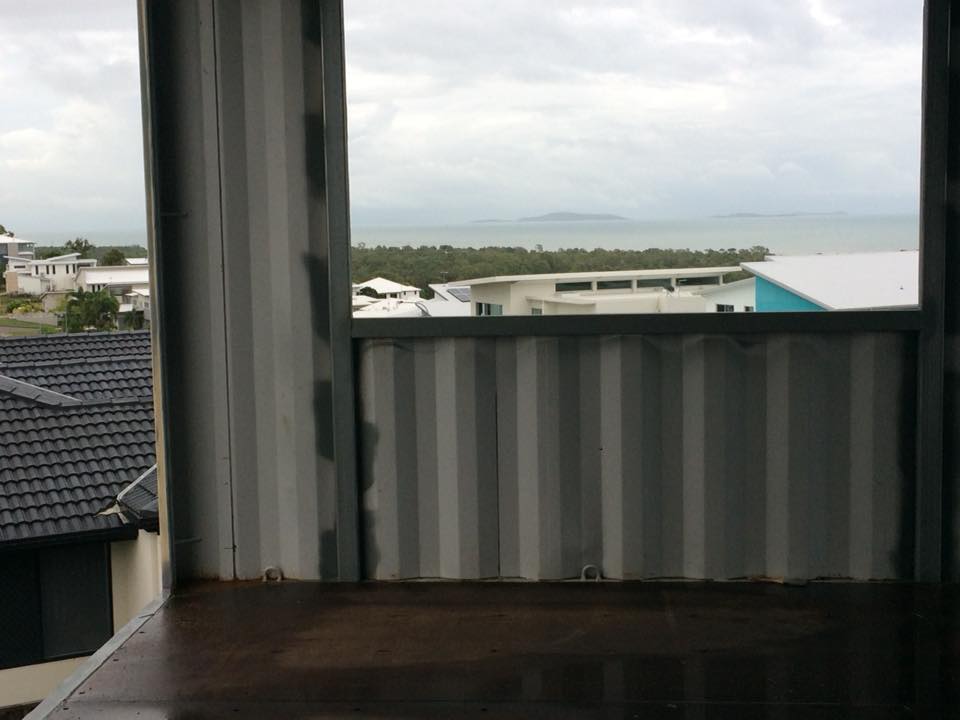
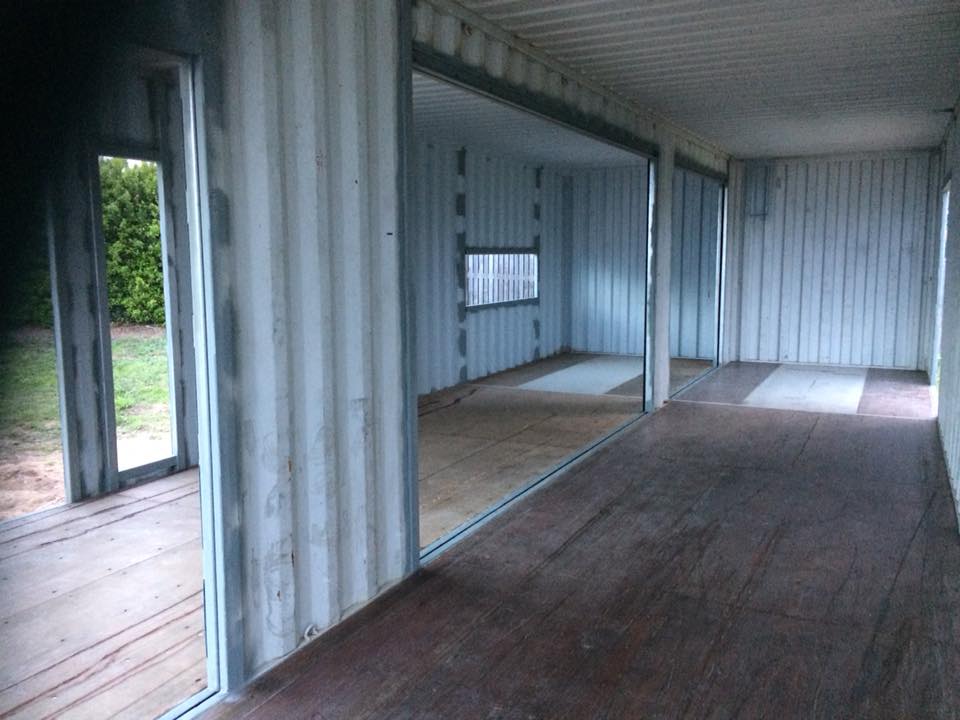
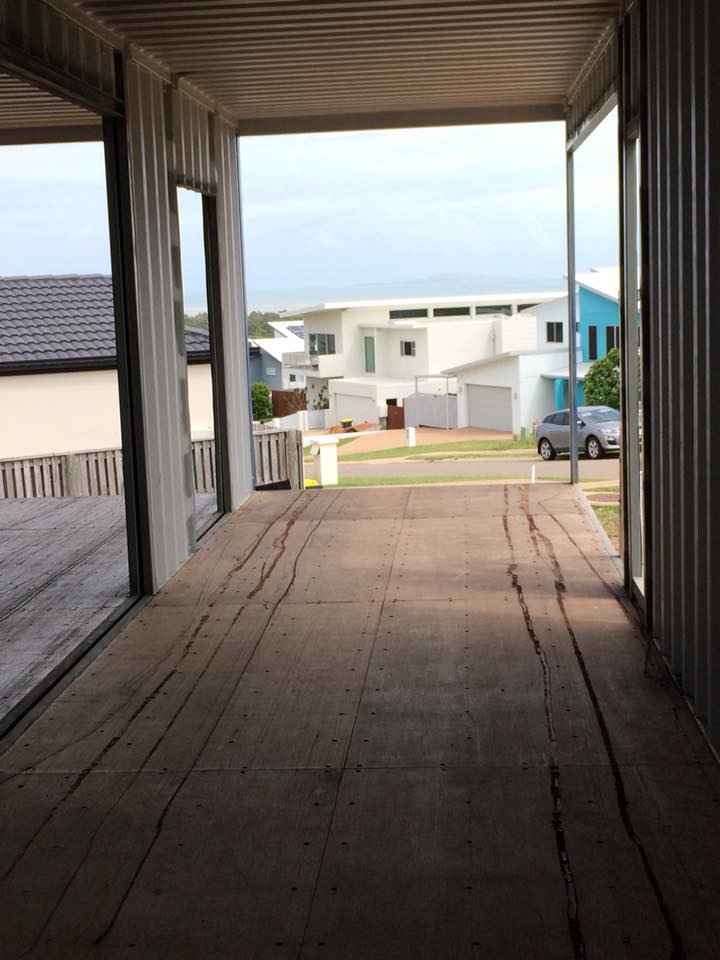
The containers on the ground floor have most of the interior walls cut out to make more open space, and one end of one container was cut out to make an outdoor deck.
The deck serves as one of the main entrances to the house, leading directly into the living room.
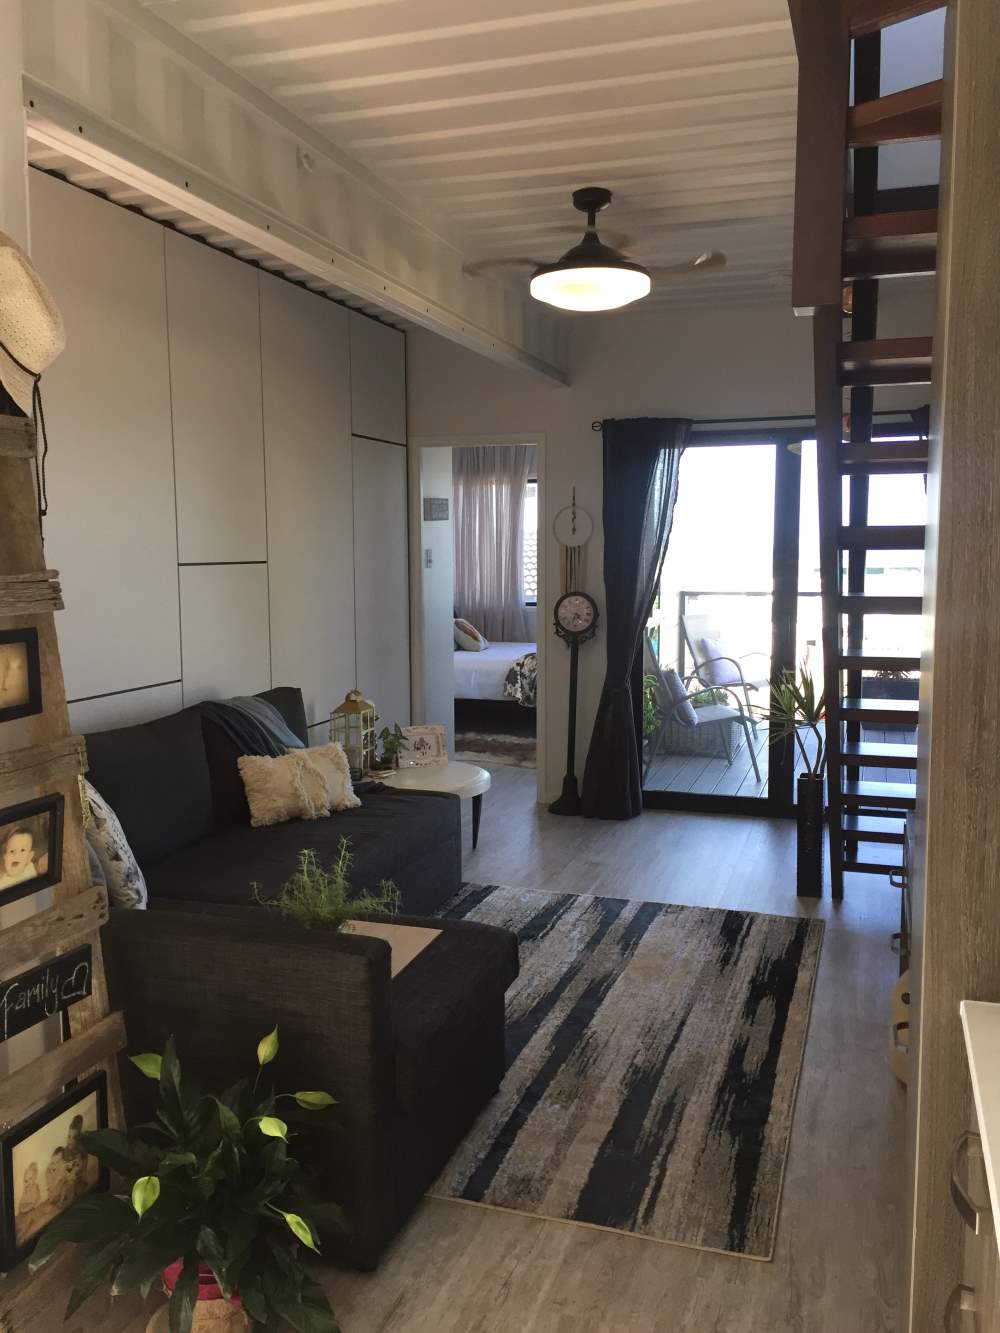
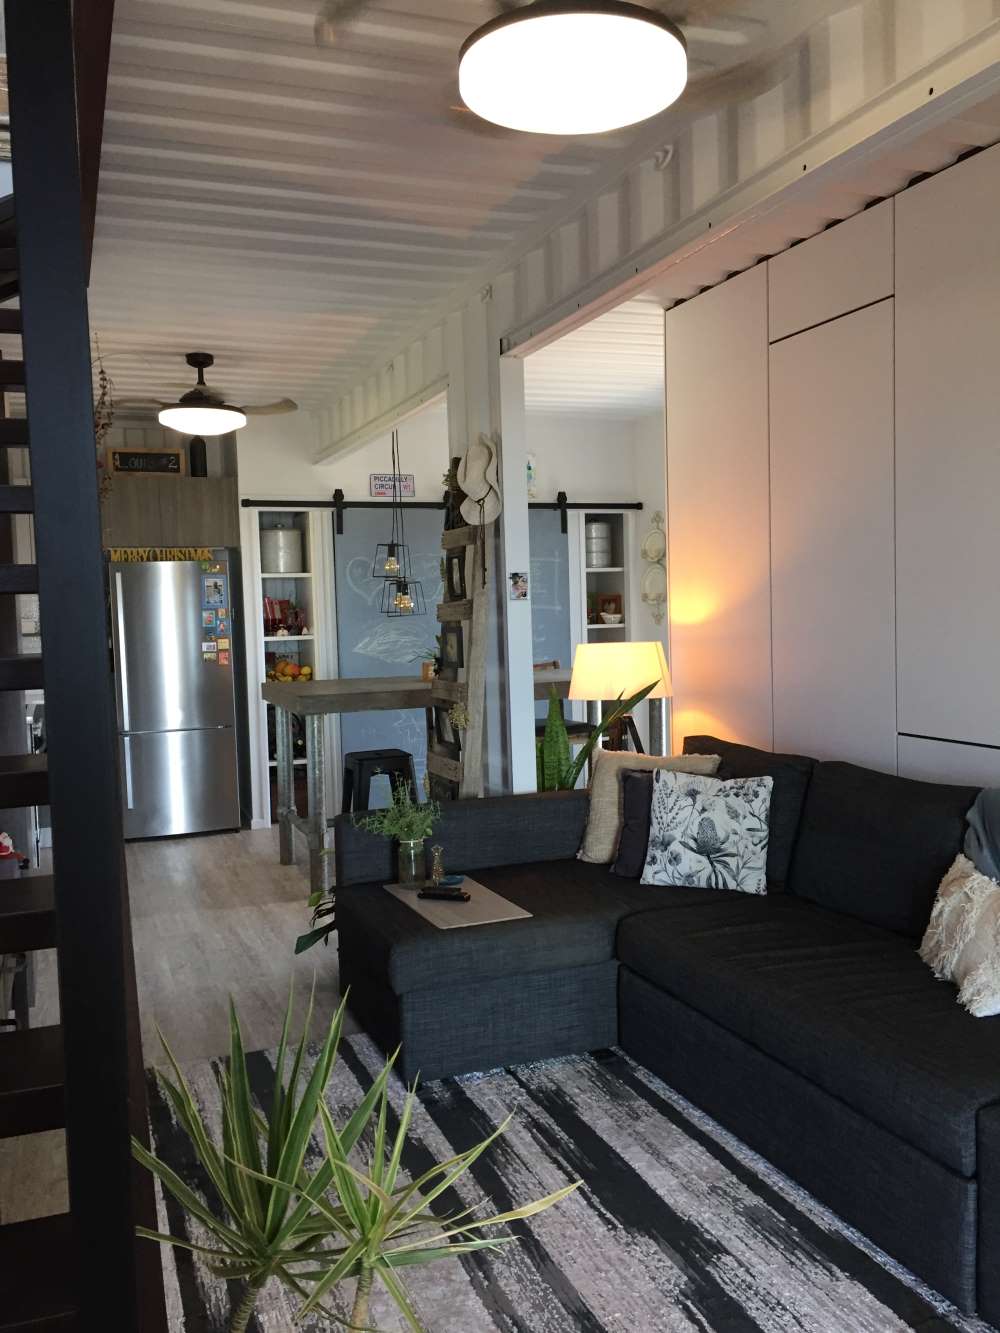
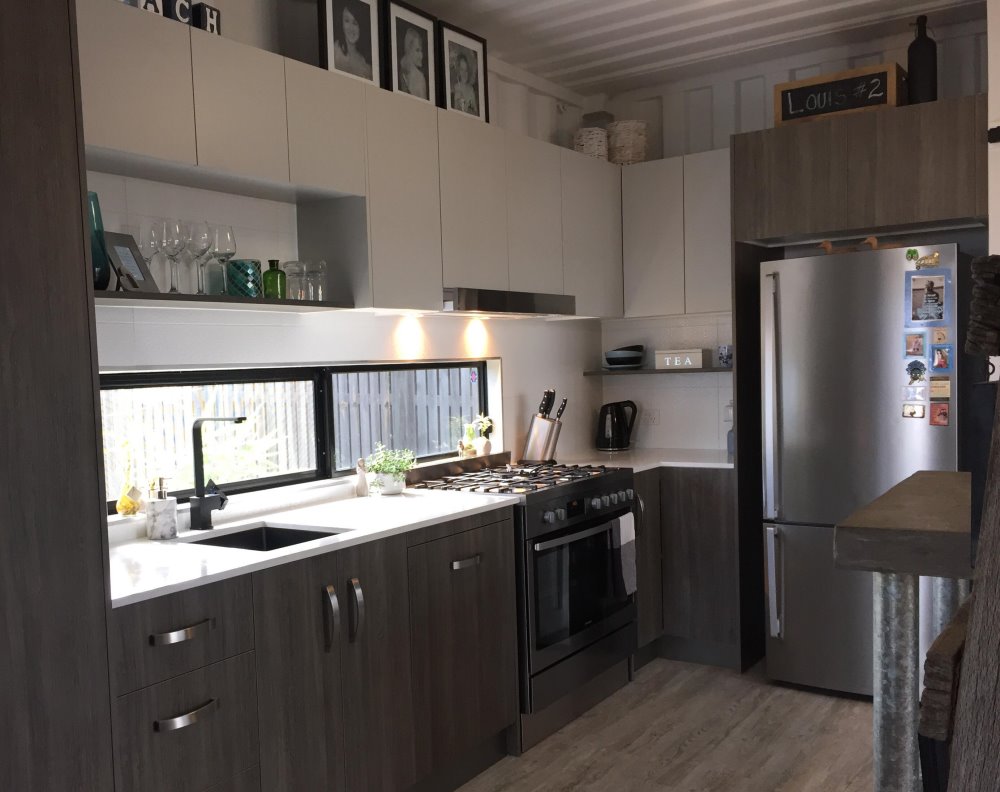
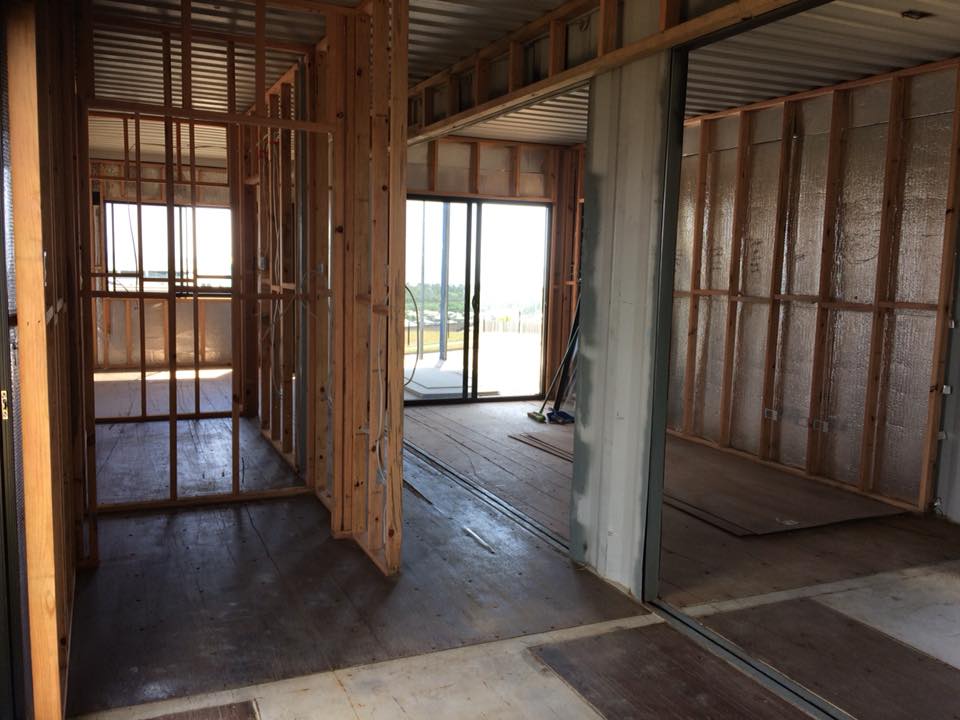
The interior of the ground floor includes a large open area that serves as the living room and kitchen.
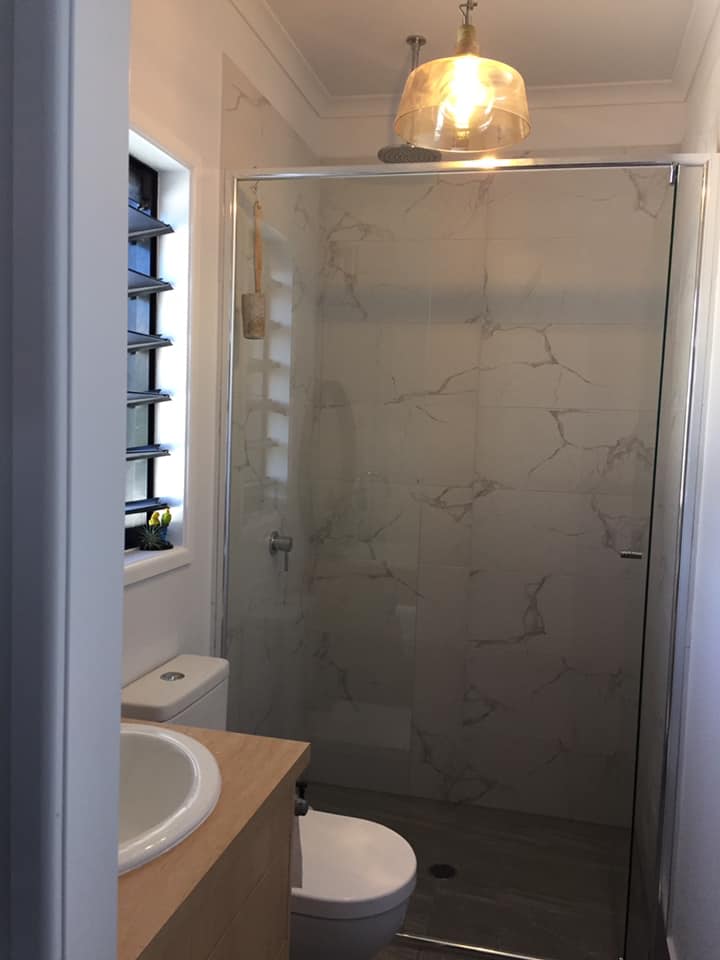
The L-shape kitchen is spacious and has great views as well. The rest of the space at this level is the bathroom, laundry area, and guest bedroom.
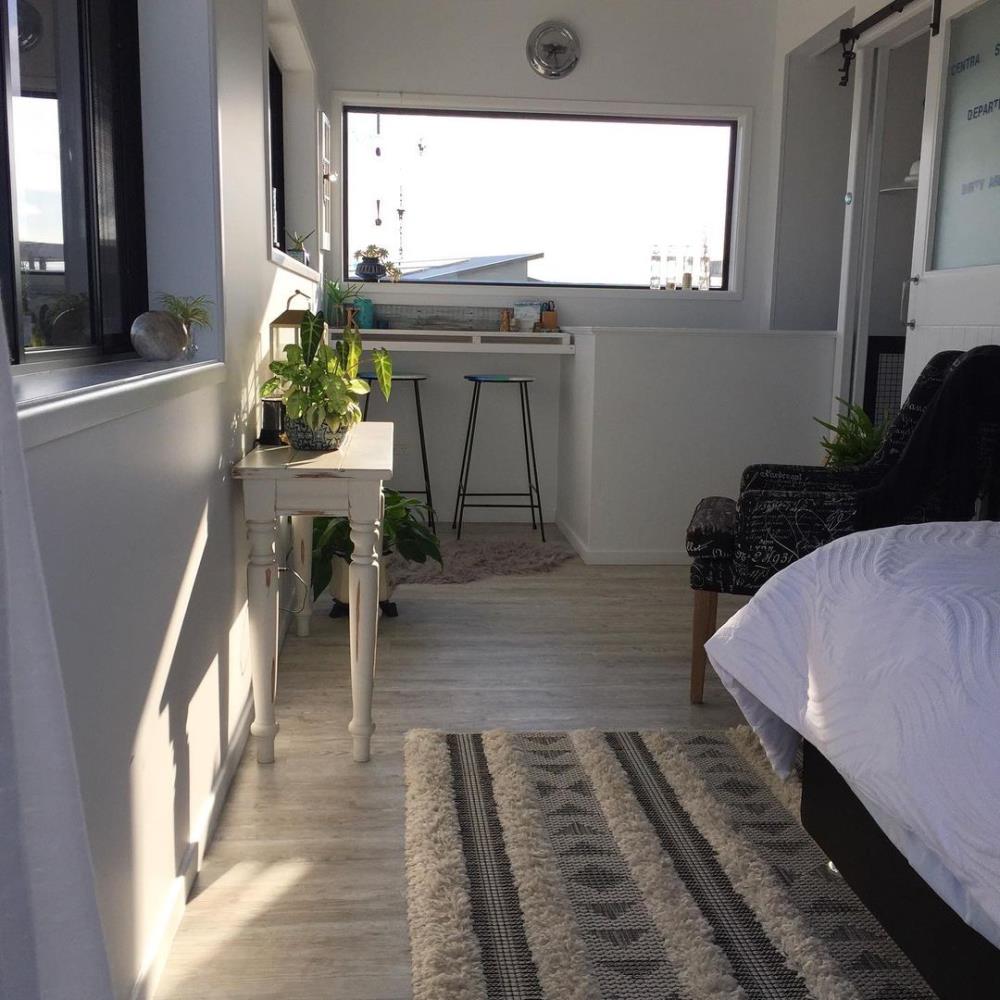
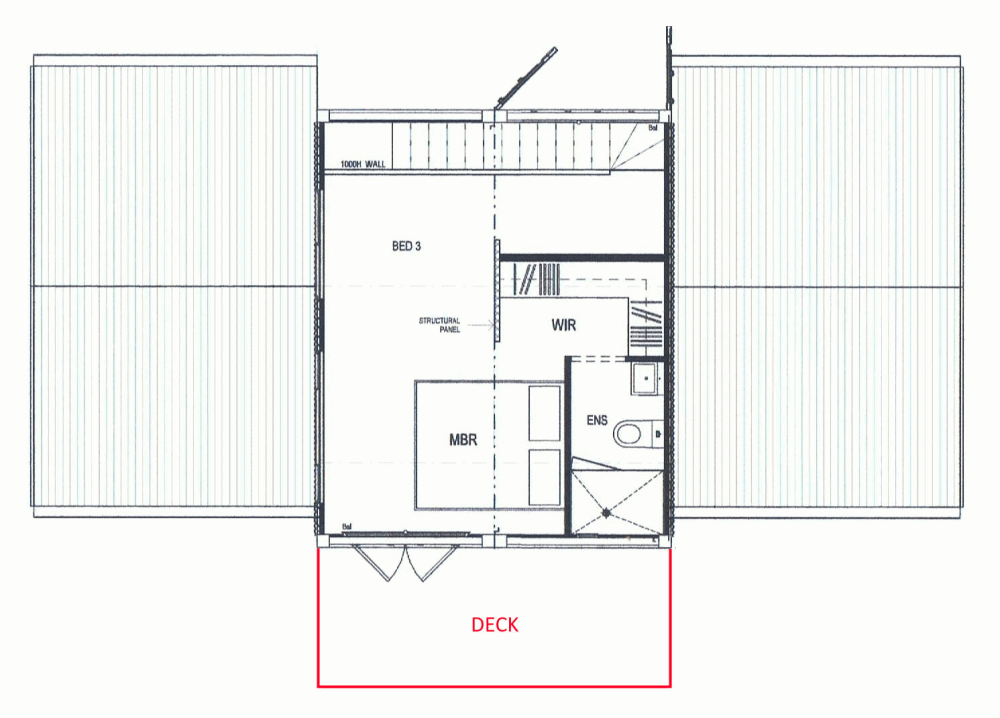
The two upper containers also have the interior walls removed and form the main bed and bathroom. It includes a walk-in closet, a mini-kitchenette area with a bar fridge to make tea and coffee in the morning, and a sitting area with a desk.
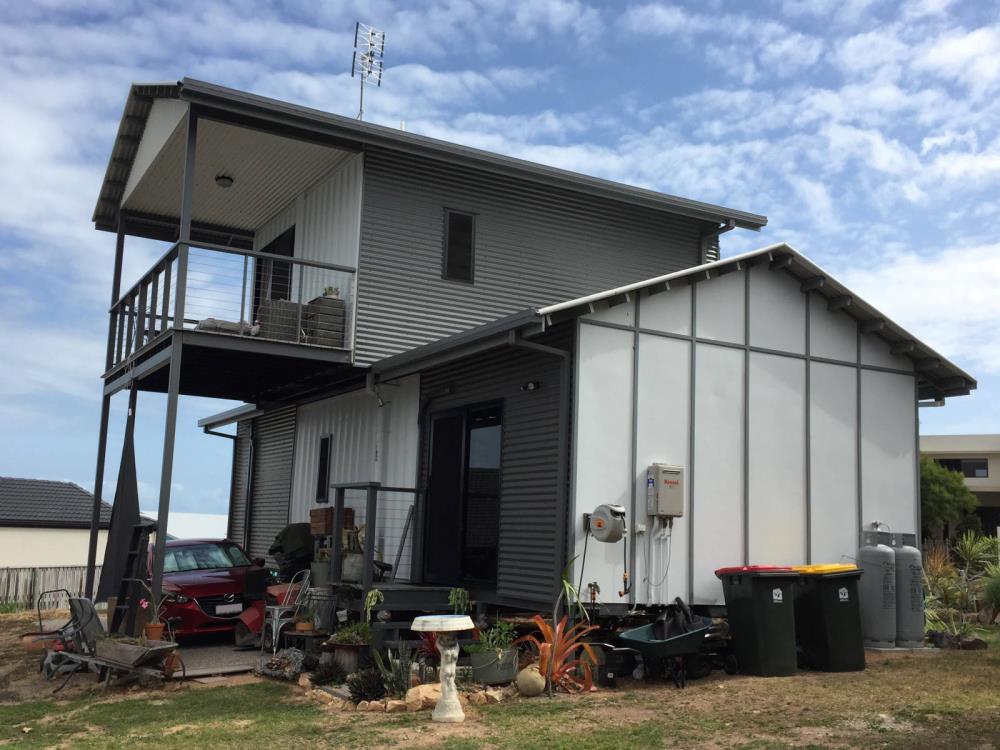
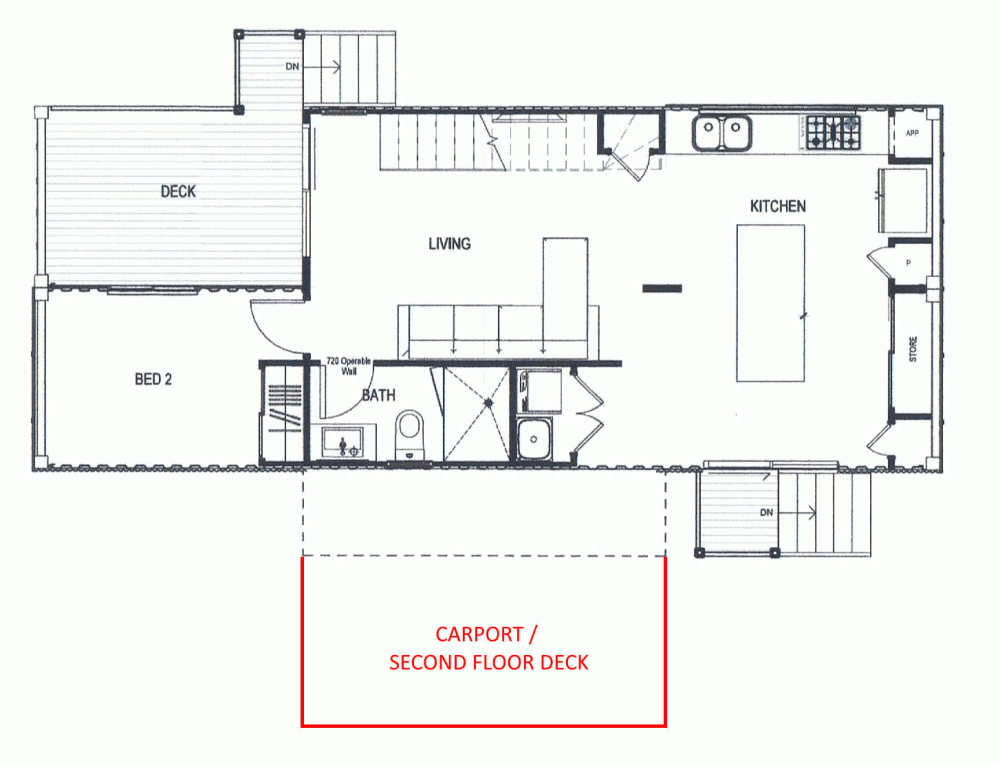
We ended up deciding to add a deck off the main bedroom after we had already finished the design documents (so the deck was conceptually added in red to the plans as you can see). It performs double duty as a covered carport.
With two 40-ft containers and two 20-ft containers, I had about 960 SF (89.2m2) of space to work with. However, about 95 SF (8.8 m2) of that was used for the ground floor porch that’s within the confines of a container, so I ended up with about 865 SF (80.4 m2) of interior room. I also have the second-floor deck with about 106 SF (9.9 m2) of outdoor space as well.
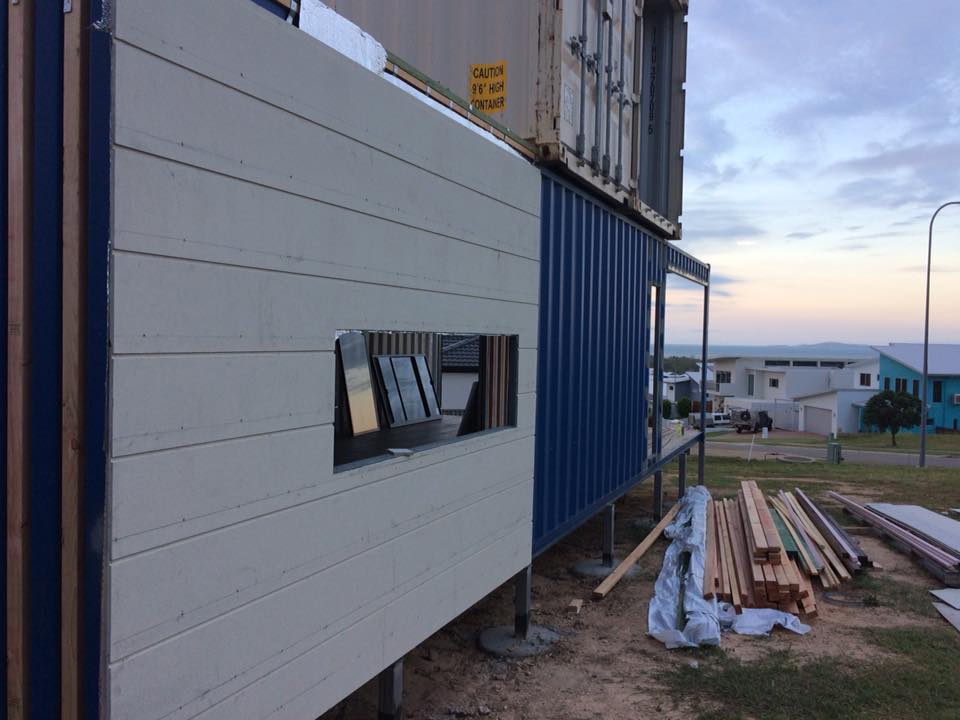
I wanted to have a home that was easy to maintain so the type of materials we used had to be sustainable. For example, using Colorbond corrugated iron cladding and ModWood for the deck flooring makes for little to no maintenance in those areas.
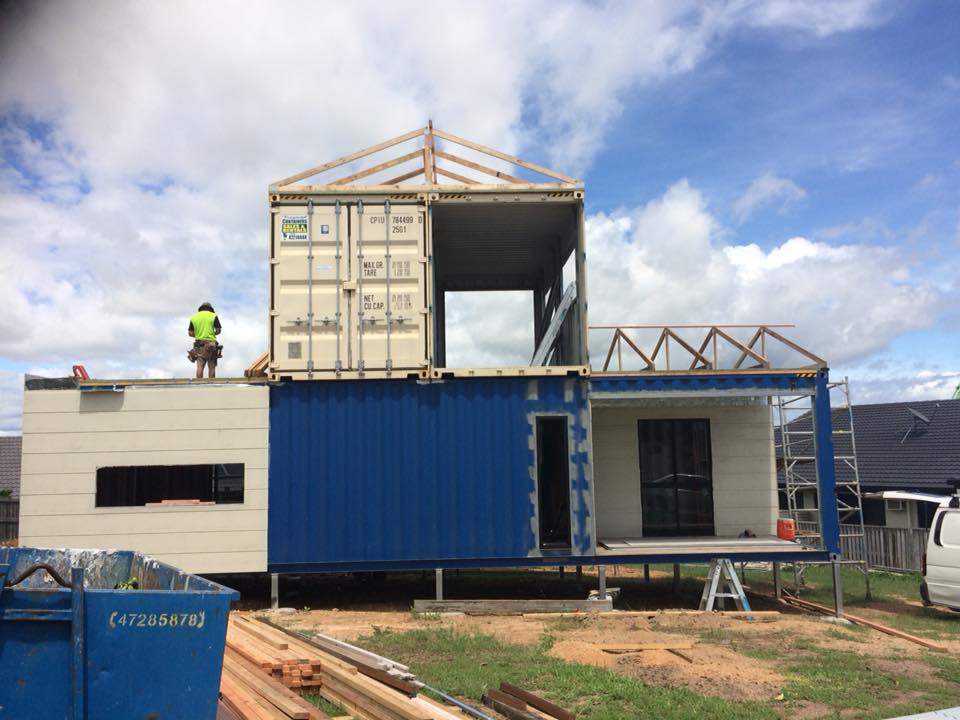
The main roofs over the containers are gabled roofing with factory-built wooden trusses. Welded steel was used to build the support structure for the second-floor deck.
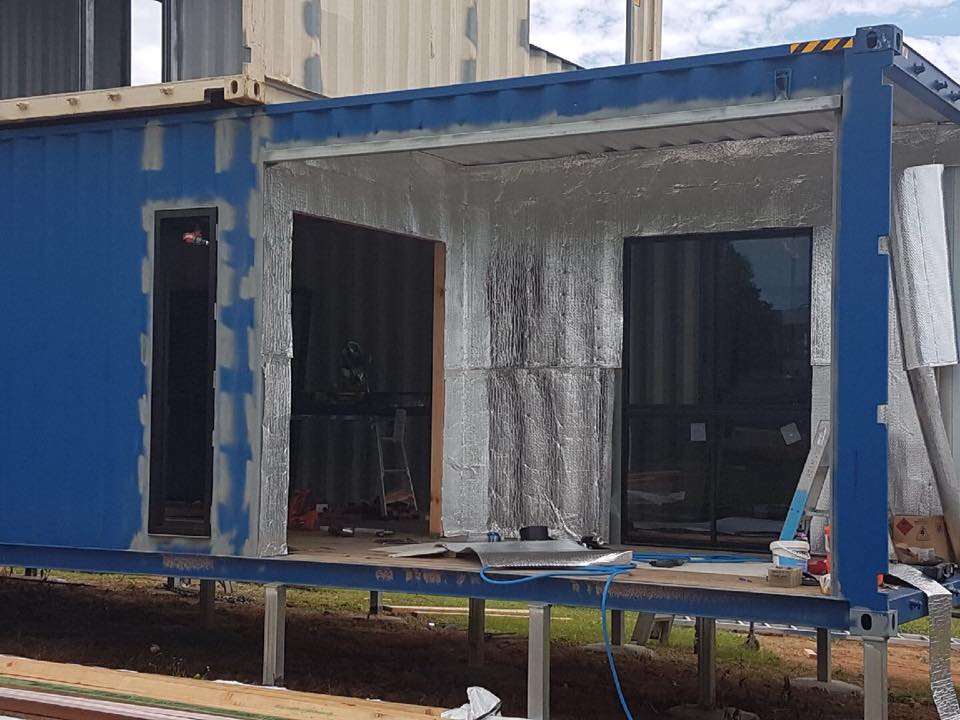
The roof was insulated with foil/wool insulation on top of the containers so the corrugated ceiling is visible inside. The walls use Aircell insulation, a foil-faced bubble wrap. In areas where we added exterior cladding to the home, the insulation was placed outside the containers beneath the cladding.
In areas without exterior cladding, the insulation is inside the container’s corrugated walls, beneath the gypsum board (sheetrock). The home is very cool in summer and keeps warm in winter when closed up.
Editor’s Note: The mild tropical climate where Kathy lives doesn’t require much if any insulation, so she was able to get by with this very low R-value insulation.
I have installed three ductless air-conditioners, one in each of the two bedrooms and one in the kitchen/lounge area. However, I hardly ever use them except for in the dead heat of summer. I always have an amazing sea breeze blowing that helps keep the temperature regulated.
To keep the air circulating, I have fans that have retractable blades. When not moving air, they appear to be nice, large lights and provide the look of more open ceiling space.
I have a gas-fueled instant hot water heater and gas stove, and all other appliances are electric. My monthly electricity bills are around $65 a month which makes me unable to justify the cost of solar at this stage.
As mentioned, the exterior appearance is a mix of the exposed container walls and cladding. We used painted, corrugated steel paneling as the exterior cladding, which gives a nice color contrast with the raw container walls. The roof is corrugated metal paneling as well.
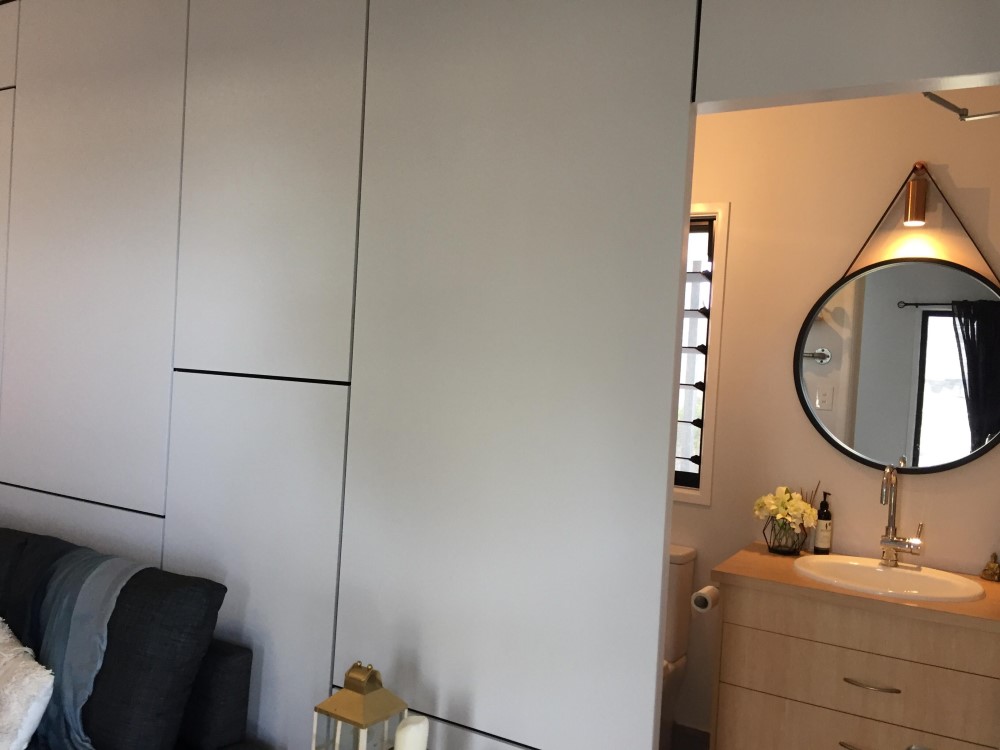
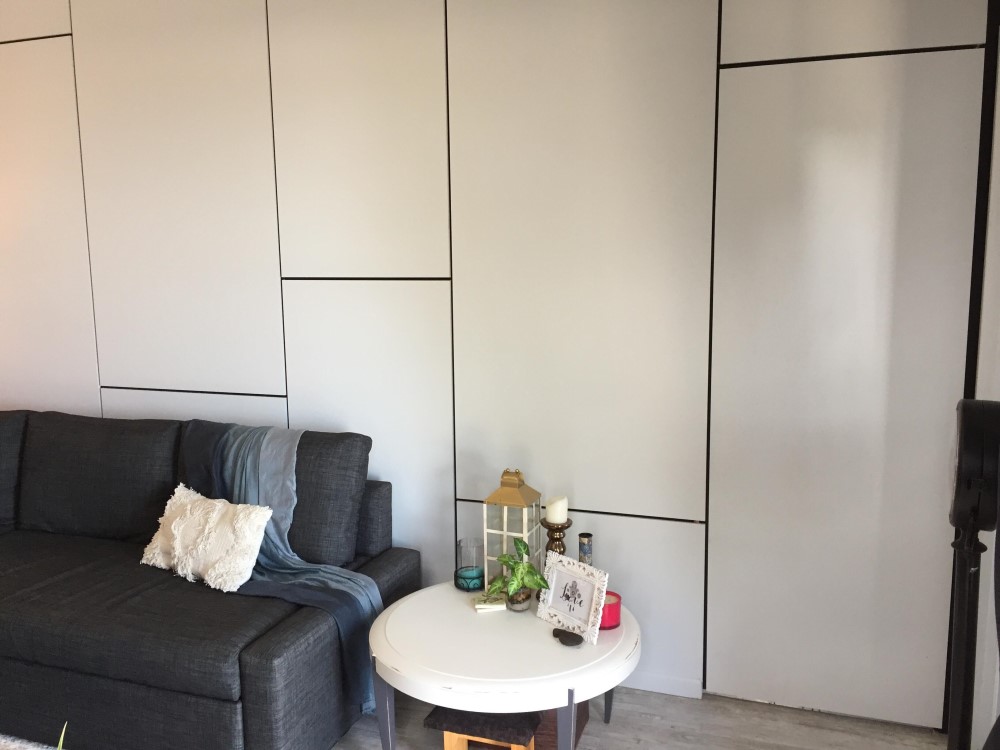
On the interior, I have a couple of notable features. First is the downstair bathroom, which is access via a hidden door along the lounge room wall. Doing away with the normal door gives the illusion of more space and always makes for a fun conversation with guests.
I already had the door going to the adjacent bedroom, so I knew that I wanted something different for the bathroom door. I forgot where exactly I got the inspiration for the idea, but it was easy enough for the builder to add it in.
The worker building the kitchen cabinets just cut additional panels of the laminate-covered MDF to cover the walls of the lounge room and the bathroom door.
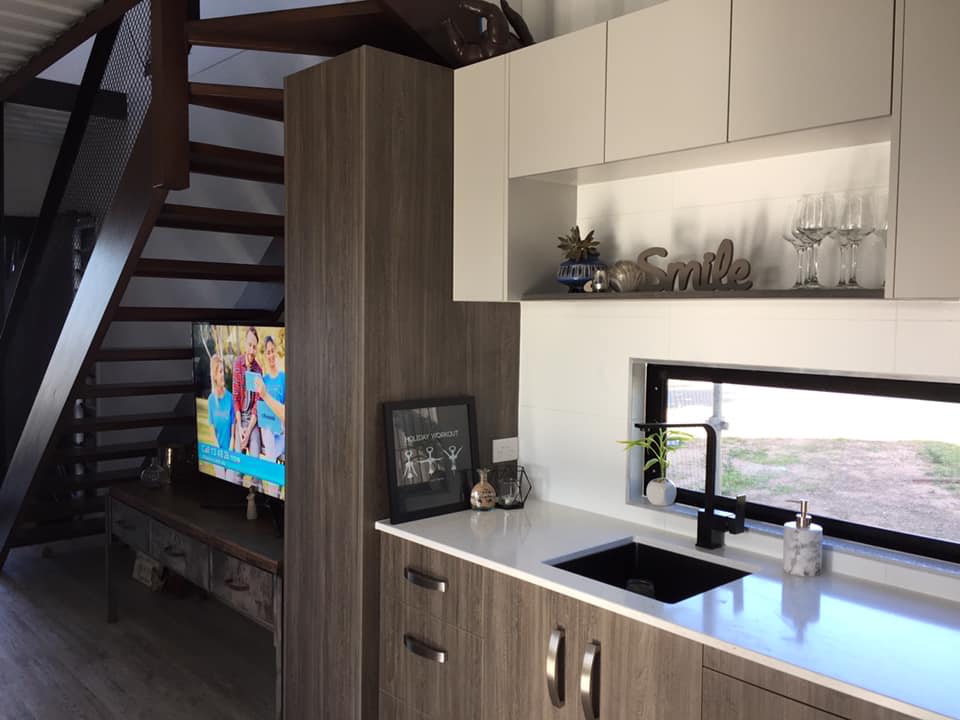
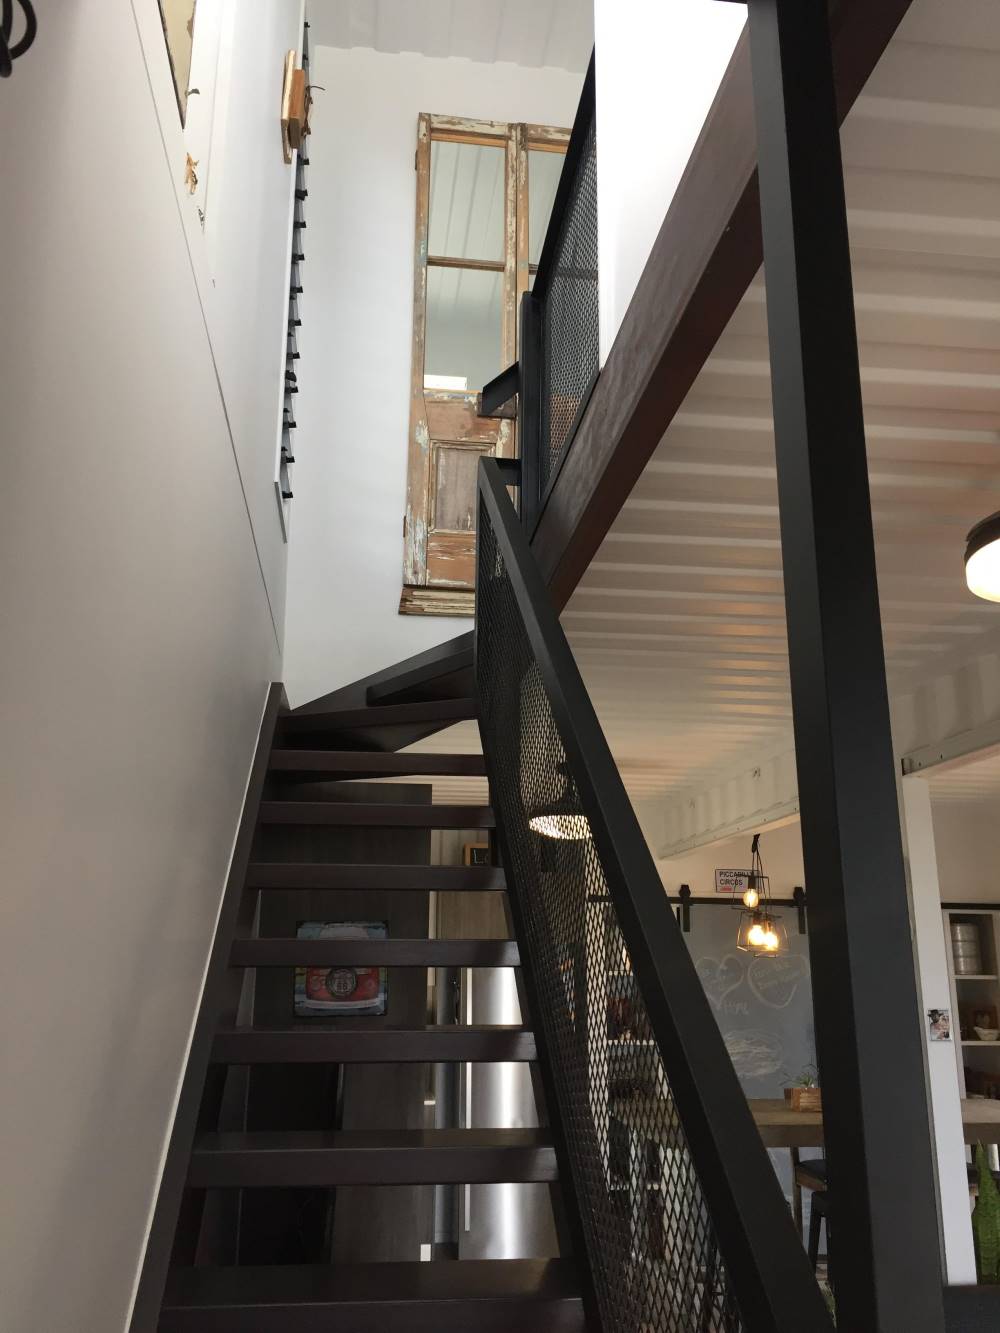
The modern staircase leading up to the main bedroom is my other favorite interior highlight. Made with metallic mesh balustrading, it continues the open-concept theme of the living area. We left the underside of the staircase open to provide a cubby for the TV/media area to take advange of the space.
I bought my land about three years prior to starting the build process. It was a 616 square meter (0.15 acre) lot with a slightly slope, but amazing ocean, island and mountain views. I knew that I’d need to orient the house at an angle to get the best views, and building a second story to have a more open sightline was a must.
Once I was ready to begin my container home project, I knew I needed a builder. I happened to come across a display village of model homes nearby and decided to stop in. One home in particular had concrete floors and a somewhat rustic feel that felt like a good fit for what I wanted. This particular builder was well-known in the area, having built several houses in my neighborhood and won lots of awards.
After talking, I found out they were actuallly building a container home at the time. It felt almost like destiny, so we quickly moved forward. After hiring the builder, we worked with an architect to jointly develop the prelimary design to that we used for our local council approval. There was loads of excitement about the project at this point, but that only lasted a few months as I’ll explain later.
The land did have some covenants in place regarding some of the exterior finishes, landscaping, and things like that. However, the neighborhood is now old enough that they weren’t too strict about anything and we got approval without issue. Around the same time, we were working with my bank to get approval for my loan for about half the cost of the house, and that too was completed without issue.
I will say that we didn’t go out of our way to advertise that the home was in fact built out of containers when working on the approvals. Obviously that became clear to everyone as they started doing inspections, but we didn’t want to cause anyone to have doubts unnecessarily. I feel like a lot of the approval processes are driven by the personality of the people working and that fills in the vast gray area between the black and white of the rules.
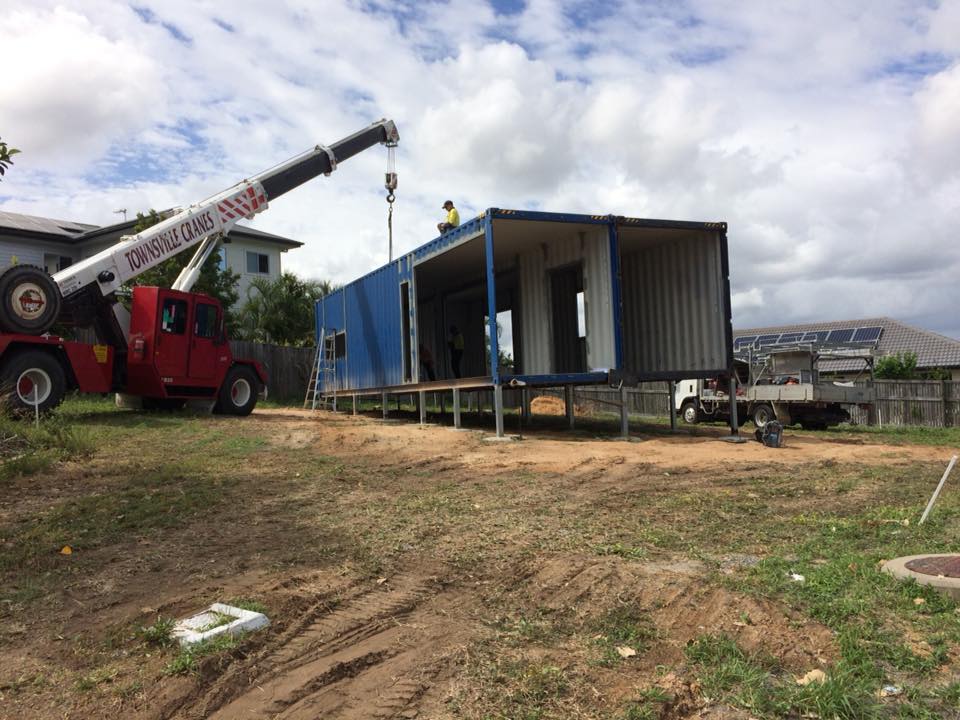
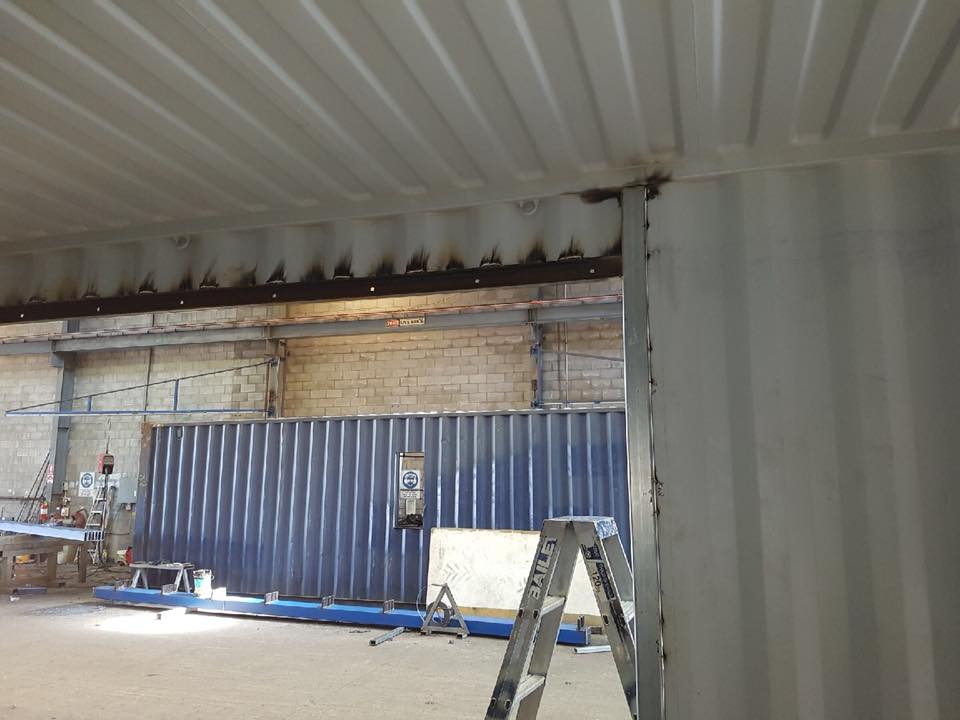
The first physical work on the home was actually performed off-site. The containers were purchased and then the cutting and reinforcing was done in a warehouse.
This way, the containers arrived on my lot already cut open for the wider rooms, windows, and doors.
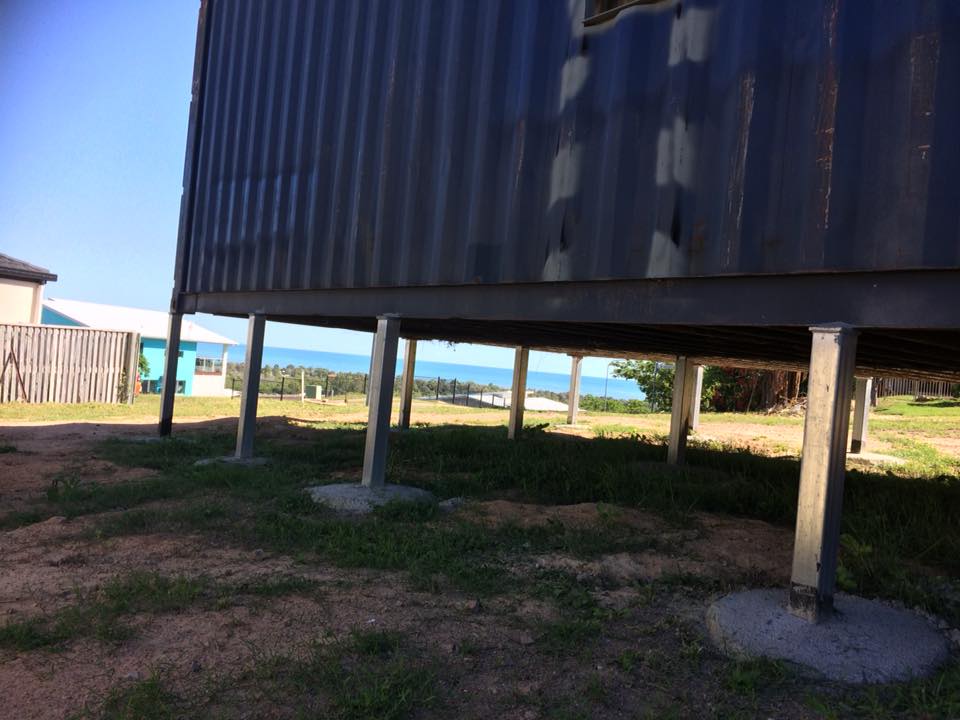
The on-site work involved digging piers for the concrete that held the metal posts to support the containers.
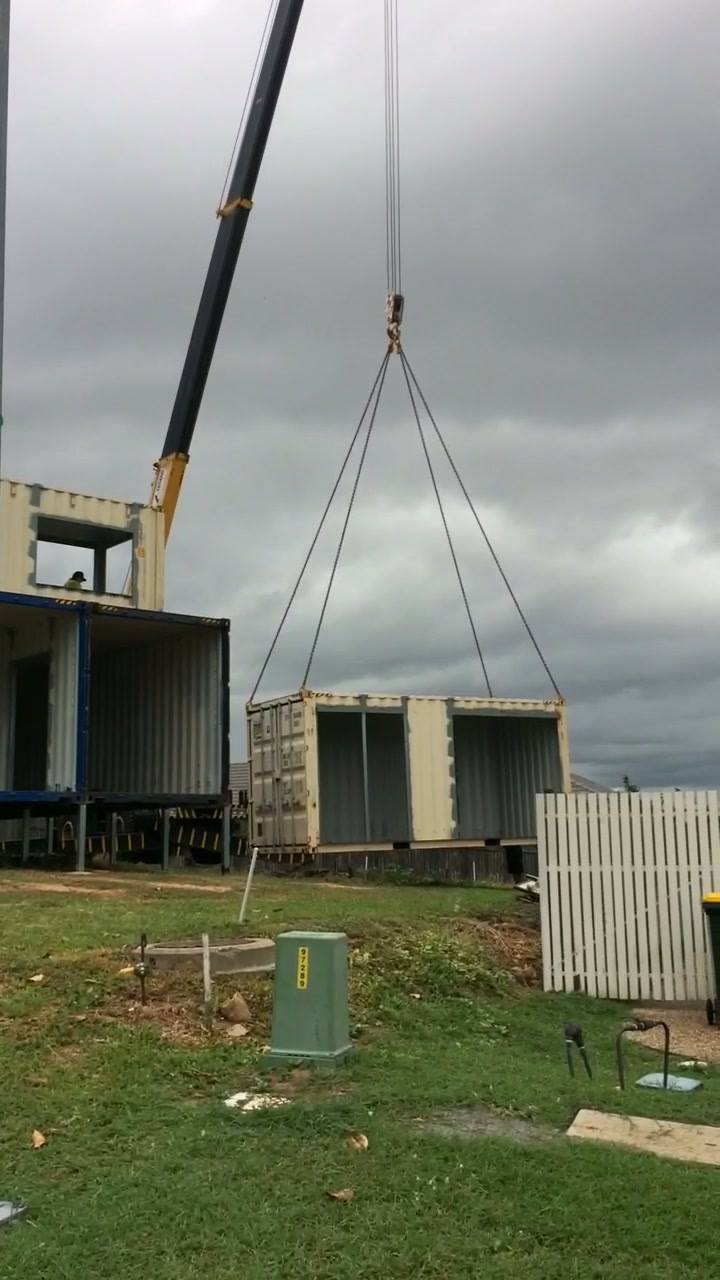
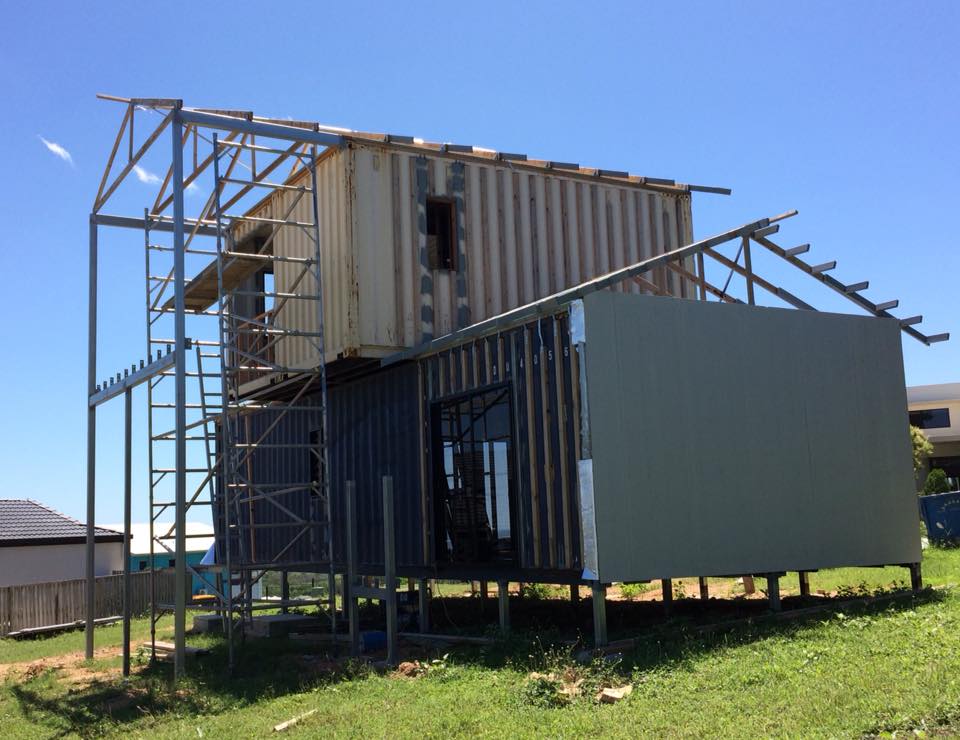
Then it was a simple matter of using a crane to lift the first floor containers into place on the posts.
After that, the 2nd floor containers were set on top of the ground floor containers.
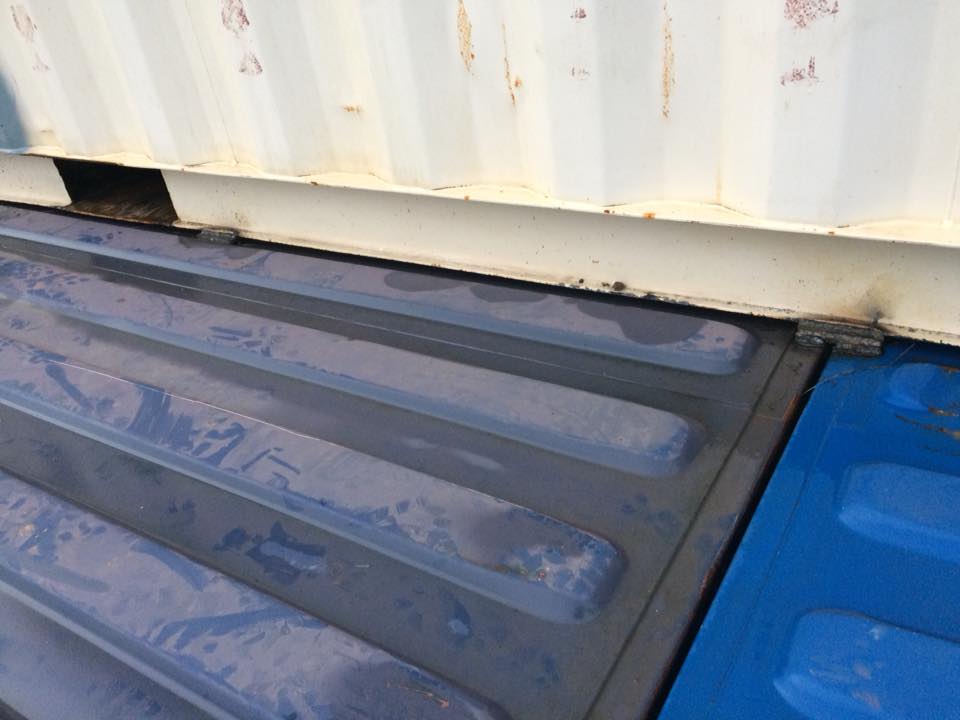
With all the containers set in place, workers started welding all the containers together.
I will say that when work on the project site actually started, I was a bit nervous. There had been another container home built nearby, and the initial reception wasn’t great from all their neighbors. Apparently, someone had even put up signs saying, “It’s ok to think outside the box, but why live in one?” In fairness, a container home can look a bit cold and industrial while under construction, but there is no way for people to know how the finished product will end up looking.
No one really said anything about it to me, but I did feel some tension from neighbors who weren’t quite sure what to make of my build and couldn’t really picture how it looked. And as I’ll share in a bit, I had some builder-related project delays that undoubtedly added to people’s concern.
Now that the home is complete, I get tons of compliments and interest from people, but at the time I felt a bit uneasy. The vast majority of people do end up loving my home once they give it a chance and actually see what we’ve built.
About six months into the project, I was diagnosed with breast cancer. Obviously this was draining in more ways than one, and I had to really dig deep for strength sometimes. I ended up making a full recovery, but having all of these stresses coming at me at once was a lot to handle.
Compounding my health and potential community relations problems were the issues I began to face with the builder. Although I was unaware, the builder was having some severe financial difficulties and was hastily trying to move the home into the locked-in phase, which was the next stage where he would get paid.
Getting to that stage was like pulling teeth. I was getting fed a lot of bull from the builder to buy time and the hold-ups and run around was literally doing my head in! If I heard the words ‘engineering issues’ one more time I was going to scream!
Finally, about 12 months into the project, everything fell apart and the builder went bankrupt. We were supposed to have a site meeting that day, but no one turned up. The next day, I woke up to an email from the builder saying that the business was now in the hands of the insurance administrator.
The bank representative had come out to look at the current state of the house and we agreed that the builder wasn’t owed the progress payment for getting to the lockup stage. The builder had cut a lot of corners and everyone agreed a lot of rework would need to be done now that he was out of the picture.
In looking at the house, the bank had no vision for the end result and could only see the mess left by the original builder. They ended up making me reapply for my loan, which was insane given that half the funds had already been spent and the land itself was worth more than what I was actually borrowing. In the end it was just another hurdle to jump through and everything was approved once again.
I hadn’t paid much attention at the time, but when getting the project setup, I had signed-up and paid for the mandatory insurance from the Queensland Building and Construction Commission (QBCC). This government entity was intended to protect people like me from situations just like this, and I was so happy to realize I had it!
I had a meeting with the QBCC officials and they were wonderful, guiding me through the entire process from there. They started by having a building inspector come out to make a detailed scope of work for what needed to be fixed and completed on the house. They sent the scope out to three new builders for bids, and one was selected.
The new builder they hired to complete my home literally saved it from the disaster course it was on, and I’m so glad to have had them on the project. They had tons of work to redo, including: reinforcing window openings, replacing all the cladding, windows and doors, and removing the roof had so the battons could be replaced. I sold all the old windows and doors online and donated the funds to The Women’s Center in Townsville as they would only have been thrown out.
The QBCC insurance officials didn’t balk at anything unreasonable and ultimately kicked in almost AU$200k to finish the project. They even paid for my rent in my existing home since the project timeline was extended due to all of these issues. Frankly, had I not had this QBCC insurance, I may have gone bankrupt myself!
This whole project took around two years to finally complete, but I ended up with the amazing container home I had dreamt of. All the drama with the builder and rework meant that I had a lot of time to think about the design and get it right, so there isn’t anything I would change now it’s all done. Even though I wasn’t involved hands on in the construction (other than my kitchen island), I was at the house daily after work and on the weekends making sure I had covered everything.
In the end, everyone was incredibly pleased with the final outcome of my home. The bank came back to see it and they were amazed as I knew they would be. The replacement builder was initially skeptical about the idea of container homes, but they did a fantastic job giving it high-end finishes and now they too love container homes (and will hopefully be building me another one on my land in the future!)
The original cost of the home was budgeted around AU$260,000 but as I mentioned, the builder went bankrupt in the middle of the project. The QBCC insurance kicked in an extra AU$198,000 to redo and finish my home, but a lot of that was rework. Because of that, it’s hard to come to a complete total, but it’s probably somewhere around AU$300,000 (About $200k in US Dollars as of 2019) in the end.
The land where I built the home cost AU$195,000 in 2015.
Technically speaking, it’s important to concern yourself with building detailing like window sealing, connections between connections, etc.
Obviously, the bigger part of my story is choosing your builder wisely and doing your research. In hindsight, I’m not sure I could have ever anticipated the issues I would have with my first builder. I did my due diligence and everything seemed fine based on his previous experience. I don’t know how I could have known or predicted the business management issues the builder would have, or how those would translate into cutting corners on my build.
So, in addition to verifying the capabilities of the builder, ensure the builder is insured in whatever way that is handled in your area. Having the QBCC insurance literally saved my project and my financial wellbeing.
As far as container homes in general, I’ll just say that there is sooo much information out there, it’s important to find information you can trust.
The first thing I looked up when I began was ‘What not to do when building a container home’. There is some great advice to help with avoiding mistakes in the beginning.
I still often have people drive or walk past that stop to take pictures and ask me about my home, and I love to share my experience. I usually try to focus on the good parts, as if I dwelt on the journey it would dull the shine that is now my beautiful home.
We are so grateful to Kathy for sharing her story with us. As you’ve seen, her home has a great design and seems larger than the actual size indicates. And those views of the Australian coastline are quite a scene to wake up to every morning.
But it’s Kathy’s story of beating cancer and overcoming a tremendous setback with her first builder that is most inspiring. We hope her example helps you to find the right team for your project and overcome any difficulties you face.
Let us know what you think about Kathy’s Container Home in the comments below!

Interested in Container Homes? You need our FREE cheat sheets to help decide if containers are right for you!