

We see shipping containers everywhere now. They’re being used as homes, swimming pools, cafes, and offices. With this, it’s very easy to forget where shipping containers came from and what their original purpose was and still is!
We have already discussed the 20 ways shipping containers changed the world and also how and who invented them.
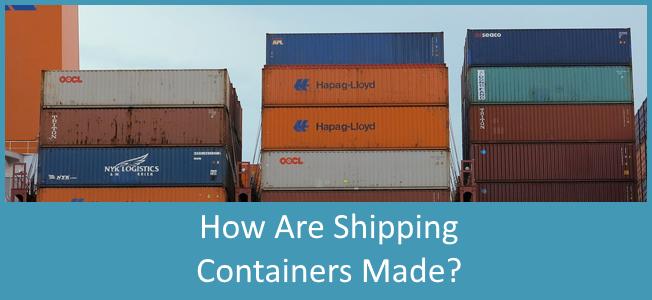
We know that shipping containers come in all sorts of shapes and sizes and today, we want to look at exactly how shipping containers are made.
In a modern world where many things are made by machines, it was amazing to see this isn’t the case with shipping containers.
Before we go any further, we want to thank Big Steel Box for the video which they have produced.
Step 1: Wall Panels
The very first task it to make the wall panels.
To do this, large steel sheets are cut down into 8 foot x 3 foot sheets. The sheets are then sandblasted and corrugated. The sheets are corrugated to add strength to them and this is what gives shipping containers their wave like texture.
Once the sheets have been corrugated they are then laid out and welded together to create the wall panel.
The final step to complete the wall panel is to weld square tubing onto the top and bottom of the wall. This tubing is used later on to weld the floor and roof to the wall.
Step 2: Floor Frame Assembly
After the wall panel is complete, the floor frame needs assembling.
The floor frame is predominantly made up of I-beams. Two longer I-beams are laid out perpendicular to each other. Then smaller I-beams are welded in between the longer I-beams to create a slab like base.
Once the welding is complete, the floor frame is sanded with a flap disc angle grinder to ensure there are no rough welding joints.
Step 3: Doors and Corner Posts
The front and back of the container now needs to be made.
Again, like the side walls, the doors are mainly made out of corrugated steel. Once the corrugated steel has been cut to size, it is encased in square steel tubing. The doors are then sanded smooth again to remove any rough welding joints.
The corner posts are then welded to I-beams and then the individual doors are welded in-place inside the I-beams.
Step 4: Completing the Box
The shipping container really starts to take shape now, as the door frames are craned into position on top of the floor frame. The door frame is welded down and then the wall panels are also craned and welded into position.
Finally, the roof panel is then lowered down onto the container and welded, completing the carcass of the container.
Step 5: Painting and Priming
The container is then wheeled into the paint workshop and primed. Priming (undercoating) is the first layer of paint to be sprayed on the container and it is a preparatory coating. This ensures that additional layers of paint stick better to the container; it also provides an additional layer of protection for the container.
Once the primer has dried, the container is spray painted several times. Multiple layers of paint are used to ensure the container is protected against the harsh elements of sea travel such as salt and water.
Step 6: Flooring
The next step is to fit the wooden flooring on top of the floor frame.
Six plywood panels are used to floor the container. However, before they are fitted, the panels are varnished with a protective coating. This protective coating makes sure that bugs and other pests aren’t present in the wood.
Once the panels have dried they are placed inside the container and screwed down into the steel floor beams.
Step 7: Decals, Identification and Doors
The container can now be decorated with the company’s logo and any advertisements. These are usually stickers which have an adhesive back to them.
The container also needs labelling with its unique identification code which can be used to identify the container from anywhere in the world.
The identification code has eleven alphanumeric characters each of which corresponds to a meaning.
The first three letters are used to identify the owner of the container. On the image ‘TGH’ refers to Textainer, one of the largest shipping container companies in the world.
The fourth character is a Product Group Code which can either be U, J or Z.
U = shipping container
J = any piece of equipment than can be attached to a shipping container- i.e. a power unit
Z = trailer used to transport a shipping container
The fifth to tenth characters make up a serial number which is assigned by the container’s owner. This serial number is used by the specific container’s owner to identify the container.
The final character is known as a Check Digit. It’s used to verify the previous ten characters.
Once the container has been labelled, the door handles and locking mechanism are attached. A rubber seal is then wrapped around the doors to ensure they are water tight.
Step 8: Waterproofing and Testing
The underside of the container is now sprayed with a waterproof sealant. Once the sealant has dried, the container is soaked in water and then inspected for any leakages or defects.
If no defects or leaks are found, the container is now complete and can be transported to its intended location.
It’s quite an impressive process, isn’t it? It is even more impressive to think that these brand new 20-foot containers can be purchased for around just a few thousand dollars.
Although we recommend building with up-cycled containers to help the environment, there are certain advantages of building with new shipping containers. One of the biggest advantages being, you know exactly where the container has been and what has been transported inside of it.
If you are looking to buy either new or used shipping containers, this guide should be helpful.
Surprised at any of the steps? Let us know what you think in the comments below.

4 Responses
Very interesting process
Hi Tom,
I understand the coatings used to paint containers may contain Hazmats (by US standards) such as chromate and/or lead. As such shouldn’t sandblasting of containers be done by specialists?
Hi Jonathan,
This varies from container to container. However, lead paint has been used with shipping containers before, so you should be careful when selecting your containers. If you choose to remove the lead paint via abrasive means such as sandblasting, adequate personal protective equipment (PPE) is vitally important and your local government may have regulations on how you can deal with this. Another option is to encapsulate with a coating on top of the existing paint.
Gentlemen
I need to paint a container of 20 feet and I want to know the type of paint to use, synthetic enamel or epoxy