
Elements
Size
Age
Levels
Note: Map location may not be exact. Click to open in Google Maps.

Saffy and her husband Dom have a beautiful, modern container home rental near Adelaide, Australia. Their story is inspiring not just because of the high-quality aesthetics of their build, but because of how using it as a short-term rental has completely changed their family’s financial situation. We know you’ll really enjoy seeing their design and hearing how they worked together as a husband-wife team to create an amazing container home!
We had been following various other Tiny Home projects from around the world on social media and had some interest is doing something of our own. With the time constraints we had, a shipping container was attractive due to being prefabricated: there was no need to build walls or a roof to get the project off the ground.
We had looked at various other construction methods and containers just excited us the most. It was also a bit of a challenge for us to make sure we fit everything into the space. It was also convenient that we could plan and buy everything we needed for the fit out before the container arrived so that we were ready to dive straight into the build.
I was four months pregnant with our second child when the container arrived. We had decided that this project would potentially cover our income gap to allow me to stay home with the children. With that goal in mind, it was important to get the project as near completion as possible before I had the baby.
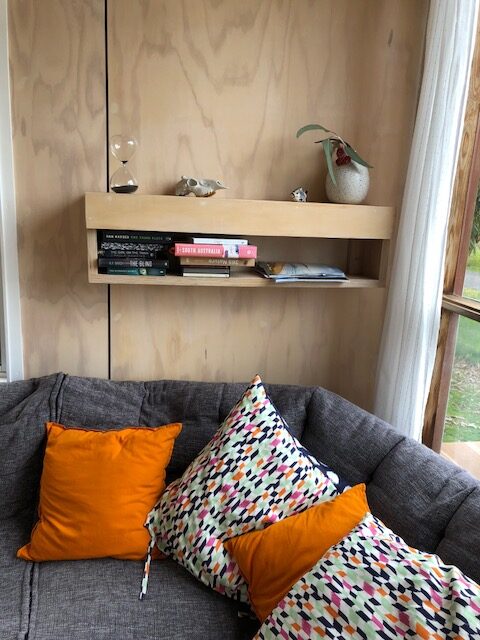
We had previously renovated a house all by ourselves and had learned a lot of do’s and don’ts through that process. My husband has some experience in building and carpentry and is both extremely handy and determined! I love the design process and organizing projects so we made a great team. We fitted the container out using materials and methods of building that we knew we were comfortable with, hence the large amount of timber used.
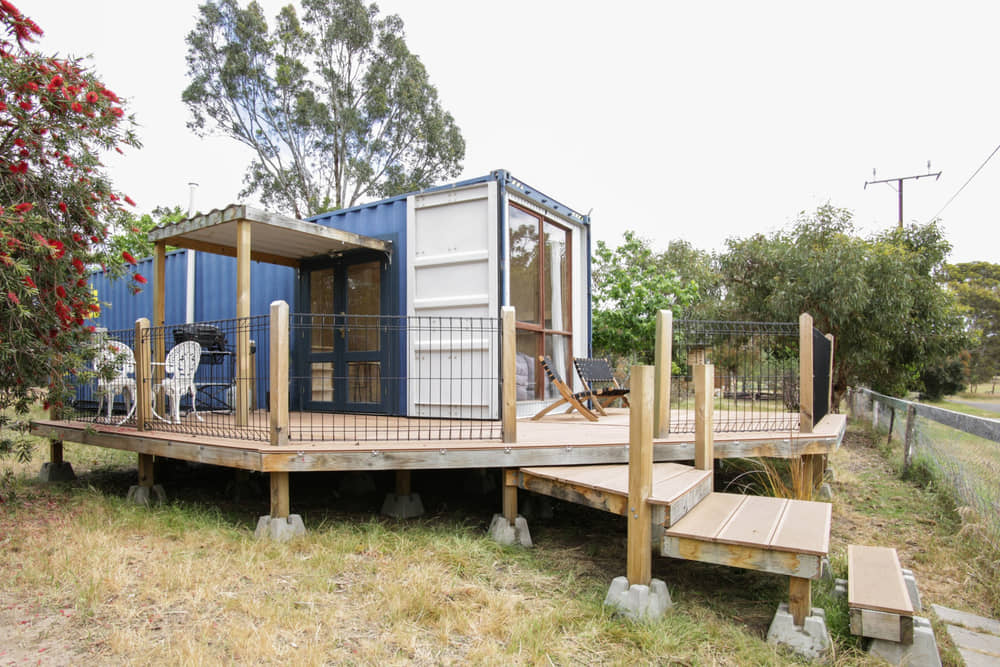
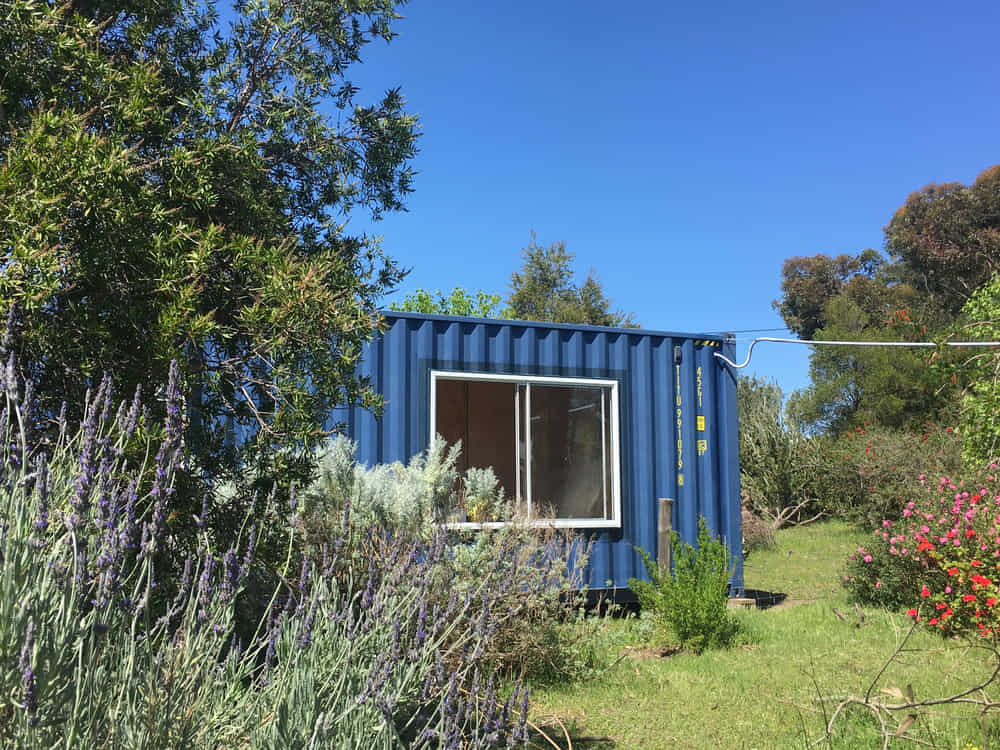
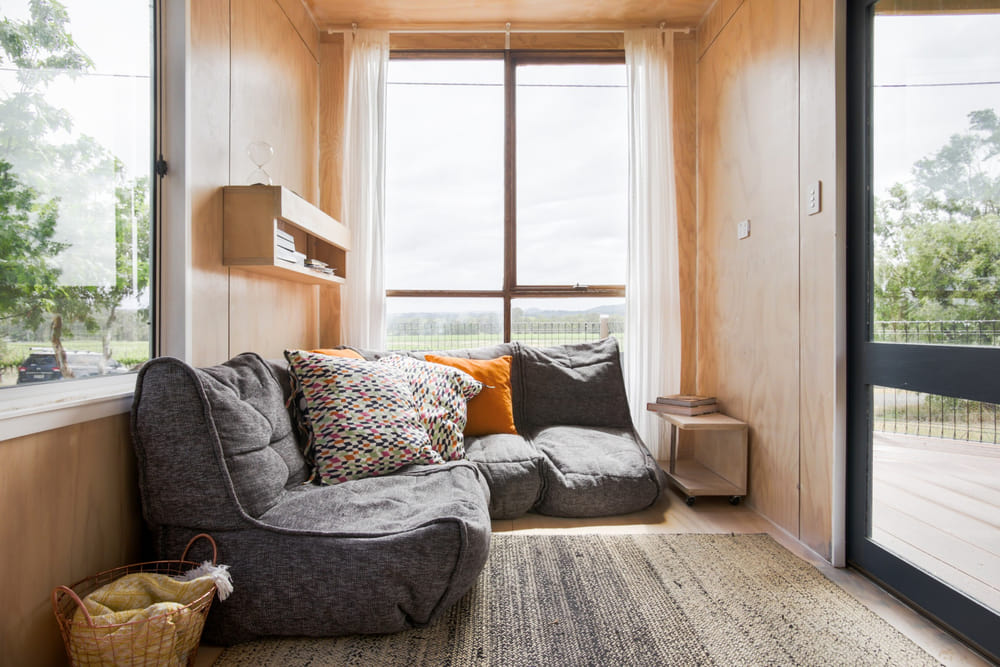
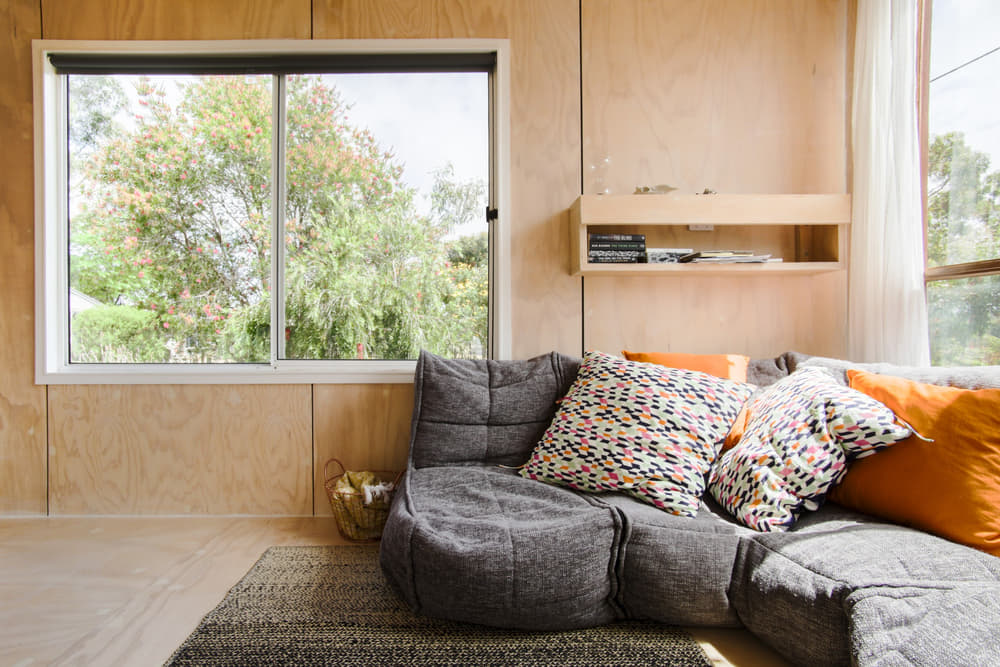
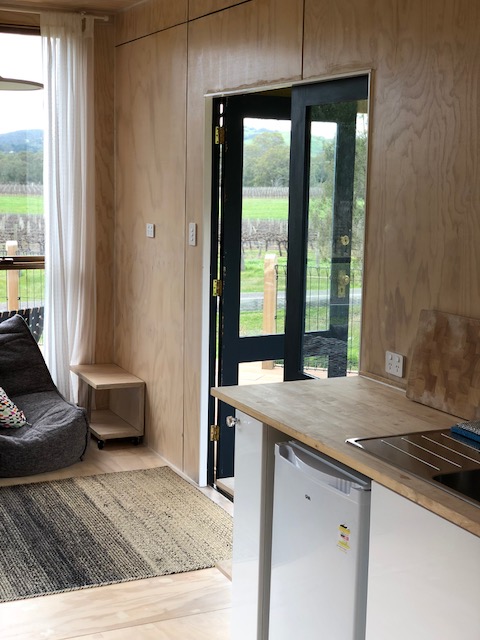
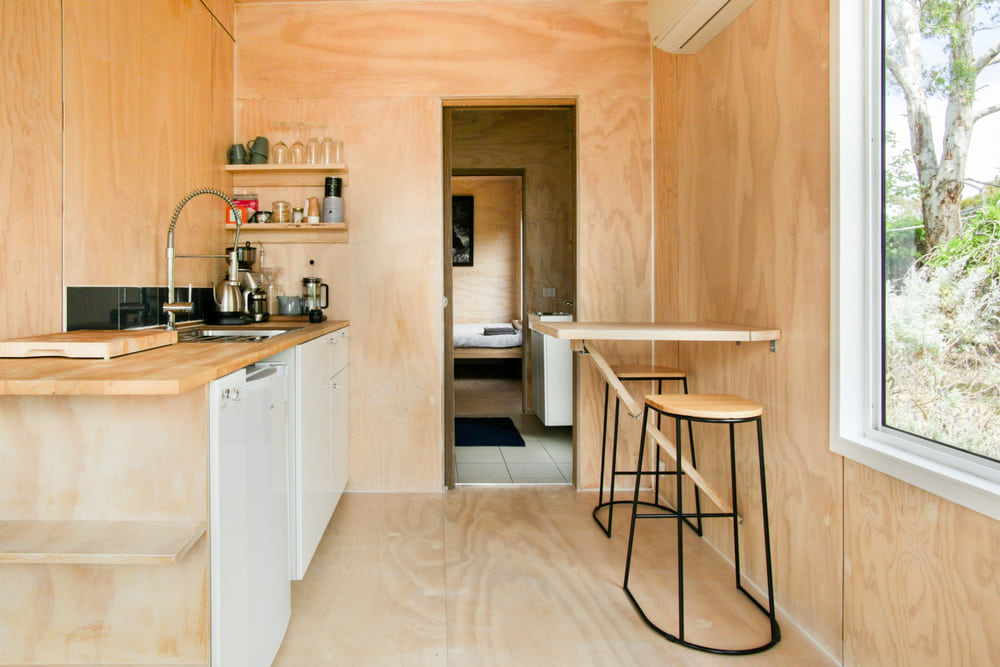
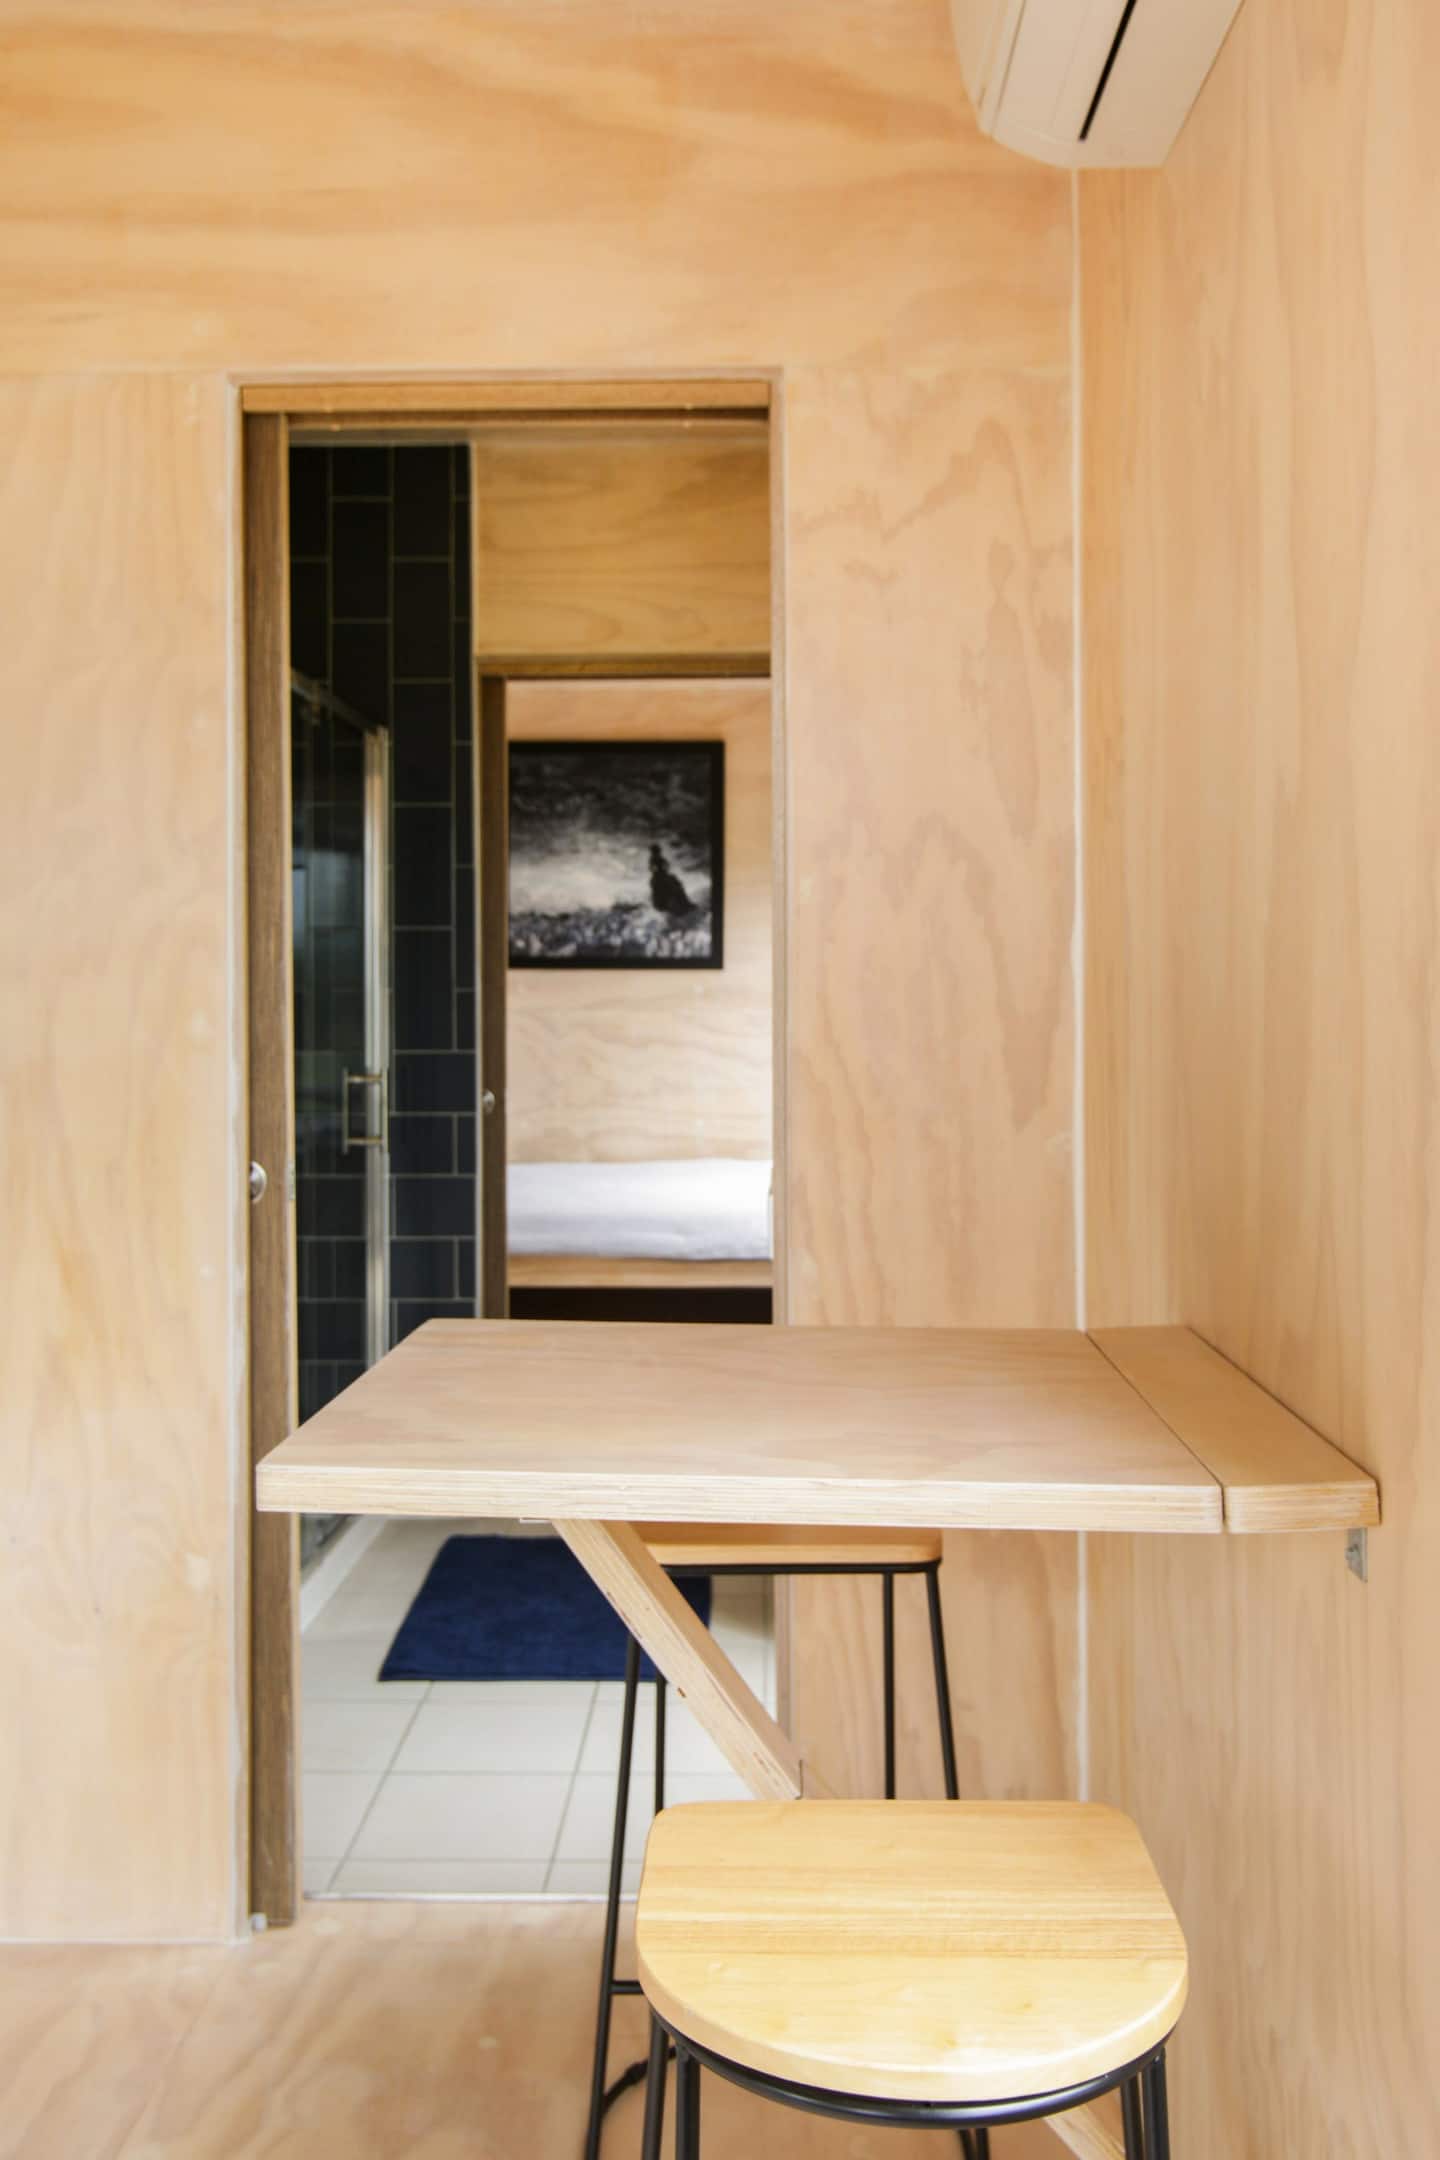
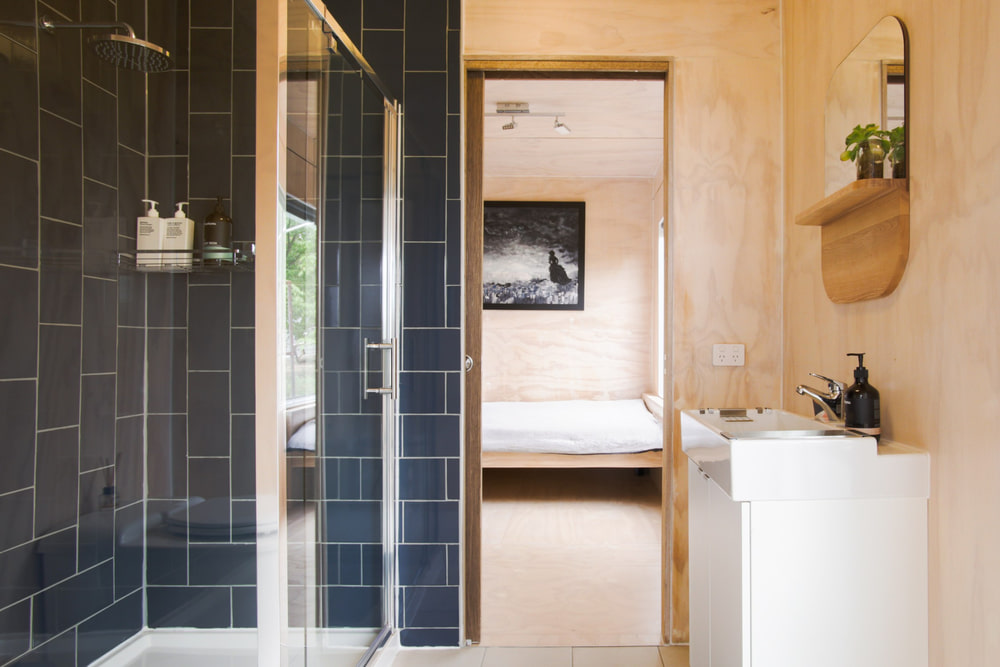
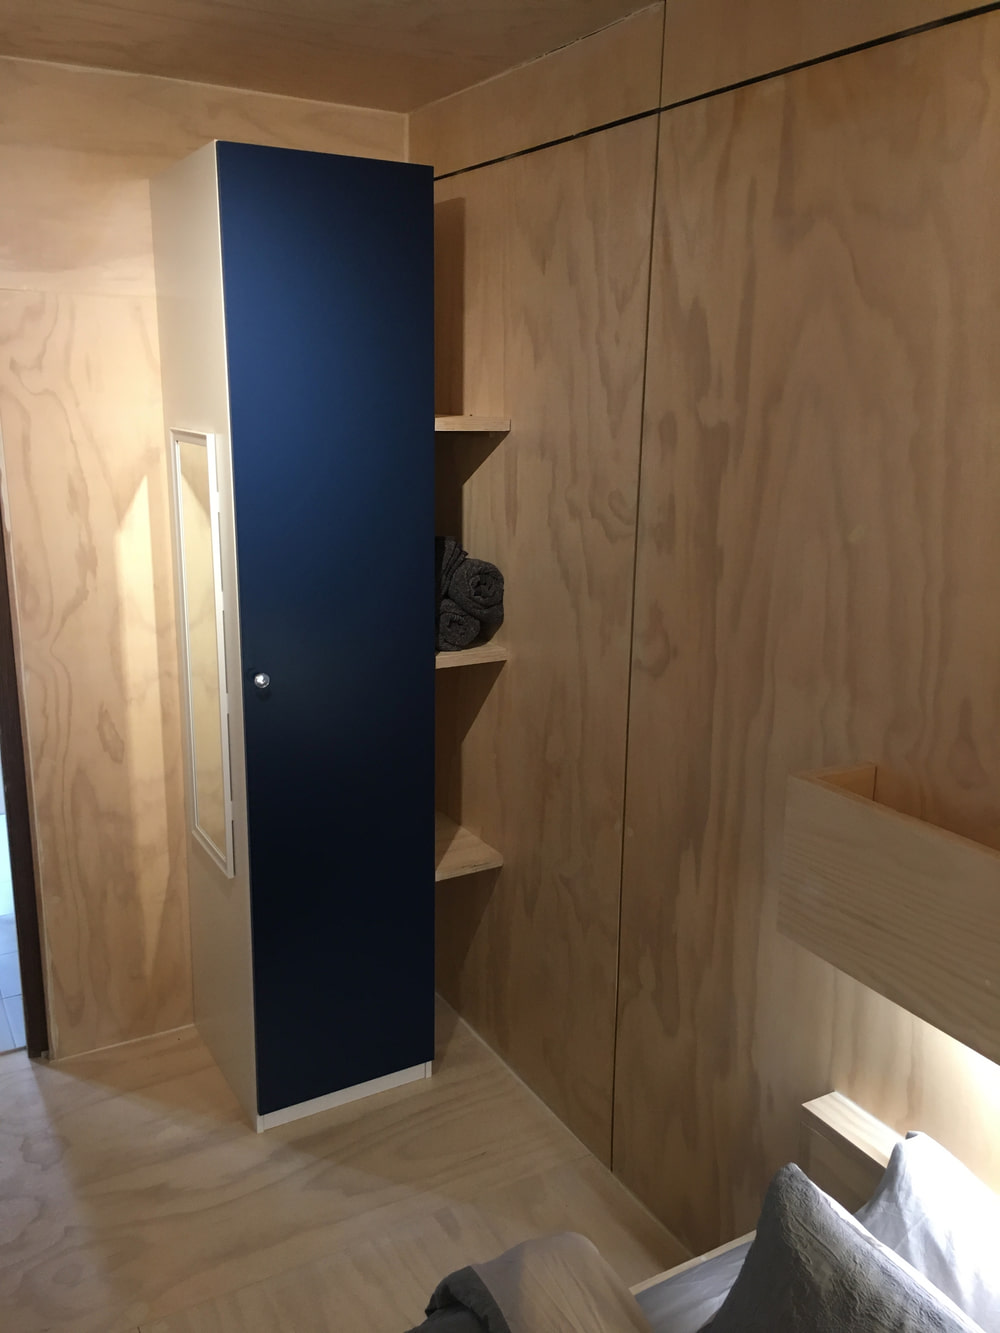
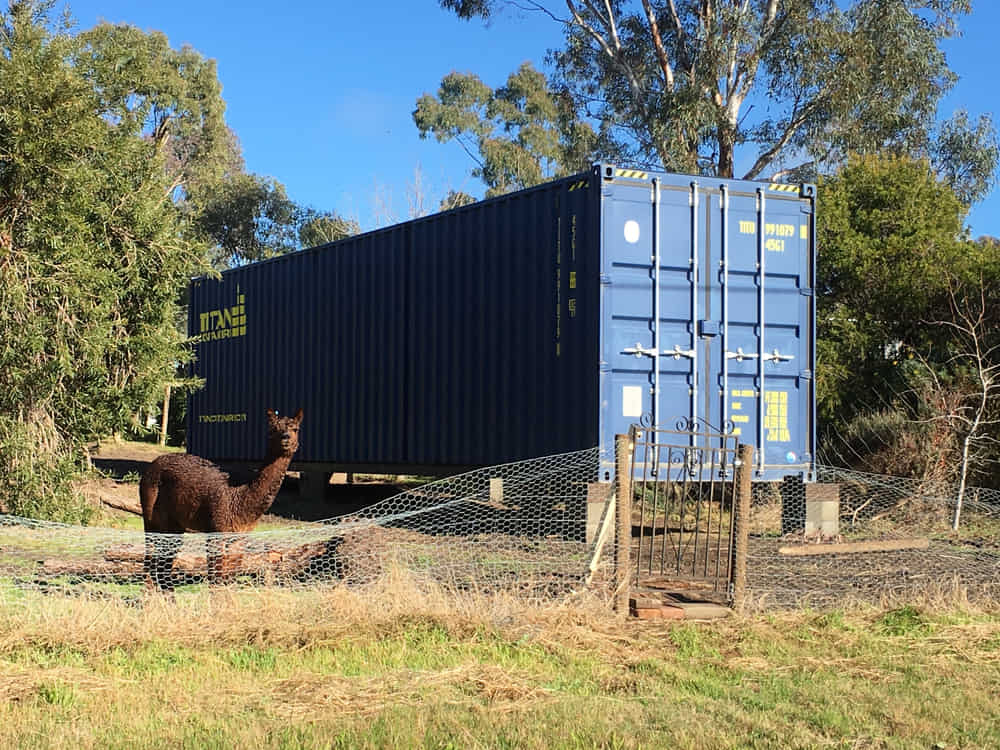
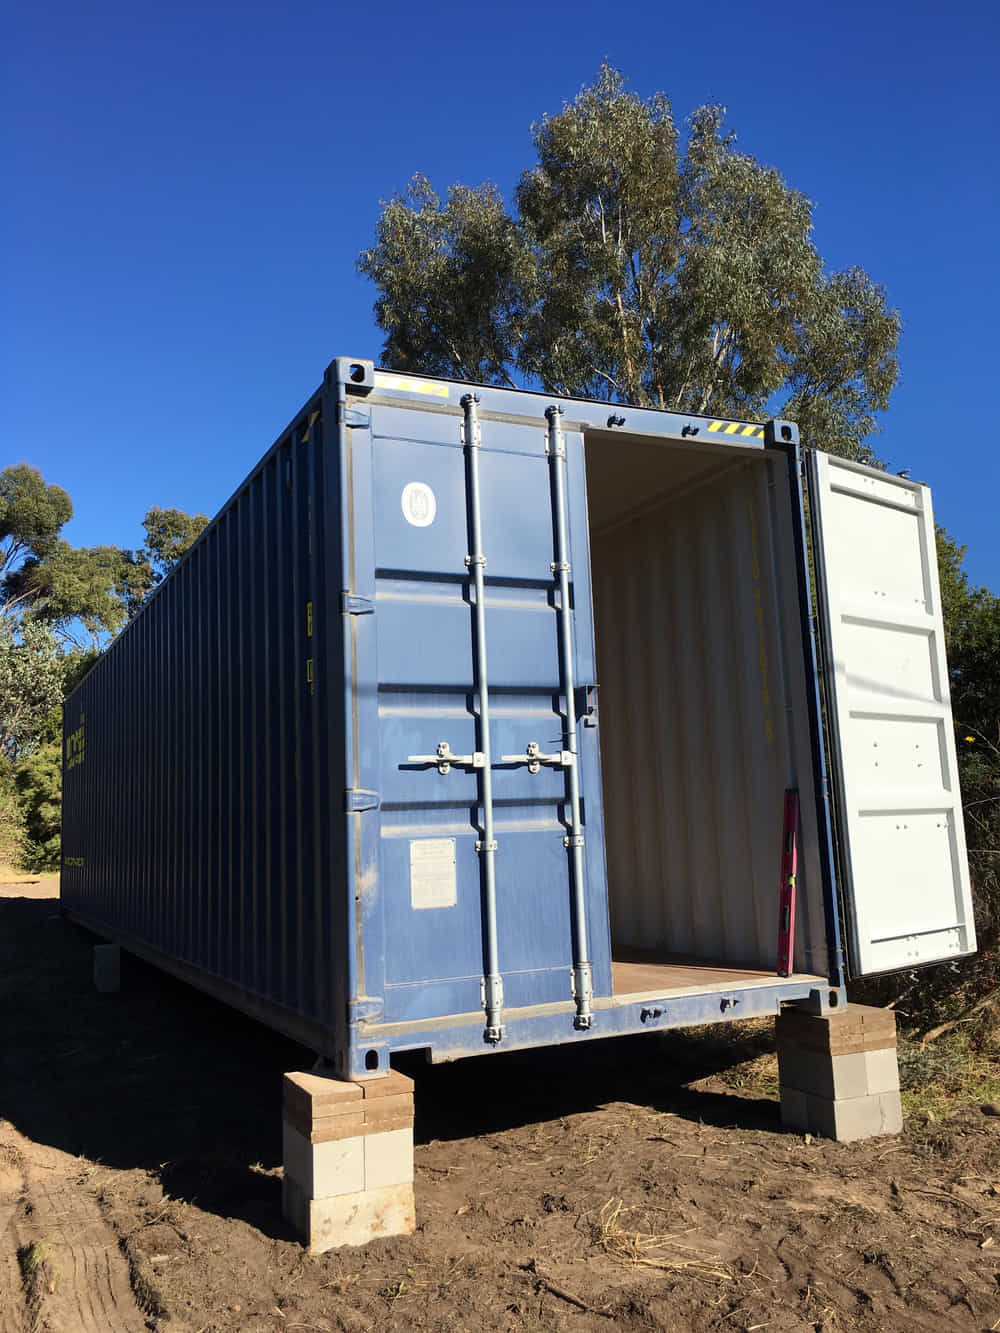
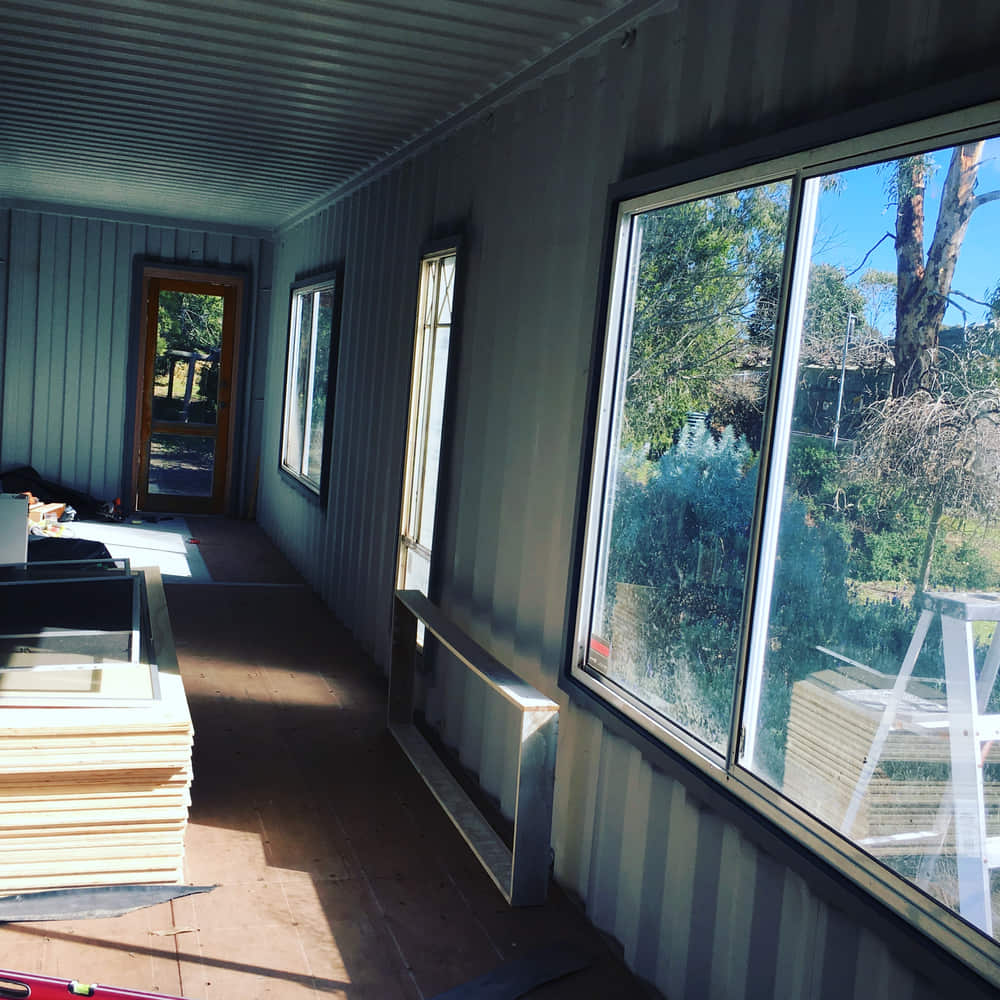
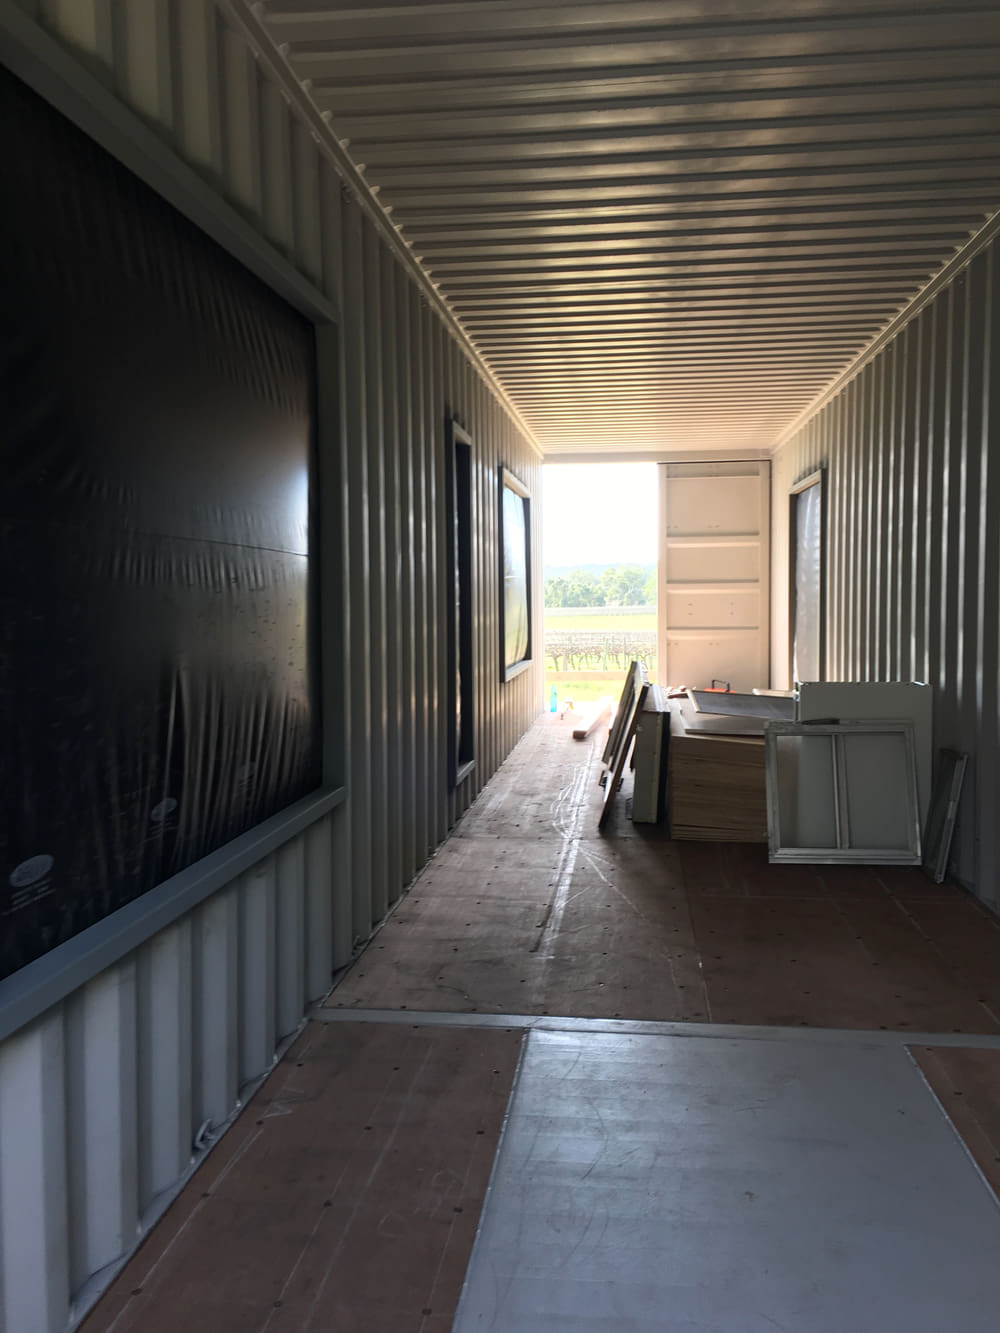
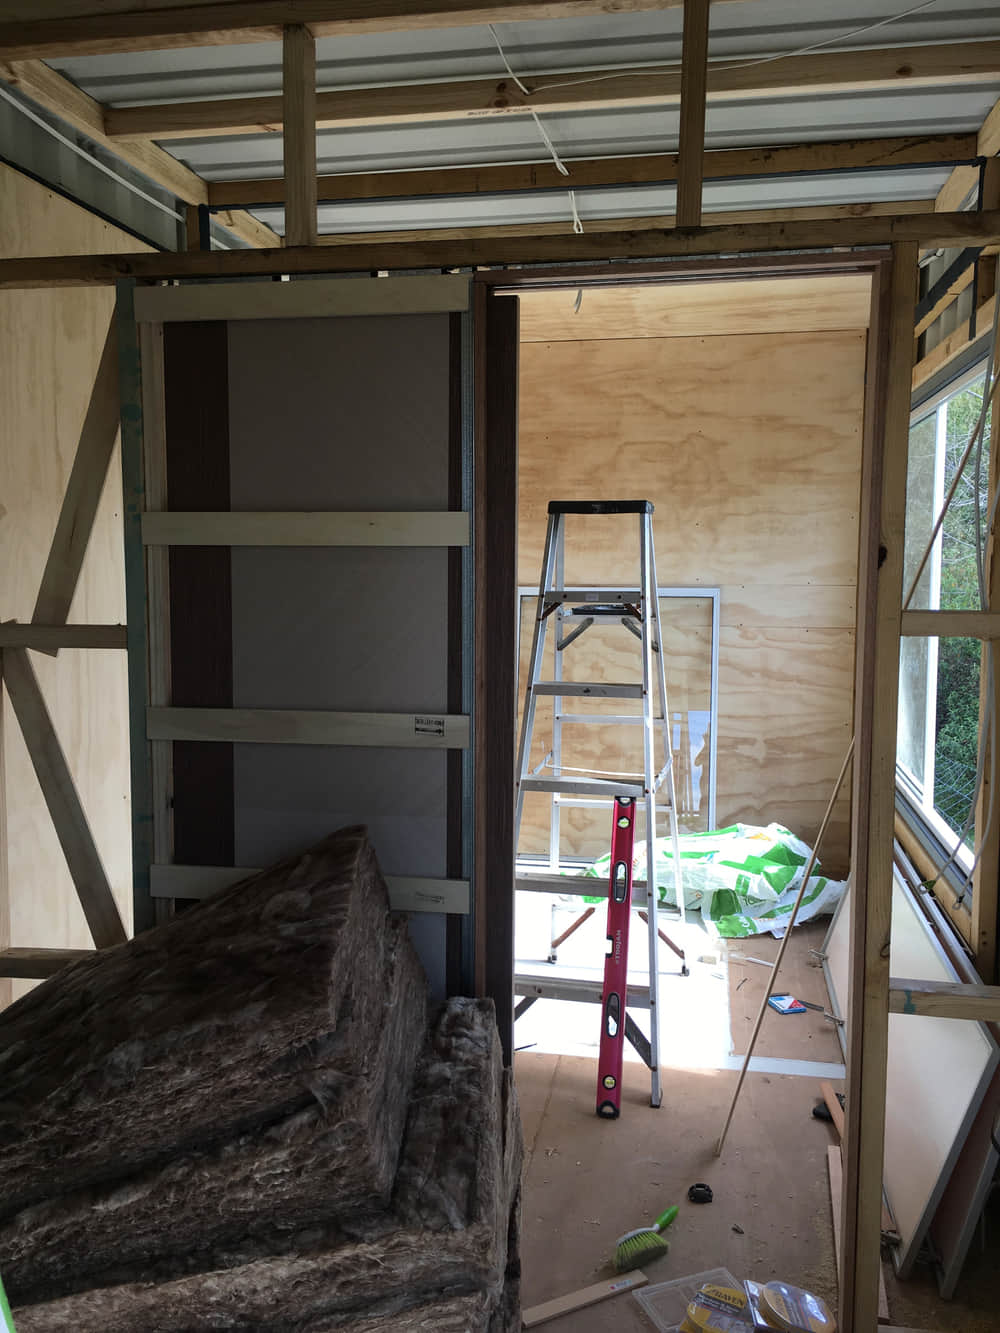
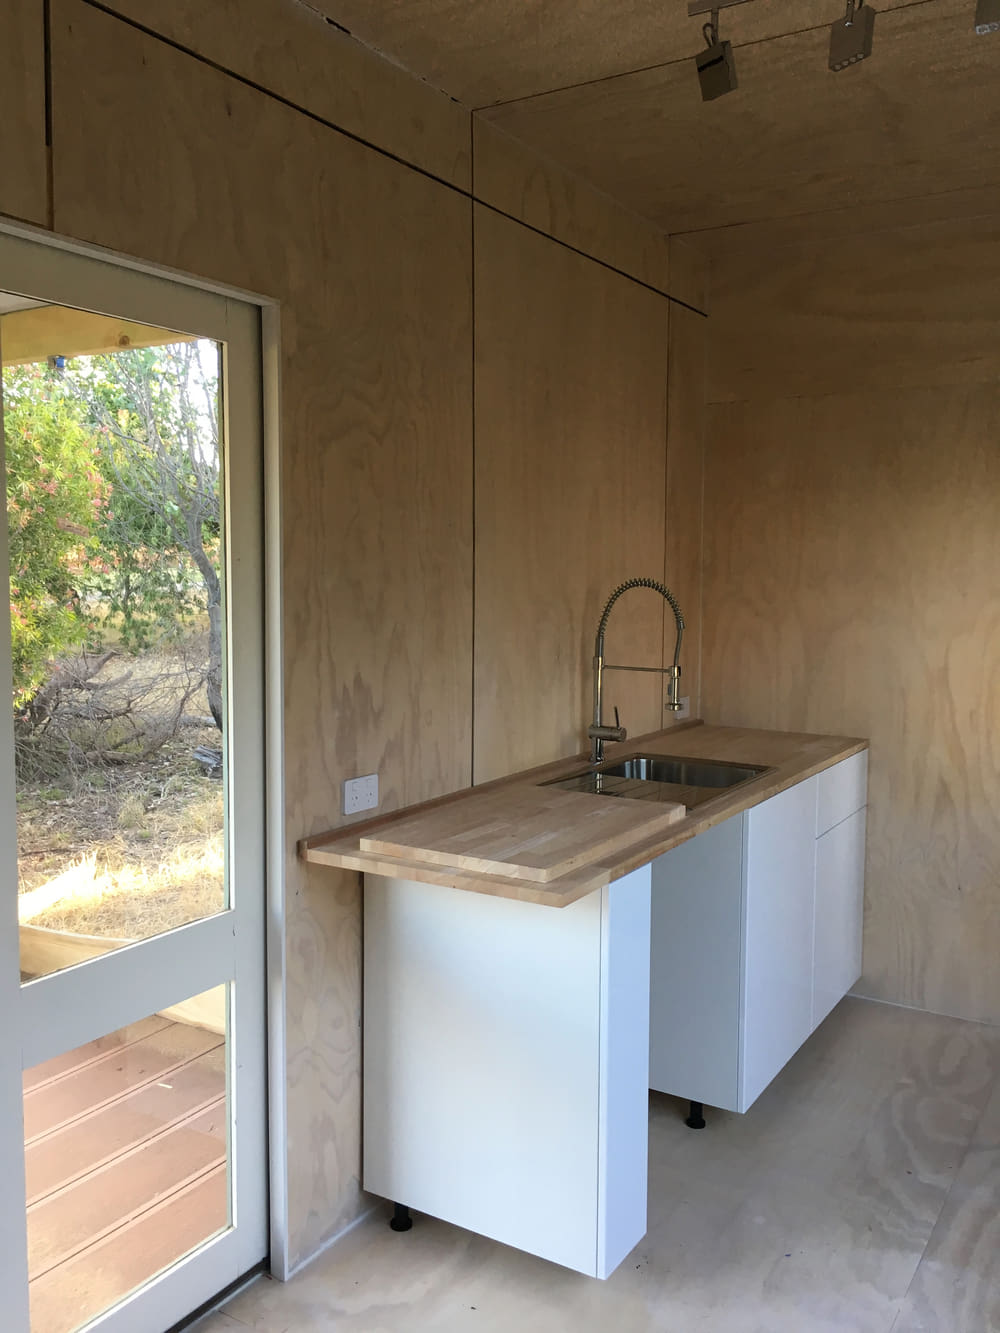
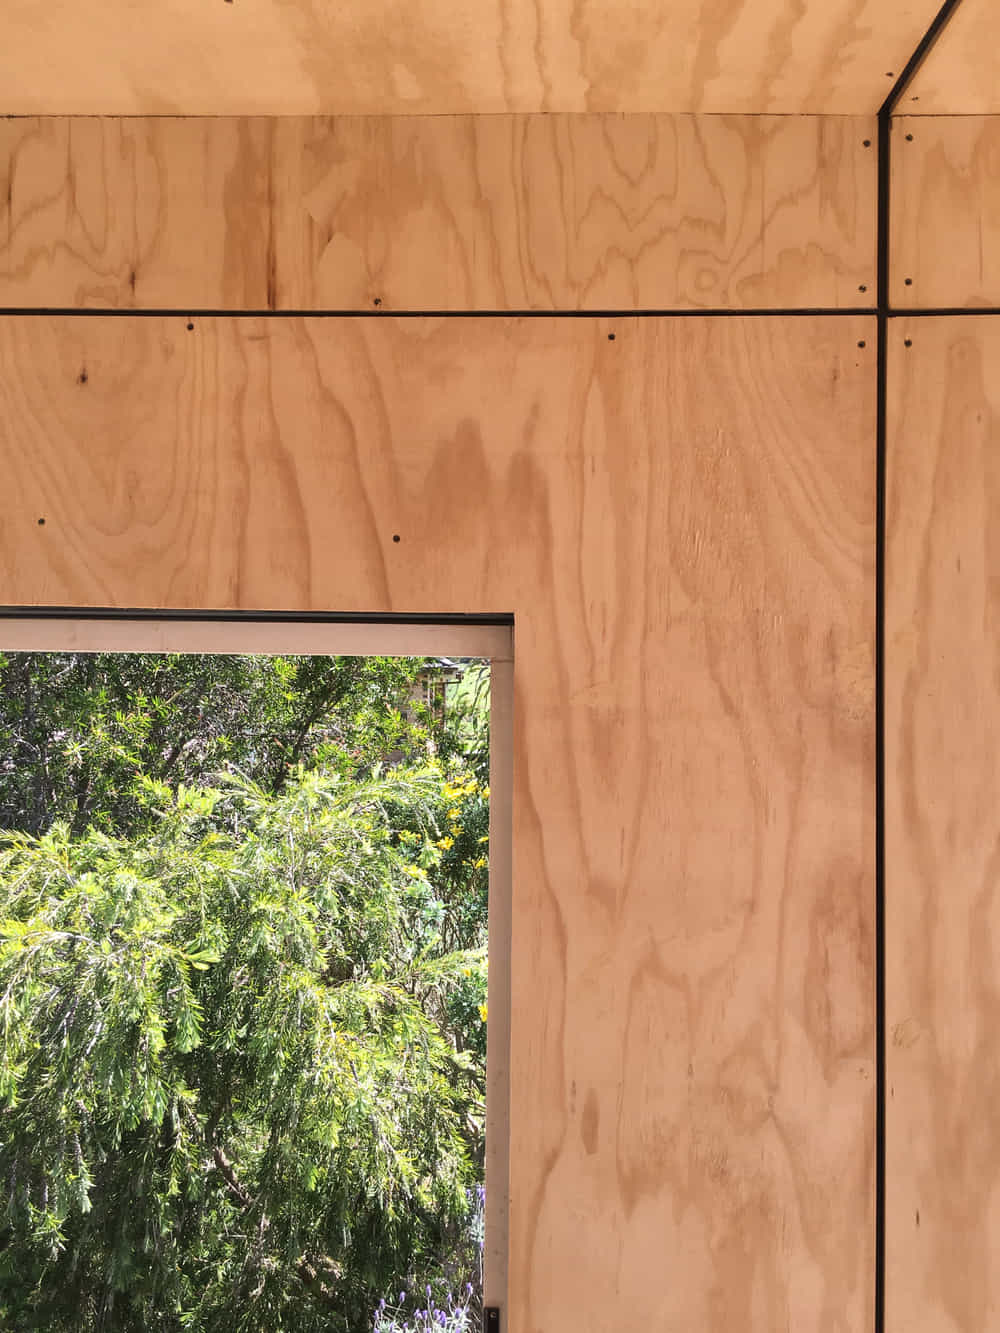
The container we used is a 40 foot high cube. We used fiberglass batt insulation between the studs and lined the walls, floor, and ceiling with high quality plywood. There are four rooms in the container, one of which has a separate access from the rest and is a spare toilet for my husband’s business next door.
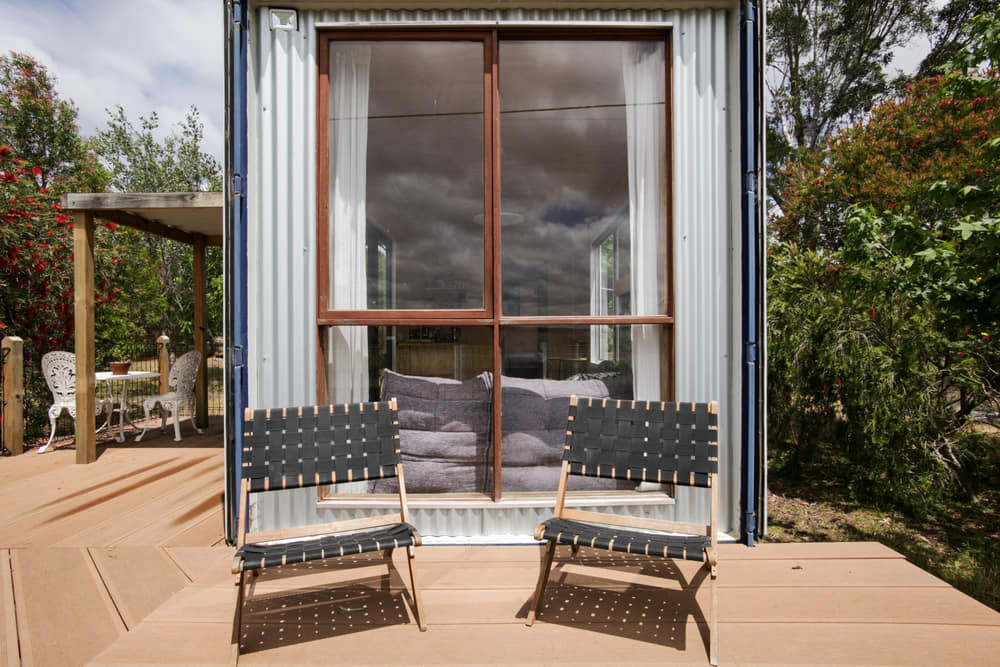
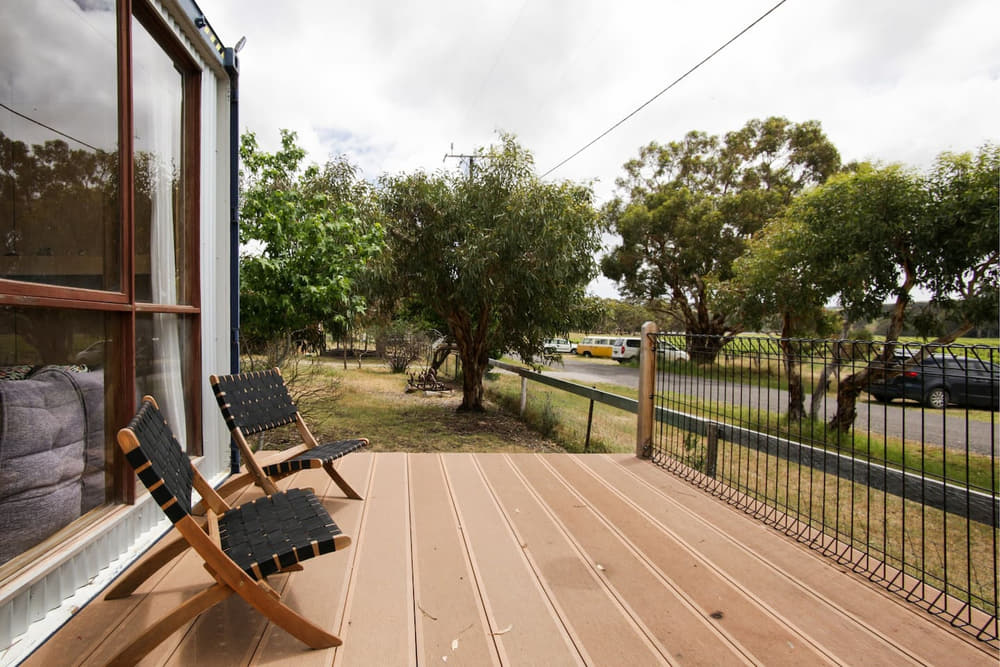
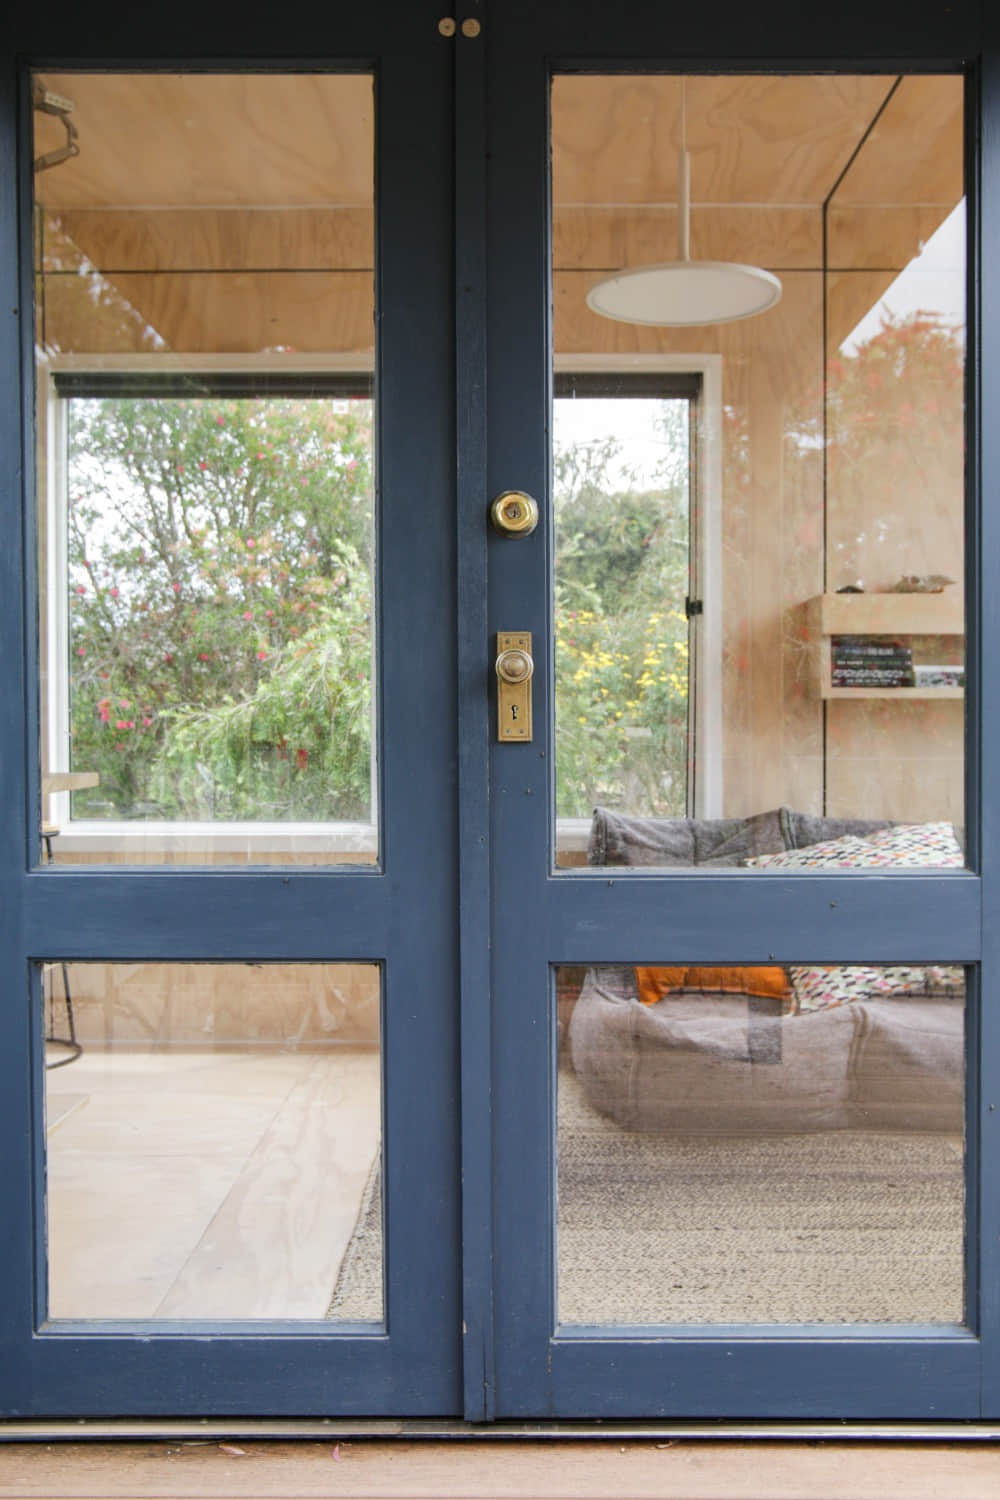
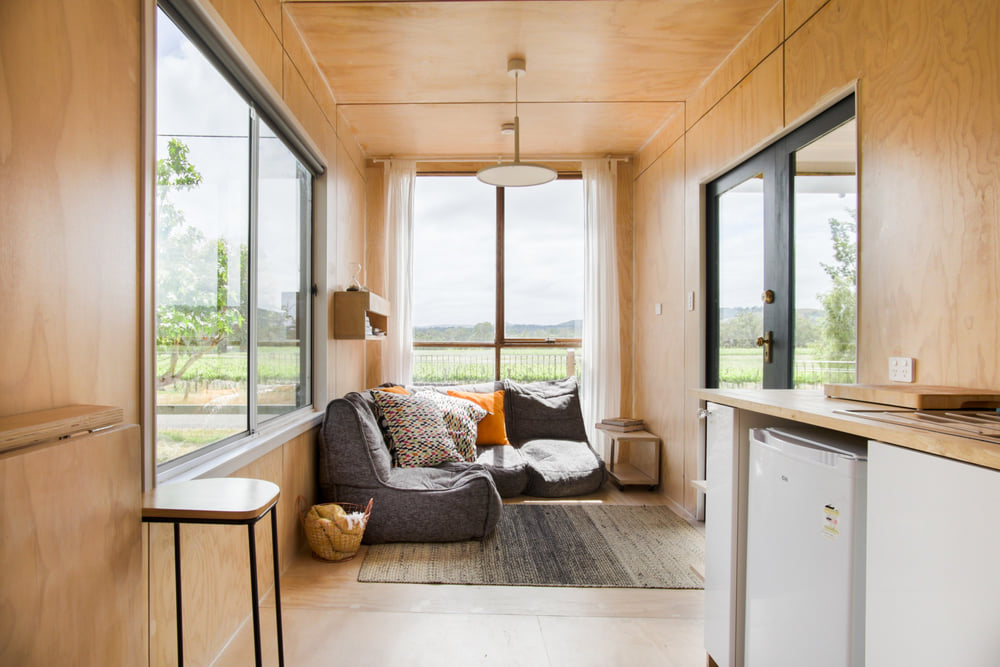
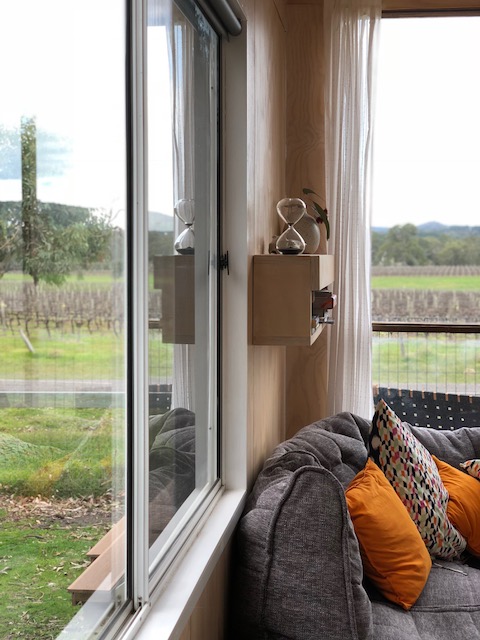
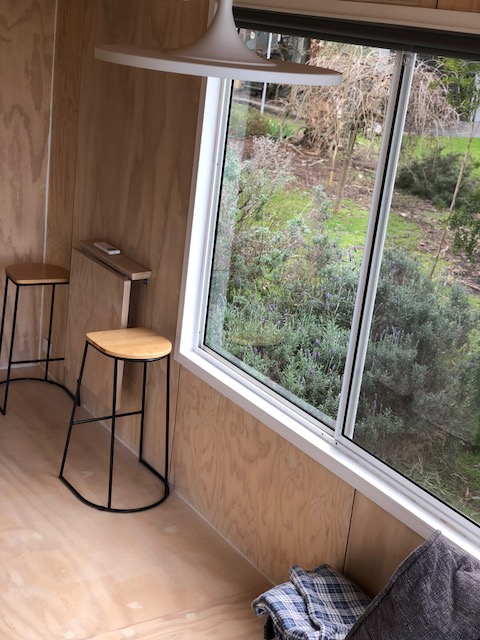
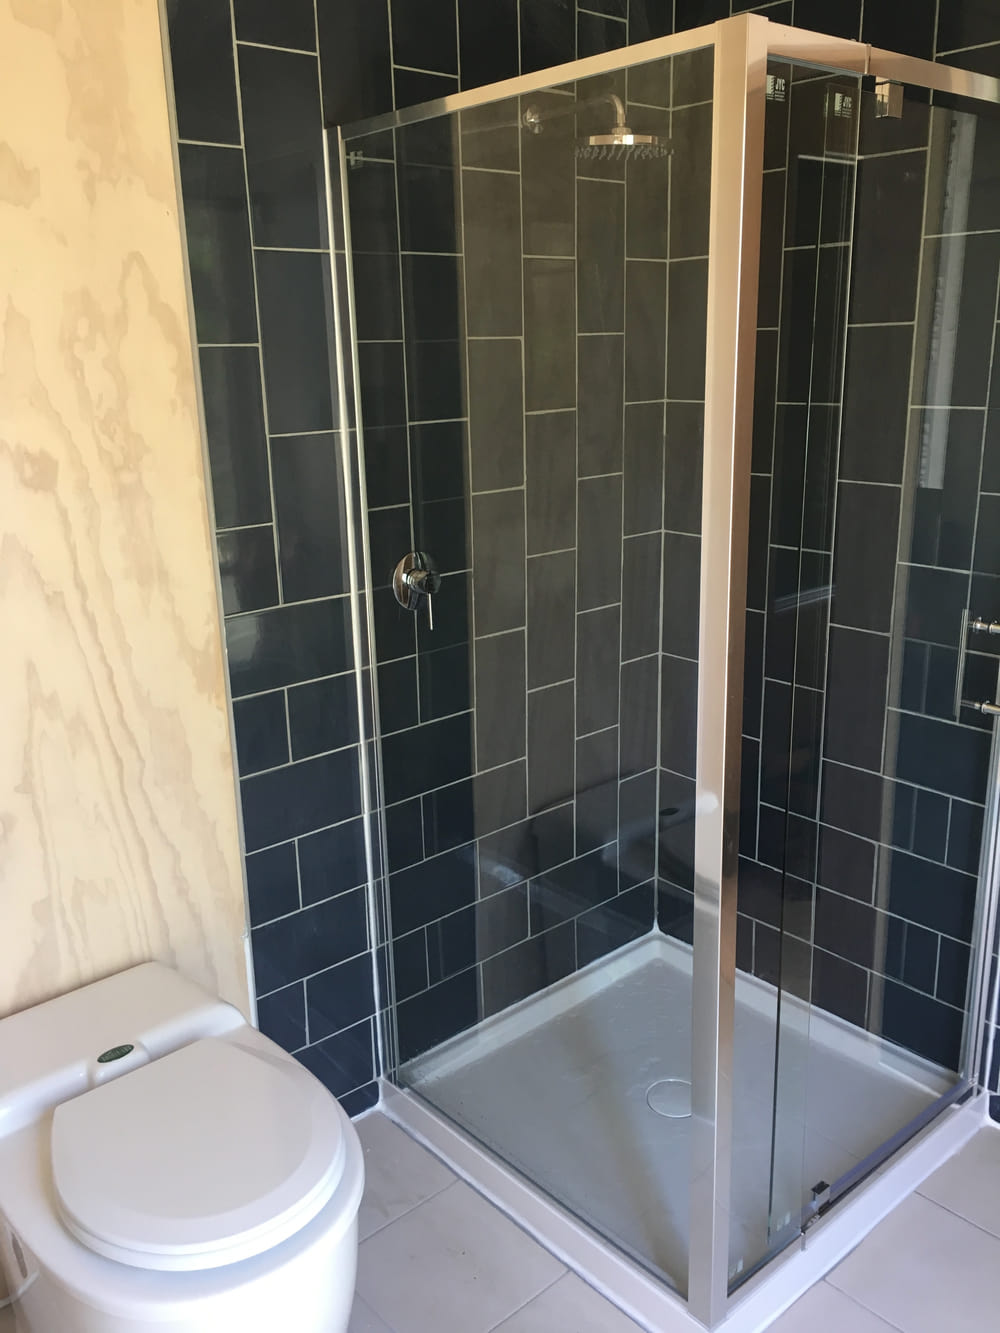
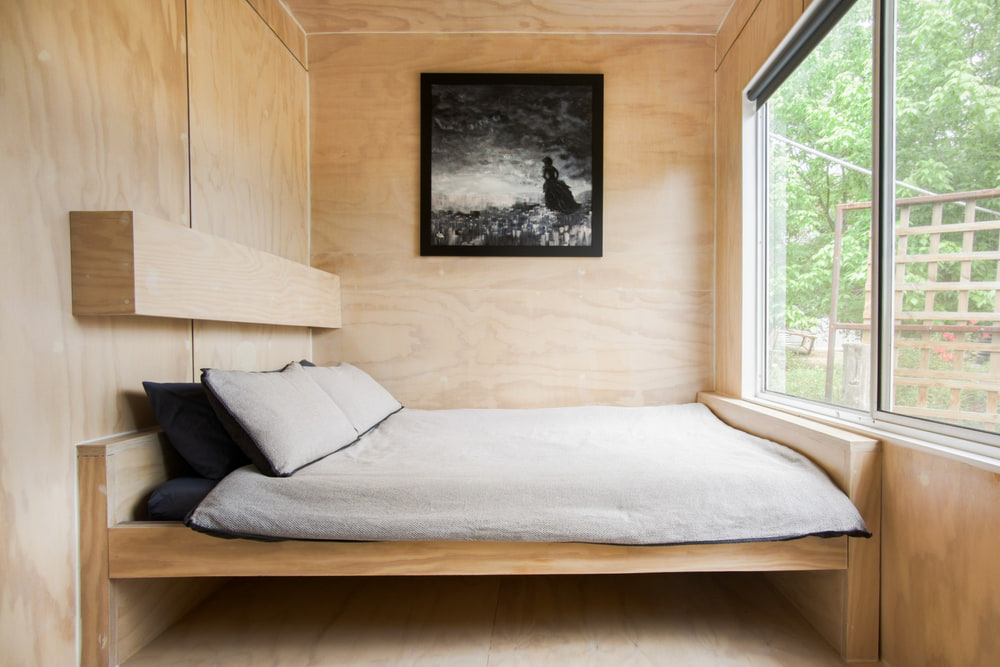
There are sliding cavity doors (pocket doors) between the bedroom, bathroom and living area to allow more wall space for furniture where swinging doors would have interfered. We installed an eco toilet and a large rain shower and chose very large windows in the bedroom and lounge to allow maximum light.
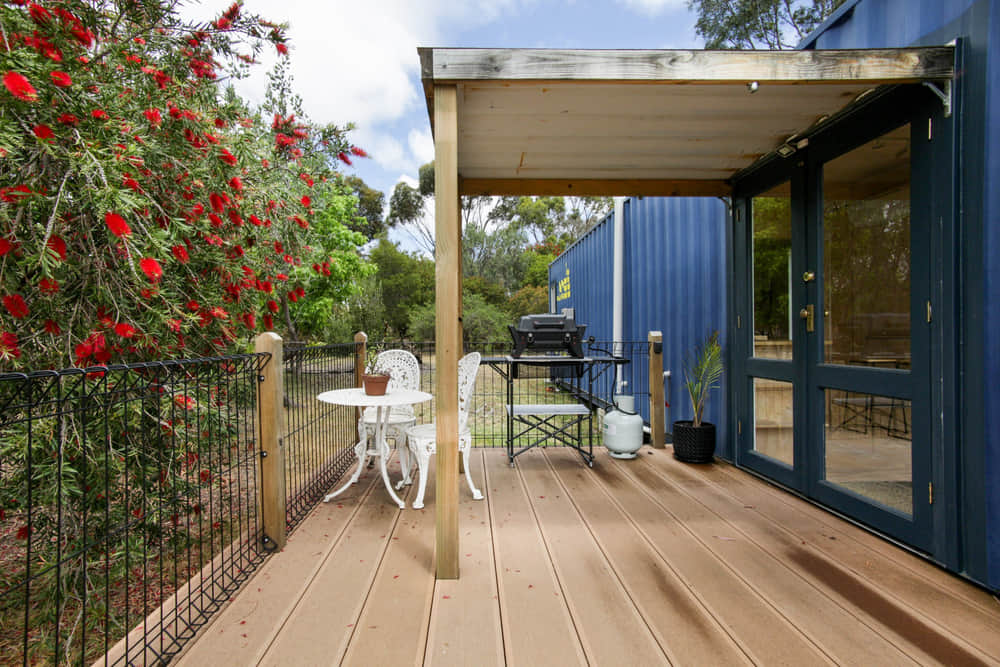
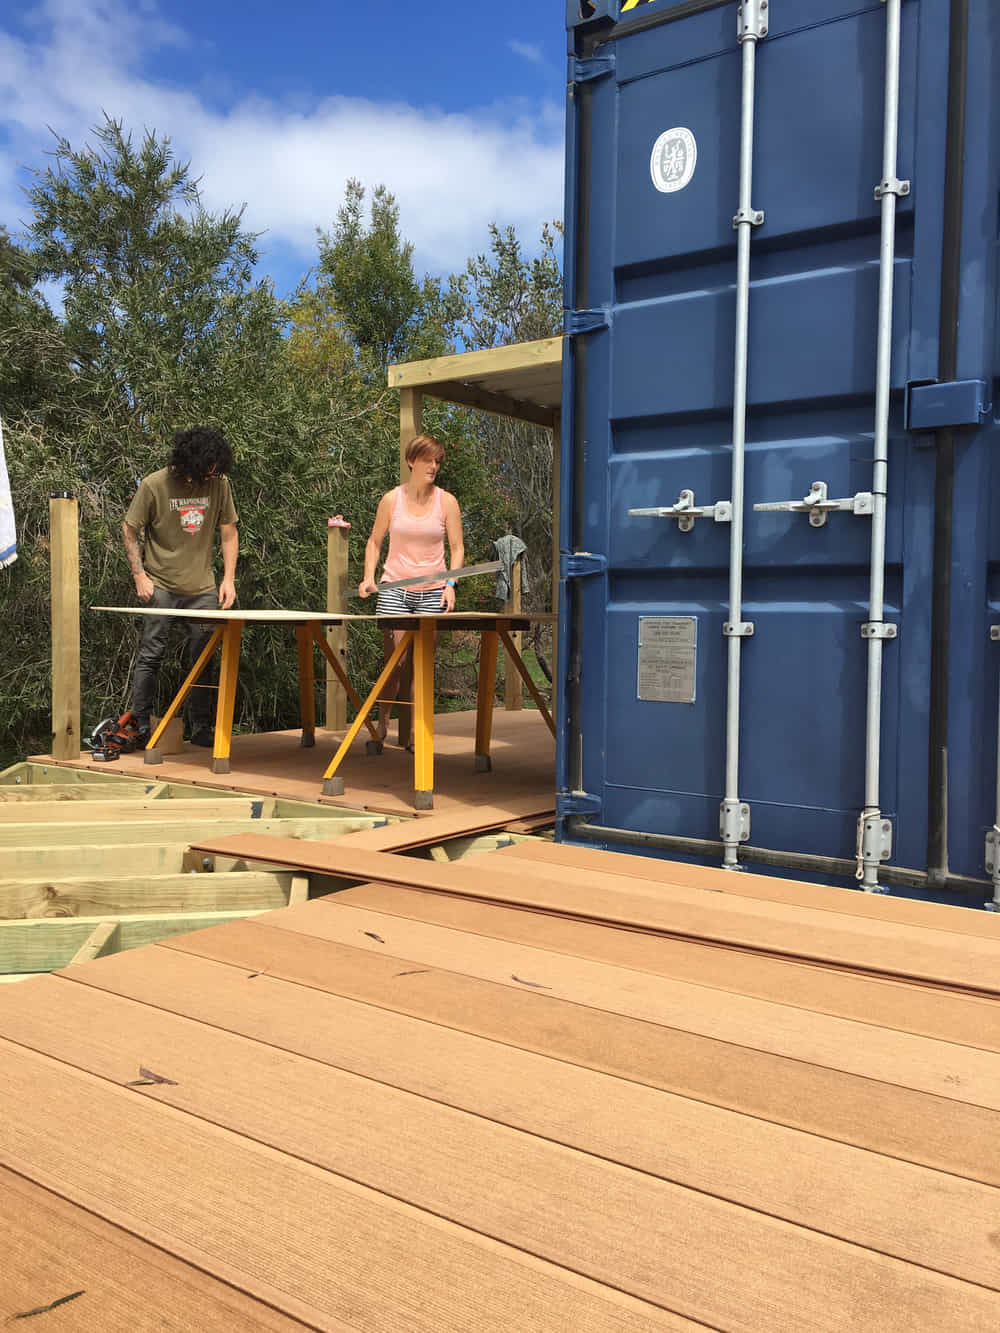
The metal exterior container doors are permanently open and we installed a floor-to-ceiling picture window in the end to take advantage of the views. Those views can also be enjoyed on the deck we built that wraps around the front of the container. We ended up making it larger than the original design specificied, but the extra space was well worth it.
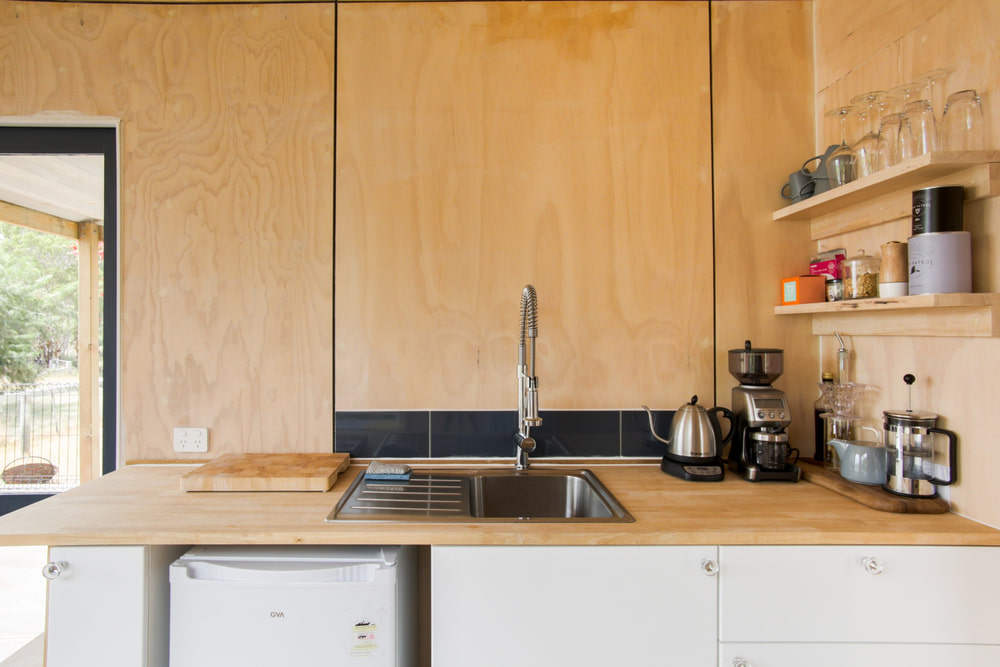
We decided that we could minimize the size of the kitchen since we planned to mainly use the container for short term rentals. Instead of a ful stove, oven and microwave, we provided portable induction cooktops and a good BBQ outside.
We didn’t use an architect but instead had a building designer draw up the plans for council approval.
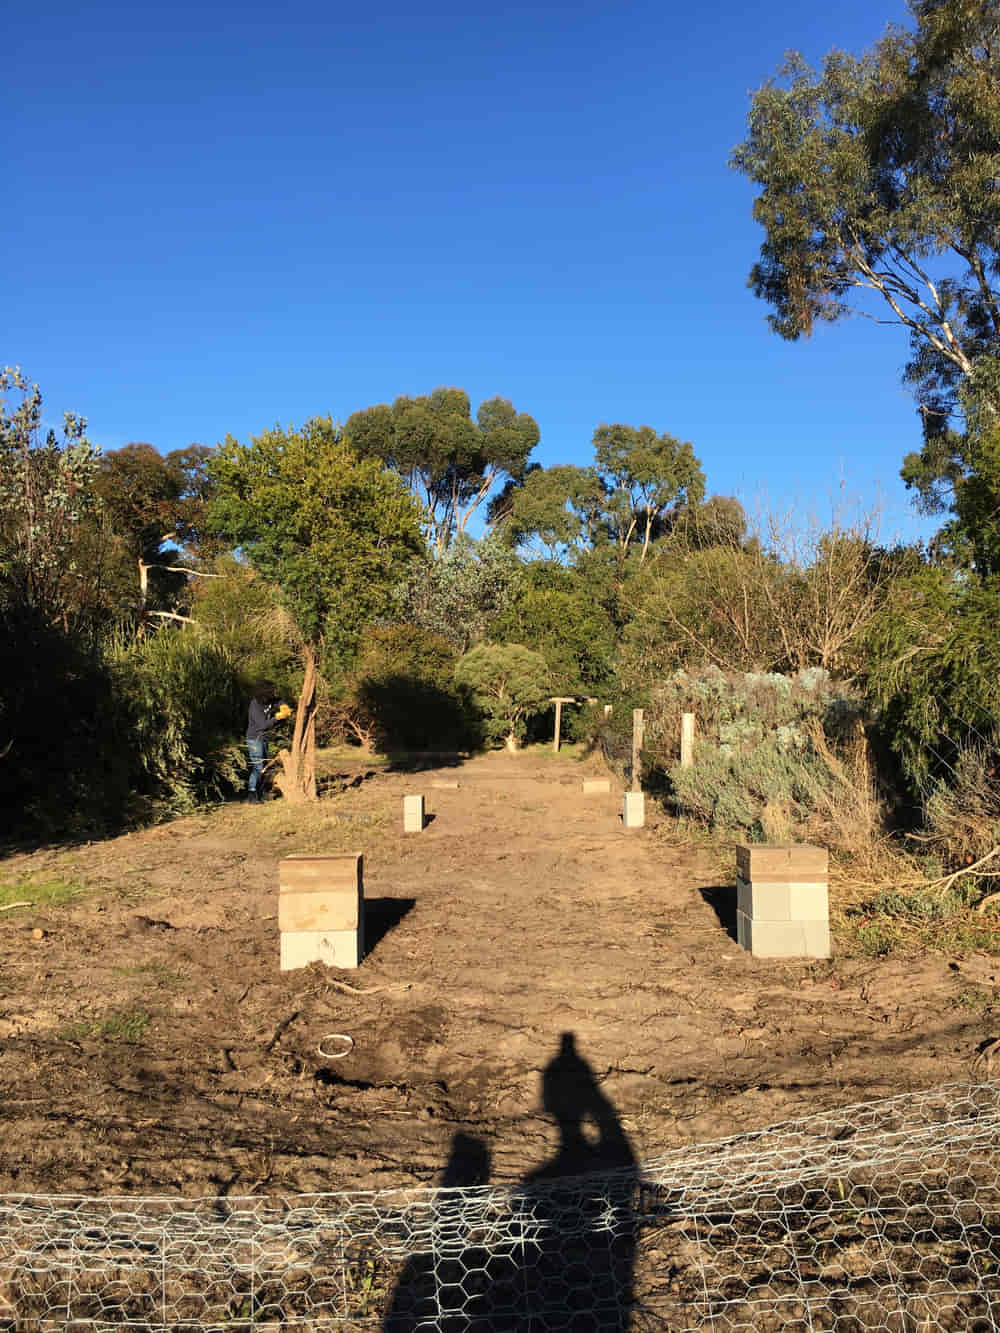
The container is on the same property as our primary residence, which made working on it very easy. It took us a long time to pick the location based on access, the best views and a distance from our house for privacy.
I spent a lot of time looking at other container floor plans and sketching ideas until I arrived at something I felt would work for us. I chalked the idea out in life-size form on the driveway and walked through it over and over, changing room sizes and window positions etc until it was perfect.
We sold a previous business that we owned so we had the capital to pay for the build, and we saved money by doing the majority of the construction ourselves.
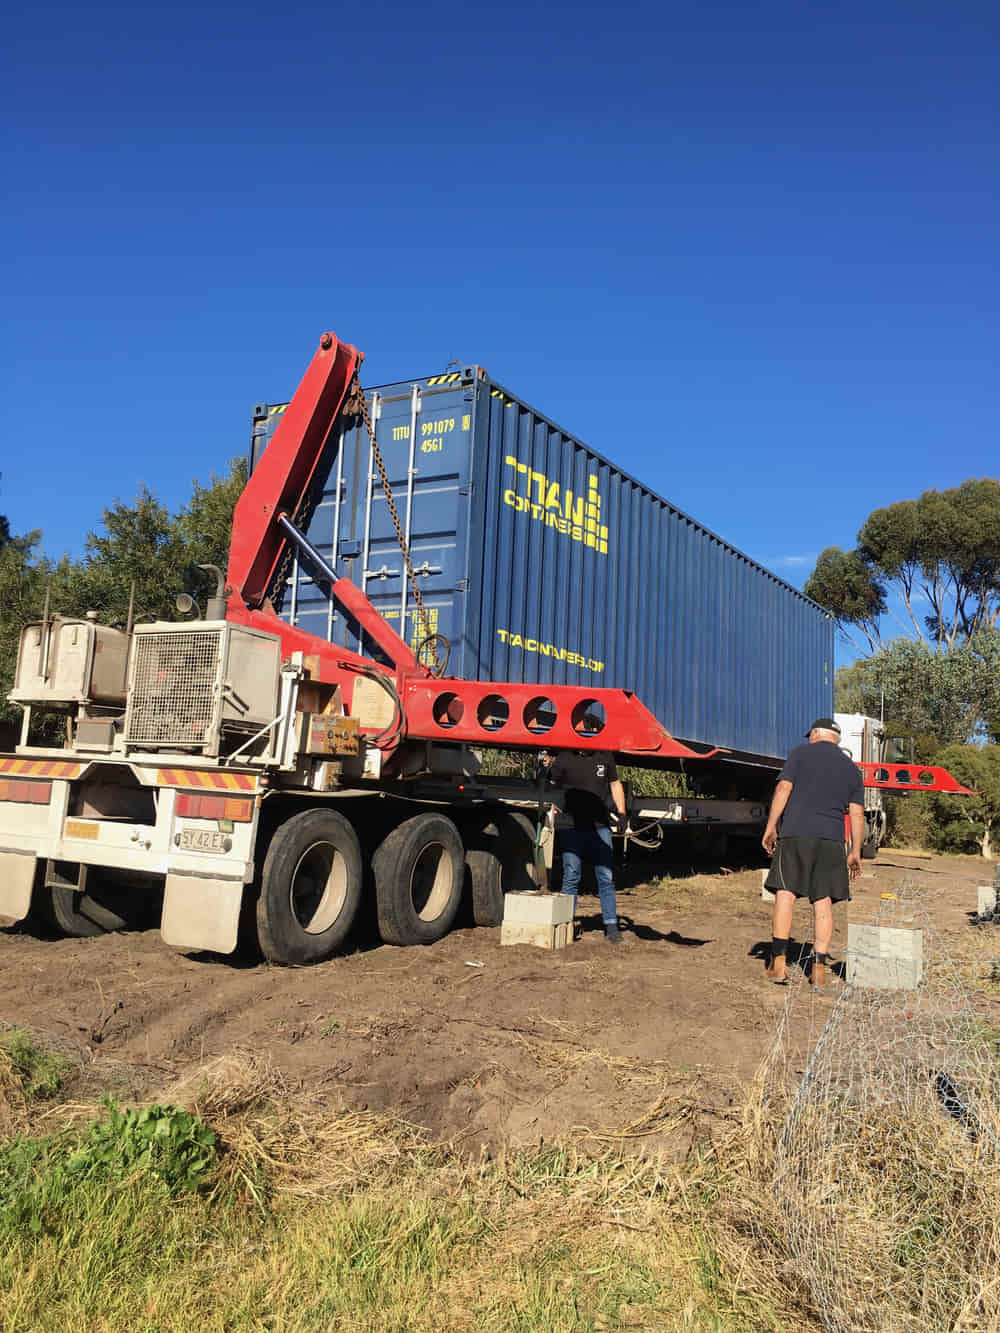
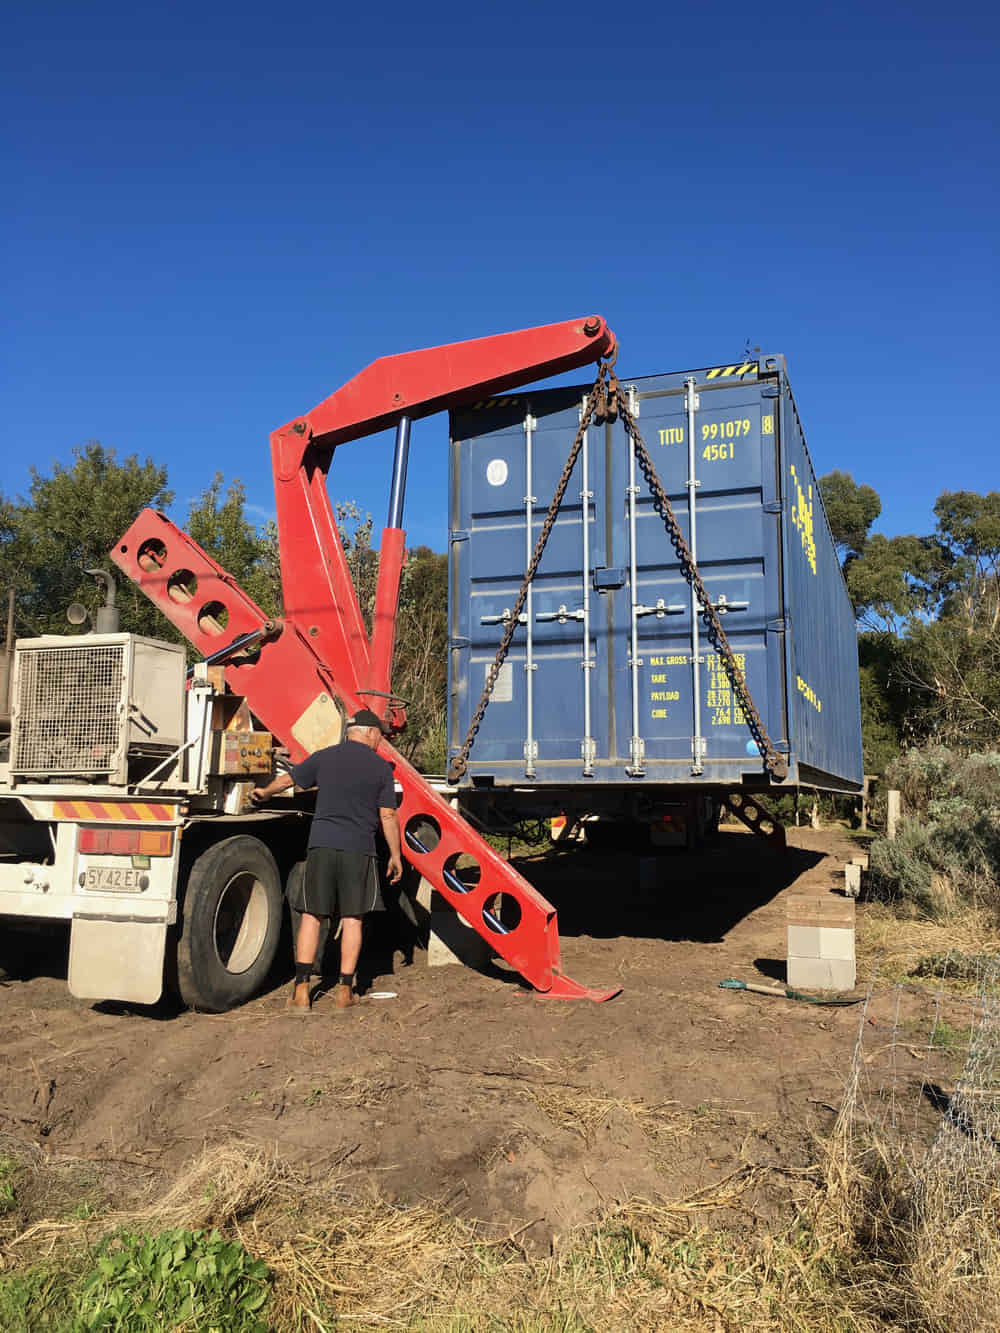
Ordering the new, empty container was pretty easy and it arrived a few weeks later in June 2017 via sideloader. Apparently, there was a long waiting list for second-hand containers.
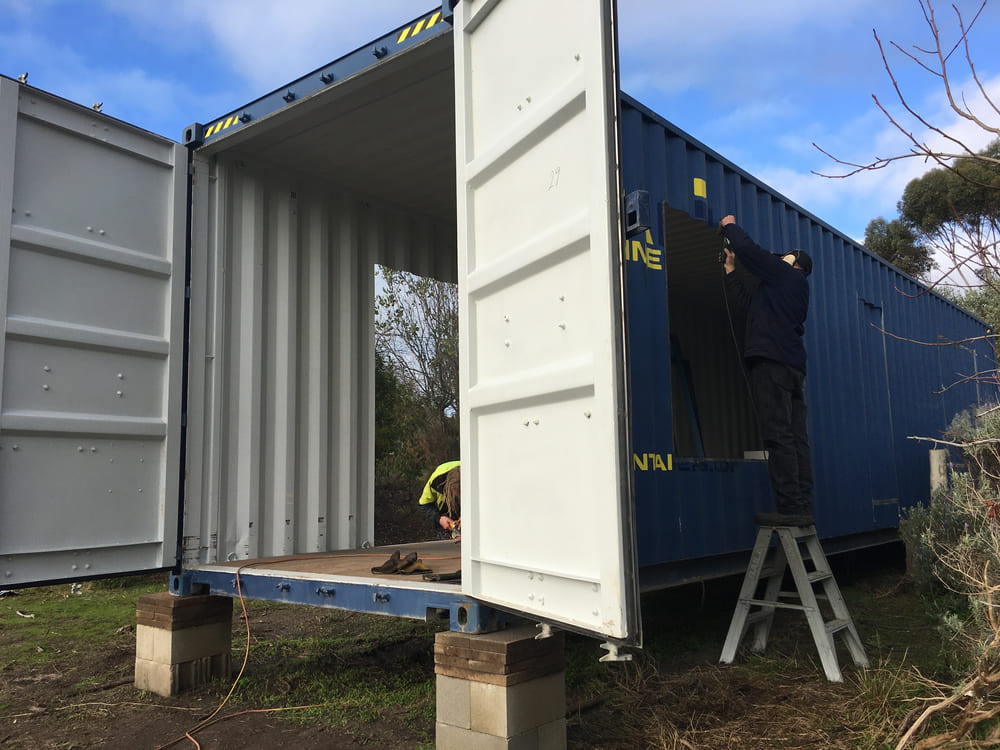
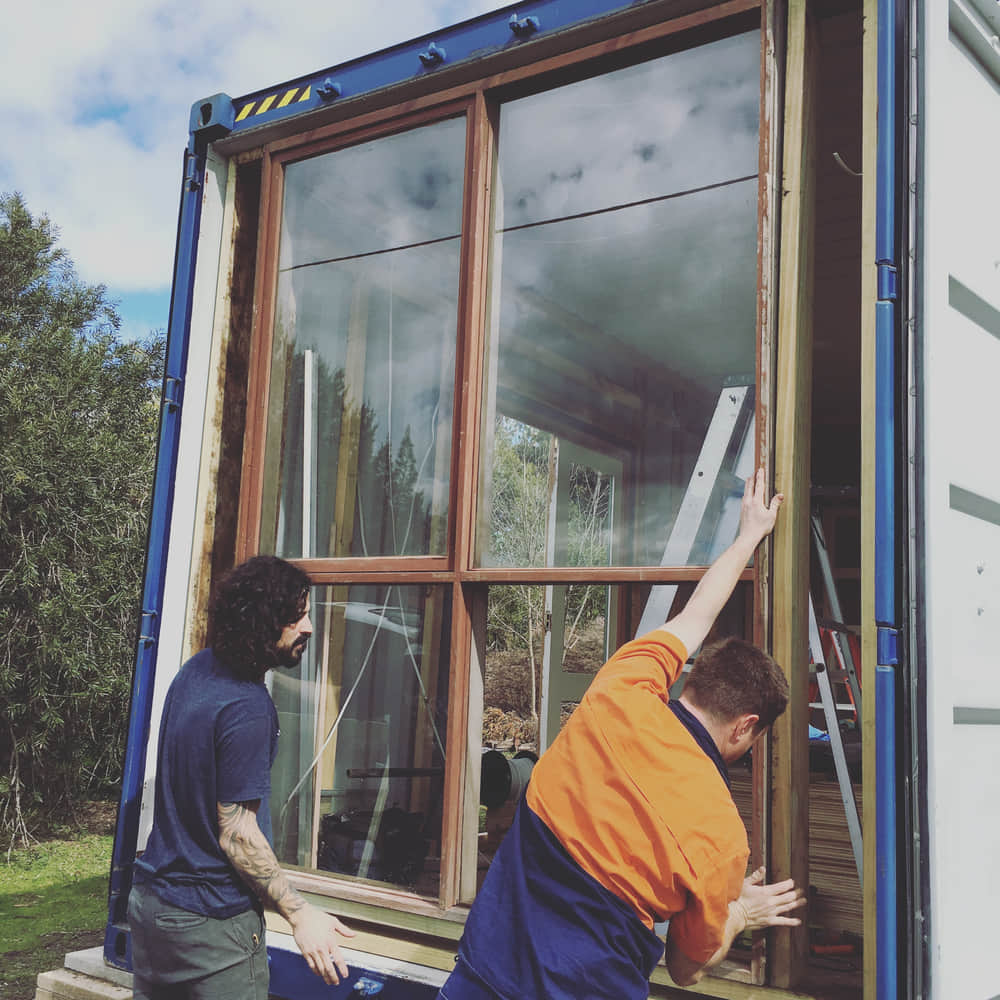
I had already worked out what materials we needed, so I went about ordering everything while we waited for the steel engineers to fabricate and install the window frames. This took about six weeks from start to finish with two days of cutting and welding on site. We had already purchased all the windows and doors from a salvage yard so we had measurements for all the holes.
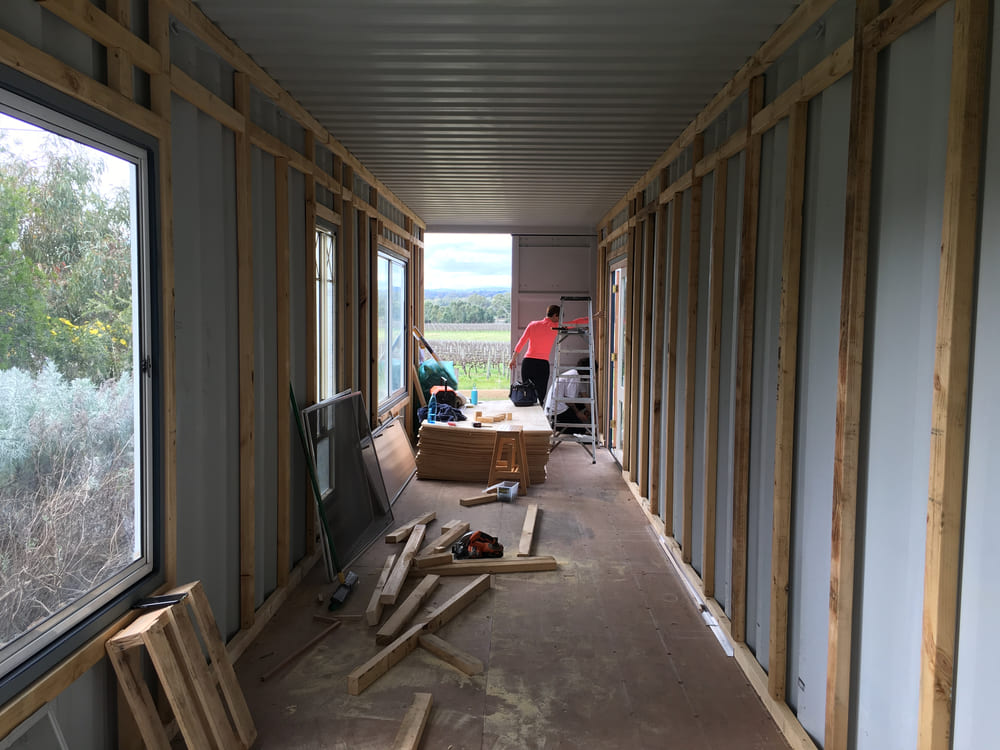
Dom was working full time at his own business, and building the container almost every evening and every day off that he had. We started digging the footings for the deck while we waited for the steel guys to come.
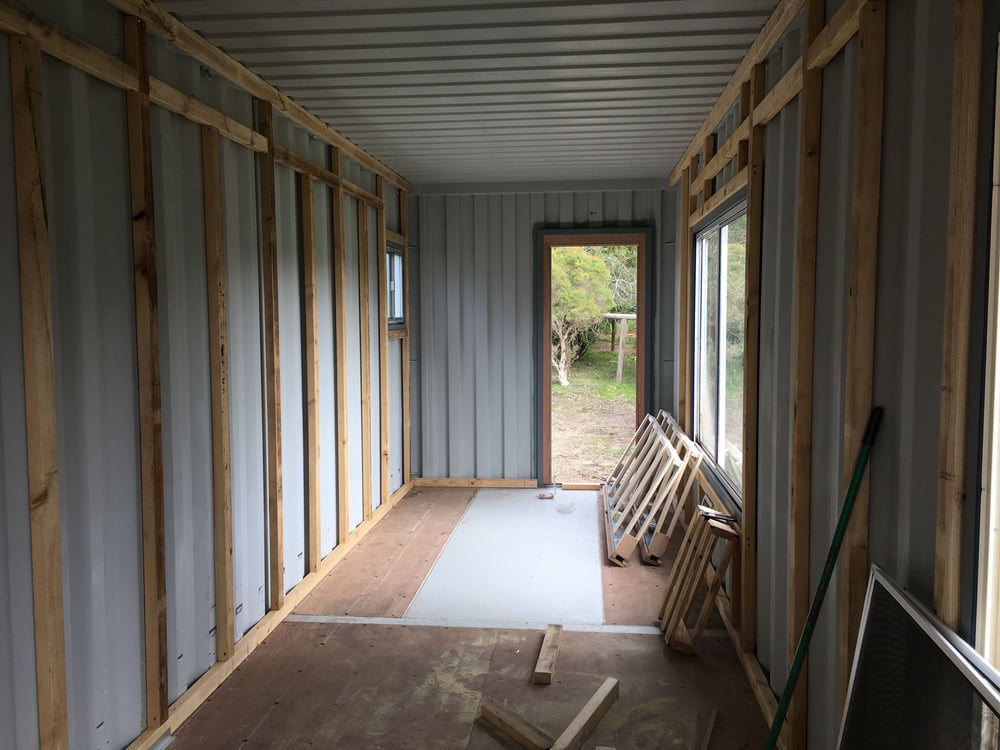
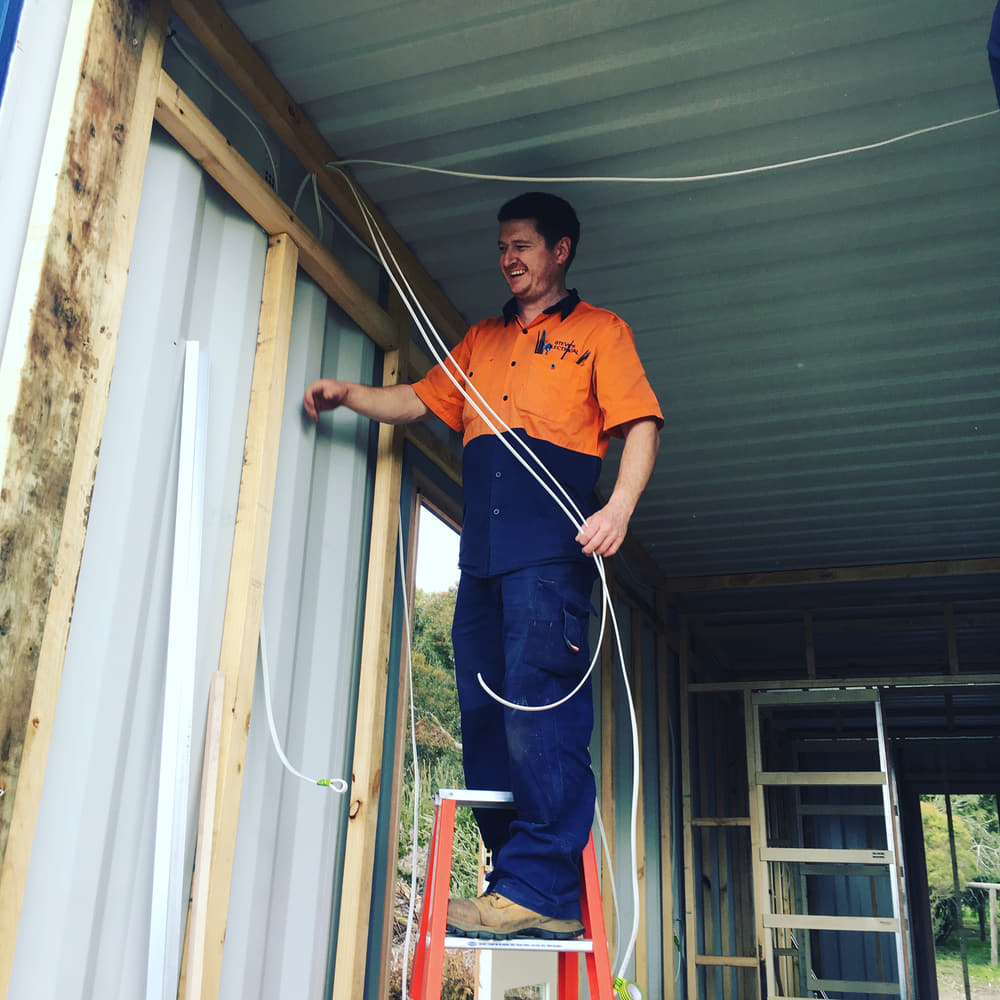
Once the windows and doors were fitted, we built the internal stud walls which took three weeks. In the first week of September, our electrician came out and spent a few days hooking up all the electrics and wiring the entire container according to our plans. While the electrician worked, Dom was cutting holes for the plumbing pipes.
I was helping Dom (as much as I could with a one-year-old and a big pregnant belly) paint the interior studs navy blue. We planned for each sheet of plywood to end on a stud with a small gap between adjacent sheets. This created something similar to a shadow around the edges of each piece of plywood as the navy color from the stud was visible through the gap. This intentional gap was also meant to allow for movement between the plywood panels, something which we had learned when lining an interior wall of our house in plywood the previous year.
Insulating and cladding the interior took more than a month. Poor Dom had no one to help him lift heavy the heavy plywood sheets most of the time, so had to do it by himself. Somehow he installed the majority of the ceiling plywood by himself too (I still don’t know how he did that!) Thanks to some help from his sister, we finally got it finished and then began to limewash and varnish the entire interior.
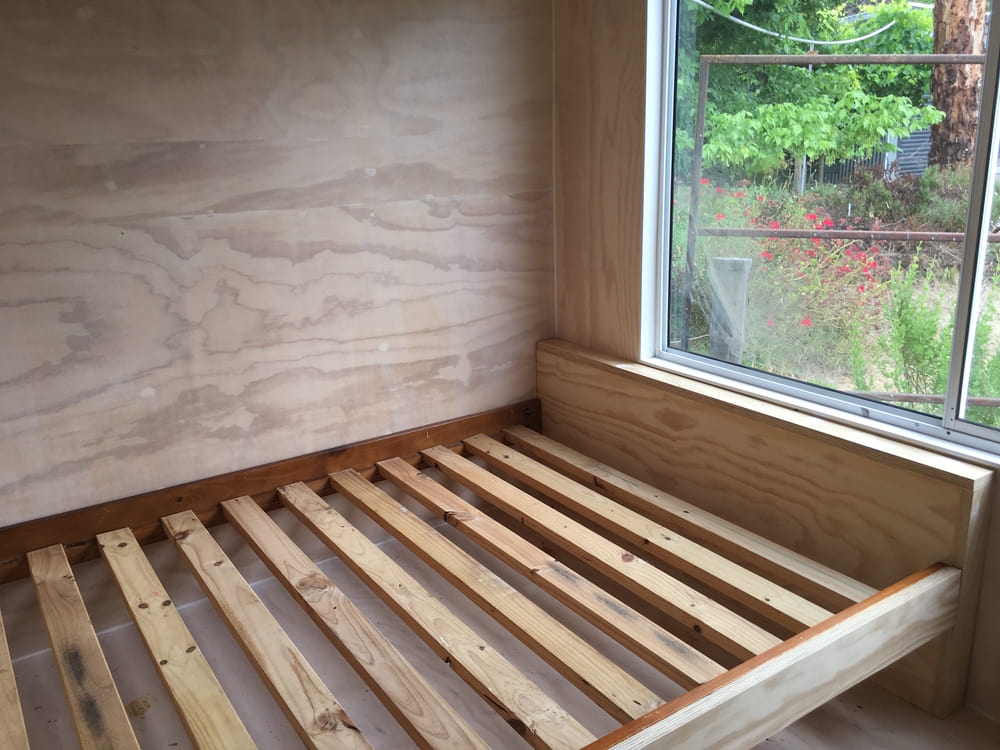
The only bit of the interior that wasn’t timber was the blue board which was prepped for tiling the shower and bathroom floor. In mid-October, we started on the bathroom and the finished the rest of the plumbing. This, along with fitting the kitchen, building a bed frame and custom folding dining table, and completing the deck, took us through November. Our progress on the previously mentioned work was slower than planned due to the arrival of our second little girl at the end of October!
We finished the tiling of the bathroom floor in December once the shower stall had been finished. My sister arrived for Christmas and they were our first ever guests! The toilet only got installed midway through their stay in January and unfortunately for them, the air-conditioning was installed a little late too but the basics were there! Our first official Airbnb guests stayed with us in February 2018. Dom was completely exhausted from the marathon of construction.
I felt a lot of guilt throughout the build as I wasn’t physically able to help with a lot of the work due to being pregnant and looking after our first little girl. Looking back though, it actually worked out well because we were always able to stay one step ahead of what was happening. I would follow whatever Dom was up to and already have the materials ordered and delivered for the next stage of the build. I was on the phone and internet a lot doing research, trying to find the best deals and keep us within a reasonable budget. I think we did an incredible job of completing it in seven months considering our family situation at the time.
From memory, our container budget went something like this:
- AU$7k for the brand new 40 foot container including delivery
- AU$7700 for the steel cutting and framing of the windows
- AU$5k for interior insulation and cladding
- AU$700 for all salvaged windows and doors
- AU$3k decking and structure
- AU$10k bathroom fit out including eco toilet
- AU$6k plumbing and electrical full fit out including connection to mains circuit across the garden
- AU$1k kitchen cabinetry
- AU$1k custom built bed, dining table, shelving
- AU$1k light fixtures
- AU$6k all other extras including council fees, appliances, bed linen, kitchen staples, fridge, crockery etc.
So a bit less than AU$50k all together (equivalent to about $35,000 in US Dollars), but that includes every single little item from starting to getting it up and running as a B&B.
We have had a lot of people booking who have expressed an interest in their own use of containers in the future or looking to experience some time in a “tiny house”. I have had plenty of guests asking questions about the process of building the place, and all of them seem to express amazement at the comfort of the space we’ve created.
For a two-person retreat, we do charge a little more than other places in the area because it is completely unique from the rest. However, we have kept our prices reasonable to attract the kind of guests we like to have stay at our place. Young professionals are our target market and I feel like we’ve hit that spot on.
Our container has been booked almost every weekend since it has been available over the past year which has been phenomenal, and we’ve even had some repeat bookings. In my original business plan for it, I had based my goals on it being rented out 25 weekends a year but it has had so many more bookings than that!
This has been incredible for our investment in it. It means that I can stay at home to raise our two little girls, cleaning in the evenings in between bookings. For now, that is all we need; it’s perfect. We host exclusively on AirBnB at the moment. I had too many technical issues with other platforms and found Airbnb to be the simplest and most user-friendly.
I think using huge windows and making clever use of the outside space was key for us. It makes the container feel much more spacious than it is. Think carefully about heating/cooling/insulation, it is a large metal box at the end of the day and at least in the Australian climate, this is a really important factor. We would love for it to go completely off-grid and have solar, which is maybe something we will think about in the future.
Once again, a big thank you to Saffy (and Dom) for inspiring us with an incredible container home AND a heartwarming story of a family working together to improve their lives. Let us know what you think below in the comments!
Interested in Container Homes? You need our FREE cheat sheets to help decide if containers are right for you!


4 Responses
Hi, this looks great!
How did you go about getting council approvals?
Thanks
You might try contacting the owner’s via Instagram (see the contact section in the article). Most owners don’t monitor their comments here.
I really am interested in the Kangarilla Container house. Is it possible to get the dimensions of the rooms?
We don’t have a floorplan or specific dimensions, but knowing that the home is built from an 8ft x 40ft container, you should be able to estimate pretty close from the pictures. You might also be able to get in touch with the owners.