
One of the reasons we most love shipping container buildings is their flexibility. Containers are often compared to Legos for obvious reasons: they can be stacked and combined in infinite ways to create entirely new shapes.
But that’s not all. Thanks to the reusable fittings integral to almost all containers, there are a number of ways that smaller accessories and additions can be integrated with containers. Let’s take a look at some of the possibilities and why you should consider them as part of your container project.
Container Attachments Overview
Part of what makes containers so attractive for building also makes them an ideal mounting point for accessories: their strength. When you have a rigid structure that is being used at a small percentage of its overall structural capacity, you feel comfortable adding some additional accessories.
We’ll get into some specific ideas of what you can add in a minute. For now, let’s focus on the fact that you can add things and think about how you might add them.
Permanent Attachment
The most obvious and straightforward means of attachment are permanent. A few possible options include:
- Weld: Use an electrical welder to securely fasten a steel attachment to the container. Welding is strong and durable but does require access to a welder and is useless if your attachment isn’t steel.
- Adhere: Use glue or epoxy to ‘stick’ something to the frame or skin of the container. Depending on materials and surface preparations, this can be quite strong. But you’ll have to check the product properties to understand its strength, resilience to sunlight and chemicals, etc. The last thing you want is something coming ‘unstuck’ a few months or years later.
- Bolt: Drill holes all the way through a portion of the container’s skin or frame members and use a bolt/nut to hold the attachment on. While the bolt can be removed, the hole cannot. Additionally, each hole drilled slightly weakens the structure of the container.
- Screw: Use sheet metal screws that thread into the metal of the container to hold something in place. Unlike a bolt, these don’t have a nut holding them on the other end and depend exclusively of the binding power of the threads against the container’s metal. Screws can be fairly secure for lighter attachment, but generally shouldn’t be used for anything structural.
Semi-Permanent Attachments
We’ve purposefully chosen to label these next options ‘semi-permanent’ instead of temporary for a reason. The examples we’ll show later in the article can perform satisfactorily for years or even decades, so there is nothing temporary or fleeting about them. The difference is that they are removable and reversible.
There may be some reasons that the above attachment types are problematic for you. A few possible reasons why include:
- Lack of Equipment: You don’t have access to a welder.
- Lack of Ownership: You have a rented/leased container and don’t want to permanently modify it.
- Lack of Ongoing Need: You only have a temporary need for the attachment.
- Shared Requirements: You want to be able to use the attachment on multiple containers or on multiple sides of the same container.
With the overview out of the way, we’re ready to introduce some actual attachments. We’ll start with exterior options that utilize the corner fittings
Exterior Attachment via Corner Fittings
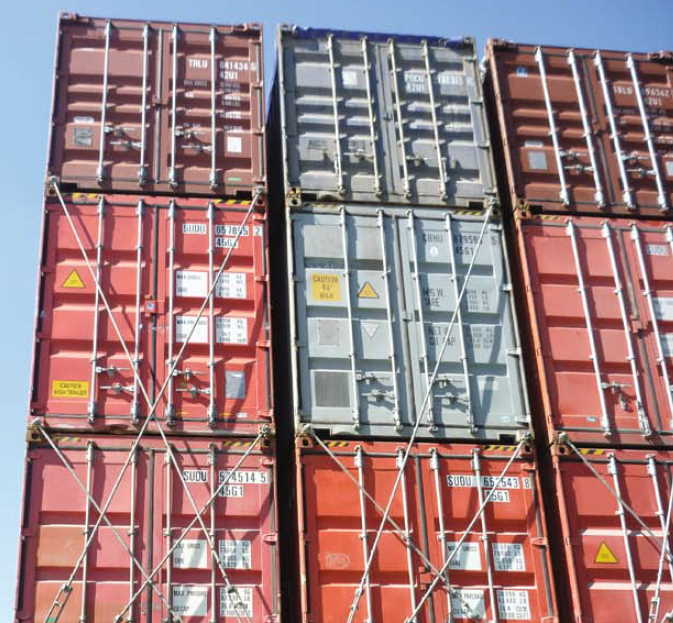
We’ve previously covered the corner castings of shipping containers, so you can read up on these innovative metal pieces there if you aren’t already familiar. In short, they are strong, durable metal fixtures that tie the entire structure of a container together.
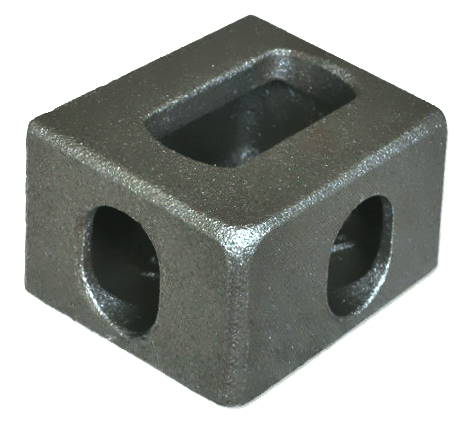
When containers are stacked on top of each other, the only parts touching are the corners. When a container is placed on a ship or truck, the only place it is attached is on the corners. In other words, the corners are very strong…the strongest part of the entire container.
For this reason, making an attachment to the corners is a logical idea. Read on to see some ideas about how to use the corners.
Wheels
Even when empty, containers are heavy! If you anticipate moving them around after you take delivery, you’re going to need some large equipment. One thing that will make it easier for you is adding some wheels.
There are actually a few different styles of wheels you can choose from. Bottom mount wheels mount with a twist-lock and often incorporate a swivel caster.
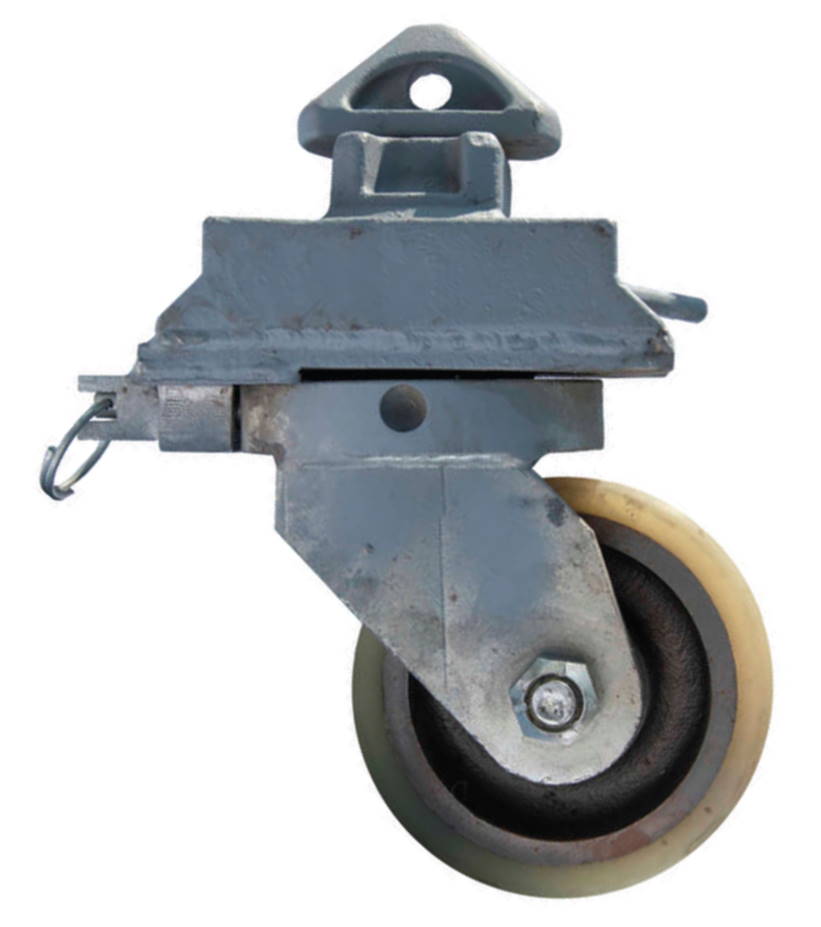
Side-mount wheels mount loosely in the corner fitting, but the weight of the container helps hold them securely in place. The mount means that the wheel isn’t underneath the container but beside it. These wheels from Ezy Engineering in Australia use an automotive wheel hub on a stub axle, so you can use a regular car wheel and tire. The stub axle is directly in line with the container’s corner, and a support arm reaches up so that the container mass pushes the support arm into the container.
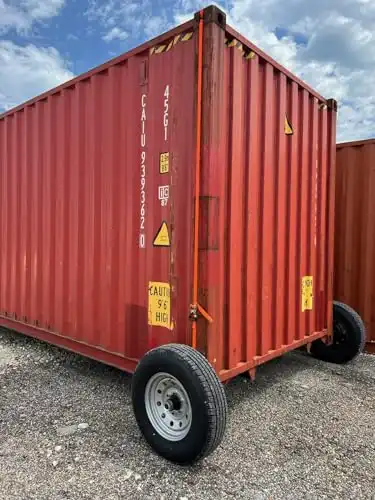
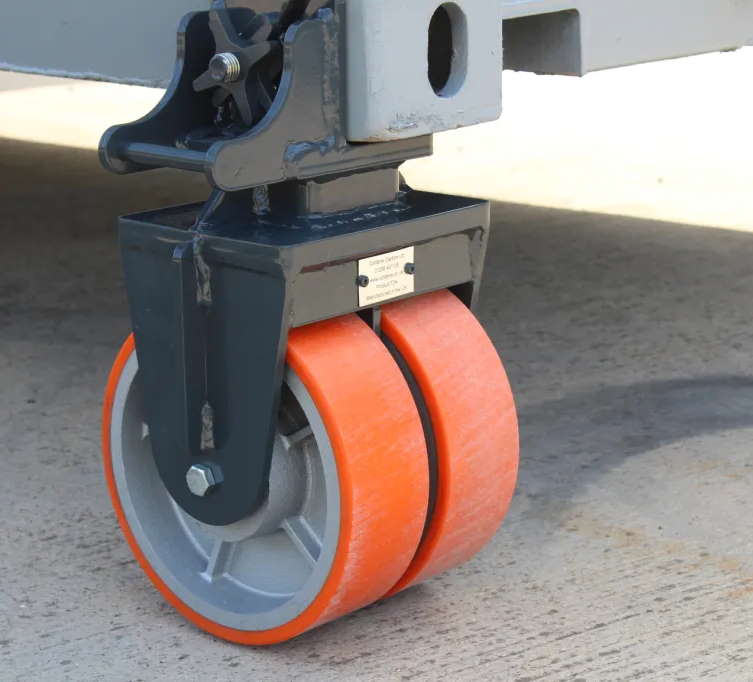
If you’ll be moving the container over a smooth surface like a warehouse floor, a urethane-coated steel wheel will work fine. The thin plastic-like coating provides a small amount of give and cushion, but it is still quite hard compared to a tire.
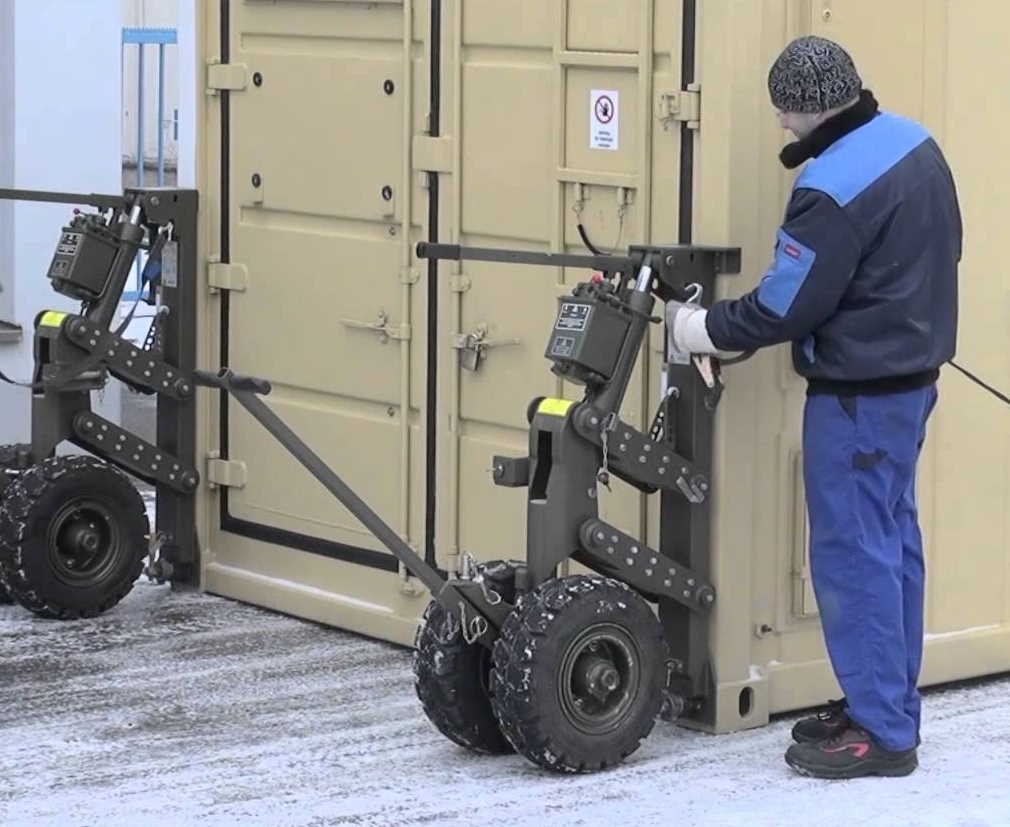
If you have to transport a container over uneven surfaces or dirt, a pneumatic tire is much better. The larger diameter and compressible nature of tires make it much easier to navigate more difficult terrain. However, in exchange for this, you’ll have to worry about flats and leaking tires.

The above wheel ideas assume you have a way to pick up the container first in order to mount the wheel. If that isn’t practical, a wheel that includes a hydraulic jack is one solution. These types of products lock into the front of the corner fitting and have a support arm that presses against the container, much like the side mount wheels shared earlier. A hydraulic jack then lifts the container up a few inches, placing all of the weight on the wheels.
Doors
All containers have at least one set of doors, and some have a set on each end. So why would you need more?
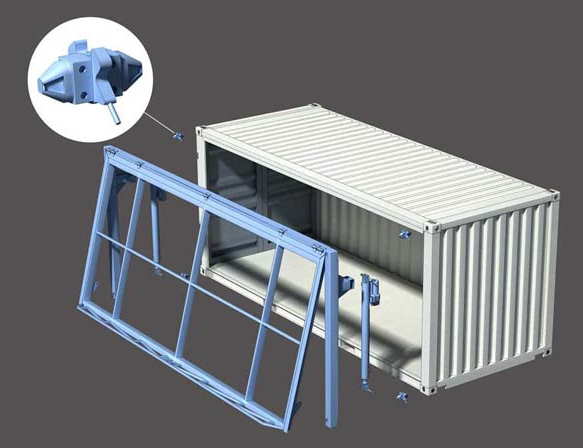
A surprising amount of residential and commercial container buildings have designs that incorporate large side opening doors to expand the space of a container’s footprint. The sidewall of the container must be removed first, and then a door can be installed.
But the door mechanism is quite complex and expensive. Rather than engineer modifications to the container to support a huge door, another option is mounting the door in a standalone frame…then mounting that frame to the container using the corner castings.
Another application doesn’t involve cutting the container at all but instead having a door frame placed between two parallel sets of containers. This way, you can open and close the space between the containers.
Lashing Rod Cantilevers
When hundreds or even thousands of containers are placed on huge container ships, the bottom rows of containers are often bound together with lashing rods. These steel rods and turnbuckles fit into the corners of containers and strengthen the whole stack due to the use of triangles.
However, there’s another use for these lashing rods that’s more applicable to container buildings: cantilevers. If you want to extend your building out horizontally without adding additional foundation supports, you need a cantilever.
While you could theoretically attach one shipping container to the side of another with just horizontal container connectors, the stresses would be very high and they might fail. A much better way is to use lashing rods to connect the bottom of the outboard container to the top of the inboard container.
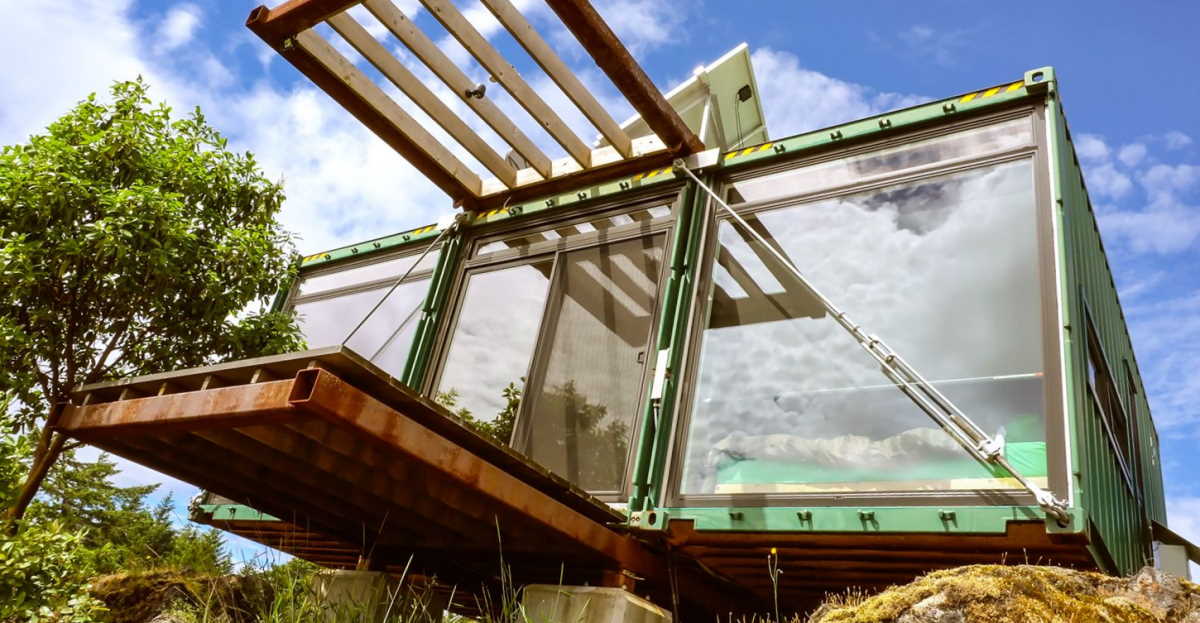
This incredible design was created by HoneyBox, and you can see more details in this video. It’s easy to imagine quite a few design applications for this. However, this is a complex design idea and we recommend working with an engineer before attempting something like this.
Custom Mounting
While we’ve shared quite a few options above, let’s say there are some custom projects you’d like to create that take advantage of your container. Maybe it’s a sign mount, antenna, or lighting. Or perhaps it’s an awning, balcony, or even a piece of sports equipment.
Whatever your idea is, you’re probably wishing you had a way to adapt from the obscure container corner fittings into something a little more common. That’s where Domino Clamps come in.

The Domino Clamp allows you to securely attach almost anything to your container with regular metric bolts, then later remove it if you’d like without any permanent modification to the container.
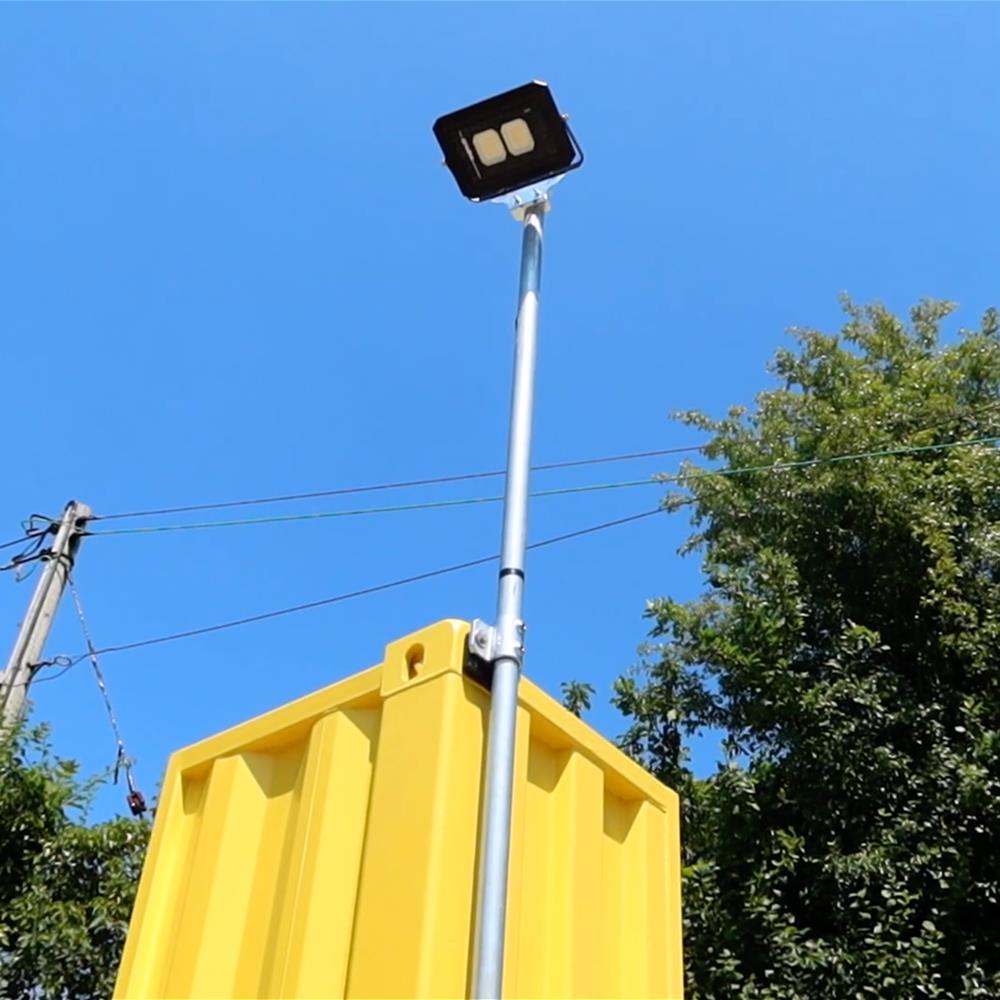
You can also attach other attachment clamps to the Domino Clamp itself. For instance, how about a floodlight or security camera!

With a pole attachment, you can raise these and other devices above the roofline of your container to get even more coverage. Long story short, combining a Domino Clamp with one of their accessory attachments gives you tons of flexibility for all kinds of unique container mounting options.
Interior Attachment via Lashing Rings
Lashing rings are C-shaped metal hooks that are typically welded to the bottom and top rails on the inside of a container. They are typically about 0.5 inches in diameter and you’ll find them roughly every few feet along the long sides of a container.
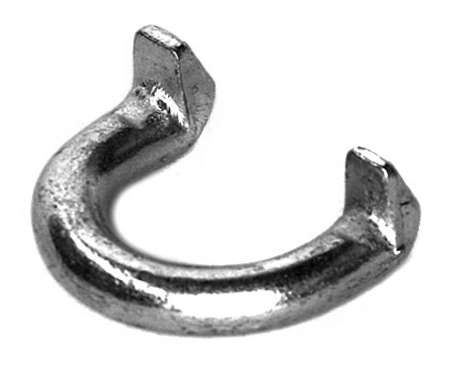
We emphasize ‘typically’ and ‘roughly’ because the ISO standards don’t specify the design or location of these rings. While most general-purpose containers have them, it’s not guaranteed. And since their spacing isn’t always the same, be sure to check your container.
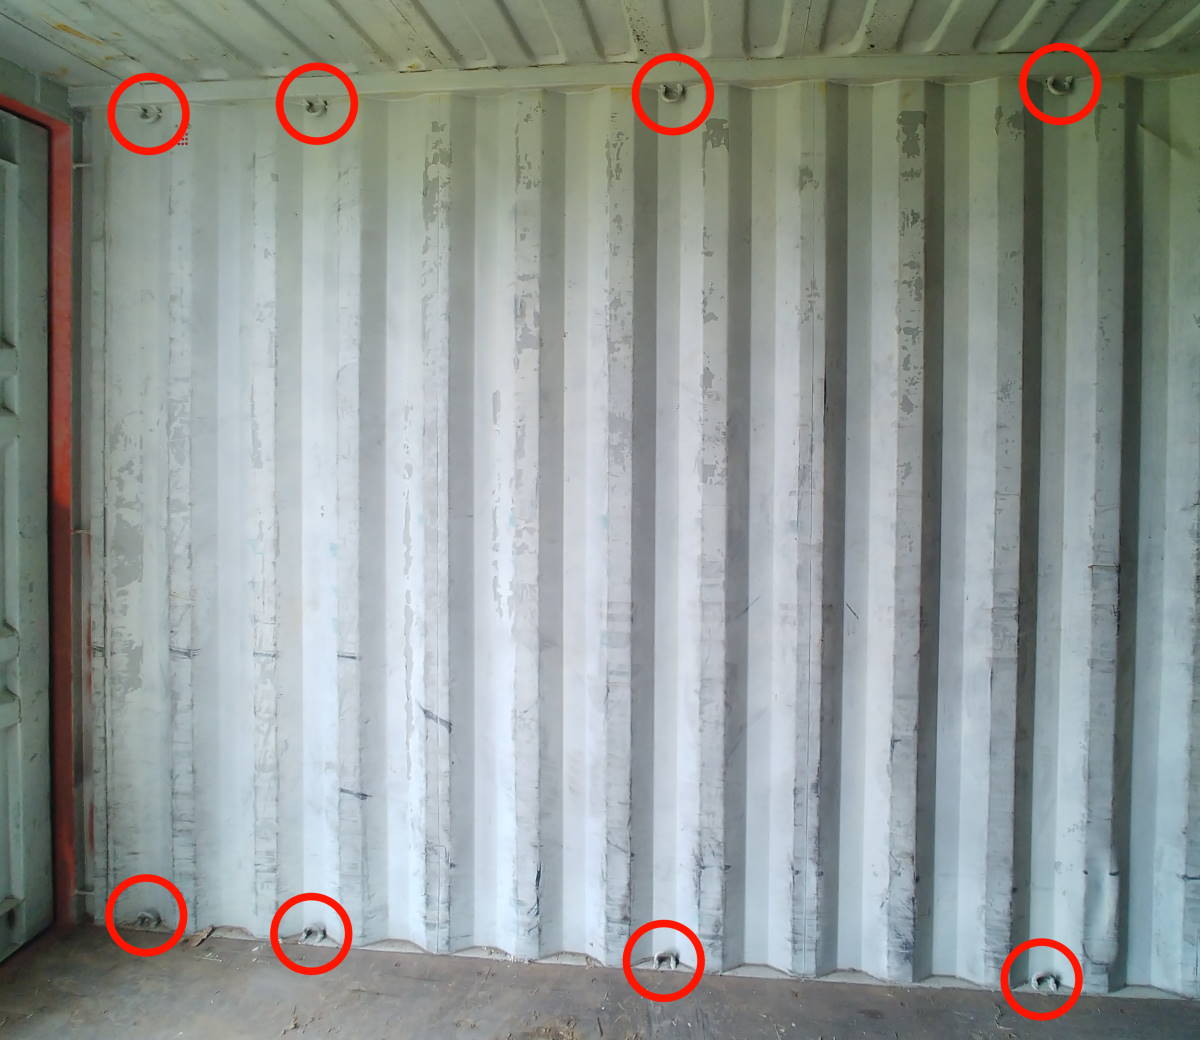
The lashing rings are typically used to hold items in the container during shipment when the container isn’t packed completely full. Your container may specify the safe working loads with a decal. If not, it’s generally assumed they can hold a few thousand pounds each.
For our purposes, the most useful of the lashing rings are those on the top rail. From them, various types of shelving can be hung.
Standard Shelves
The typical container shelf works by hooking to the ceiling ring, hanging down, and pressing back against the container wall. It isn’t rigidly secured to the container and instead depends on gravity to hold it in place.
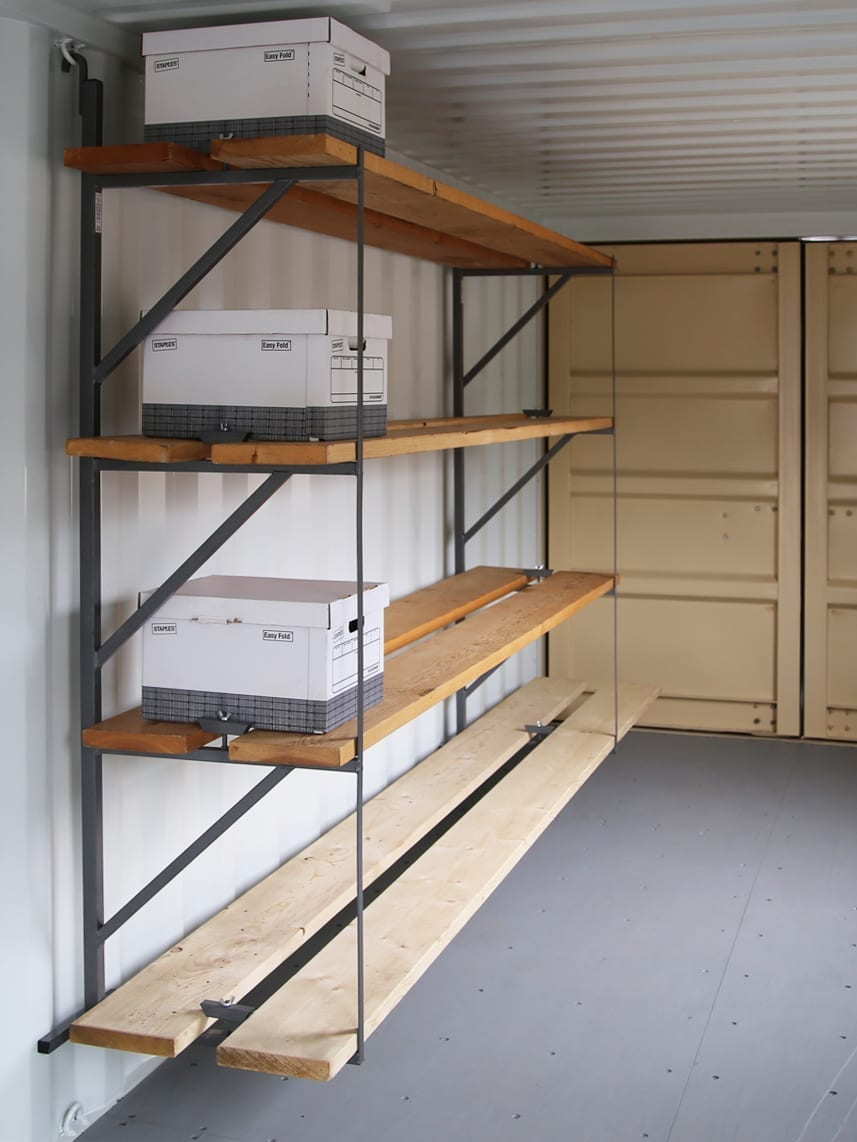
Shipping container shelving is made up of shelf brackets and shelf runners. The runners are typically wooden planks to span across the brackets, giving a horizontal surface to hold boxes or other items.
Pipe Racks
These shelves have a rearward sloping profile as compared to the shelves, keeping anything stored from rolling off. This is quite useful for round profile objects like pipes and rods.

Given that most of the stored objects are quite long and self-supporting, most pipe storage shelves don’t include shelf runners.
Other Interior Lashing Ring Options
The lashing rings aren’t only useful for narrow types of shelving. Here are a few other things you could attach via lashing rings:
- Bulk Overhead Storage: If you have longer items you want kept high and out of the way, a chain or cable between upper lashing rings on both sides of the container can secure these items close to the ceiling.
- Loft Overhead Storage: Similar to the above, but for smaller items. Instead of a chain, a rigid shelf that spans across the width of the container can be hung from vertical risers attached to the upper lashing rings on both sides of a container.
- Privacy Curtains: Four cords and a sheet or tarp can be quickly strung together across the container, connecting all four lashing rings at the top of and bottom of the container to provide a quick means of sectioning off the interior.
Other Interior Attachments
Lashing rings don’t provide the only possible attachment mechanism on the inside of a shipping container. The metal corrugations actually provide an attachment option as well.
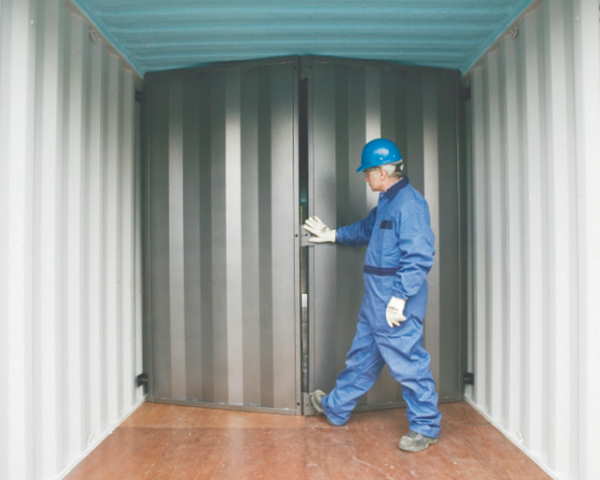
If you need to subdivide a container in multiple rooms but don’t want to permanently modify the container to do it, this is a perfect solution.
Summary
As you’ve learned in this article, there are numerous ways to employ the flexible fittings integral to containers. We talked about how to use corner castings, lashing rings, and even the metal corrugations as ways to attach things to your container.
More importantly, using these attachment styles doesn’t permanently modify the container in any way and is completely removable. And yet, despite the fact that these mounting systems are reversible, they are still incredibly strong.
We’d love to hear what unique ideas you’ve come up with for your own container projects. What have you mounted to containers using these attachment points? Let us know in the comments below.
4 Responses
Hi
Can you let me know what you would use to penetrate and hold a cable in the wall of container for electrical power
You’d obviously want the cable in conduit, and then you should be able to get a rubber or plastic boot to seal between the conduit and the container wall. Check with your local electrical supply shop, these penetrations are done all the time for regular steel buildings.
I have seen somewhere containers which are raised off the ground with legs/supports to give quite a lot of ground clearance – in the case I remember, it was for snow . I could imagine something similar for allowing more storage underneath . Any ideas on this ?
People do this for a variety of reasons: a better view from up high, storage/parking underneath, uneven terrain that it’s easier to bridge over than flatten, or flood-prone areas that cause you to build higher. The higher you go, the more you have to worry about the supports collapsing into a parallelogram and failing, which will usually require that you add structural triangulation at a certain point.