

Almost every container project design is going to require cutting a container in some form or fashion. Whether you’re adding windows, doors, or just expanding a room to span across two or more containers, at some point you’ll likely need to cut the steel walls of your shipping container.
There is a lot of debate on the best tools to cut a container, so we’ll cover all the major options along with their pros and cons. Things like your available time, physical strength, utility availability, and more will all play a part in your decision.
We’ll also cover how to be how to prepare before you make the cuts, what to do with the cutouts, and more. This article is a comprehensive guide to cutting openings in a container, and while long, we intend to give you all the information you need to be safe and successful!
Reasons to Modify a Shipping Container
Shipping containers are sealed boxes, great for transporting goods, but not ideal for human habitation. Unmodified, a container is a dark room with only one set of doors…doors that are heavy and can only be unlocked from the outside!
People that intend to build a container home, container office, or other shipping container project typically want to add doors and windows to the walls or end of their container. And if your design includes multiple containers stacked on top of each other, you may need to cut holes in the floor or roof of the container for things like staircases as well.
Some people even cut their containers into pieces lengthwise. For instance, turning a standard 40-foot container into a custom 30-foot container if their site conditions and project design require it.
While the size, location, and the number of cuts you’ll need to make will certainly vary, almost everyone planning a shipping container build will need to make some type of cuts. So, now that we’ve established that this is a topic you absolutely need to understand, let’s get into the tactics.
How to Prepare for Cutting a Shipping Container

There are tons of quotes about preparation because preparation is so important for any complex, dangerous, or irreversible task. One of our favorites is “A failure to plan is a plan to fail.”
Regardless of any quotes, the truth is the same: You don’t want to just jump into cutting up your container. Without adequate preparation, you could hurt yourself, damage your equipment, or cause a costly mistake to your container.
We’re pretty sure you don’t want any of those things! So make sure you read through all the preparation tips and guidelines below before you even think about grabbing a cutting tool.
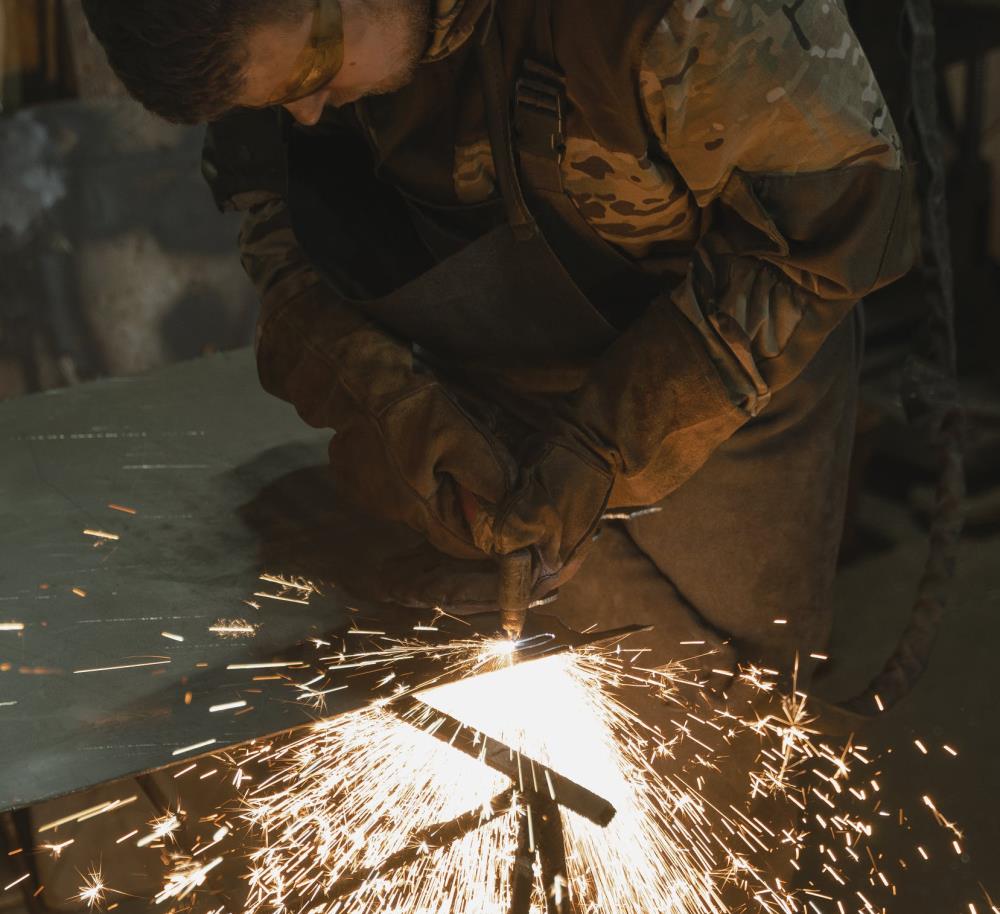
Safety Tips for Cutting a Container
We’ll start with some general safety tips. First, ensure you safely cut your containers by wearing the correct personal protective equipment (PPE). This includes:
- Eye/Face Protection: Safety glasses, goggles, or ideally a full face shield to protect from flying debris and hot sparks
- Hearing Protection: Earplugs and/or earmuffs to protect from loud noises
- Skin Protection: Gloves, long pants, and long sleeve shirt made from a durable, burn-resistant material to protect against power tools, flying debris, and hot sparks
- Foot Protection: Durable shoes, ideally with a safety toe, to protect from flying debris, hot sparks, and dropped tools or cut materials
- Breathing Protection: A respirator or mask to protect against both particles and fumes that may be released from cutting metal and coatings on the metal
Secondly, you need to ensure the safety of your equipment and associated accessories. For instance, ensure that any electrical cords and hoses are undamaged and not pinched or kinked. You don’t them running over a sharp edge or tight corner where they could be cut, for instance. Also, ensure that any cutting equipment and tools are in good working order and haven’t been damaged since the last time you used them.
Finally, be mindful of the seriousness of what you’re doing. Containers are large and heavy. You’re likely working on a building site with uneven ground. If you’re on a large lot or in a rural area, you may be far away from sources of medical aid.
The most important safety tip? Don’t cut a container by yourself! Ensure you have someone onsite to help you in case there is an accident, or if you just need another pair of hands.
Now, we’ll talk about the best ways to set up your workspace when cutting a cargo container. This will ensure you’re not only safe but also efficient.
Workspace Access and Setup for Cutting a Container
Ever started cooking a new recipe and realized you were missing a key ingredient? Or been doing a simple home repair and noticed that you left the tool you needed in the other room? Getting everything you need set up, staged, and ready to use is important for both efficiency and quality. And it pertains not only to baking a cake but cutting a container!
Starting and stopping in the middle of a project can take you out of the ‘zone’ and leave you frustrated. Ideally, you want your focus to be uninterrupted by making sure everything is ready to go before you start.
Let’s start with the worksite setup. Will you need a step stool, ladder, or scaffolding to reach your cutting area? If so, get those pieces set up in the correct position.
What about lighting? If you’re cutting on the inside of your container, lighting can really help you see what you’re doing. But ensure your electrical circuit can handle running the light and any power tools you use before you get started.
Equally important is ensuring you have cords and hoses run in such a way that they don’t create tripping hazards and confine your range of motion. Instead, check to see that you have enough slack to cover all the cuts you need to do.
Similarly, you need to think through (or even better, do a dry run-through) the physical movements you’ll need to perform for the cut. Can you really squat low enough to get that lower cut, or do you need to get some knee pads?
Can you hold that big, heavy saw over your head for the high cut, or do you need something a little taller to stand on? Will you be able to climb up and down the ladder while holding that cutting torch, or do you need a way to pull it up and stage it closer to the cut?
We’ve already covered tools and equipment from a safety perspective, but what about through an operations and maintenance lens? Do your tools have good batteries, blades, filters, lubrication, and other consumables? Make sure each piece of equipment has had all the upkeep and preventative maintenance it needs for optimal performance.
Next, check what’s around you. Is there anything on the front or backside of the container that could be destroyed by flying debris, power tools, etc? Make sure anything susceptible to damage is kept far away from the worksite, including pets and loved ones.
Finally, you need to inspect the container itself. Are there any large dents, flammable coatings, or other issues that may be in the way of your tool path as you cut the container? And is the actual container itself sitting level and unrestrained?
Remember that shipping containers that are slightly twisted from uneven ground or prior damage can have torsional, compressive, or tensile energy stored in the metal that may be released when cutting. This can result in the container or the cut metal springing out when the final cut is made.
How to Handle the Cut Pieces of the Container
You already know the empty shipping containers weigh thousands of pounds. So, you should expect that pieces you cut off of one are going to be pretty heavy as well.
While the steel container corrugations are different in both shape and thickness between the sides, tops, and end of a standard shipping container, a good estimate for the weight of any of these panels is about four pounds per square foot (4 lbs/SF). As an example, if you’re cutting out a 4-foot by 4-foot window, you can guess that the piece you remove will weigh around 64 pounds. It might be a little less than this based on which area you’re cutting from, but it shouldn’t be more.
Given that we’re dealing with some pretty heavy pieces of metal, you need to figure out how you’re going to handle this metal the moment it comes loose from the container. If you’re not thoughtful about the order in which you make your cutouts, you can also end up pinching your blade or having other issues.
We recommend that you make the bottom cut first, then the sides, and finally the top cut. Then ensure that when the cutout finally breaks loose, it is falling away from your cutting tool, and not towards it.
Another recommendation is breaking large cutouts into smaller sections. Depending on the tools you’re using, how much help you have, and what other systems you have in place, it may be advantageous to break large container cutouts into two or more pieces. For instance, if you’re cutting out a 20-foot-wide section of the side of a container, it might be easier to handle cutting out four separate 5-foot-wide sections instead.
As far as handling the cutouts themselves, you have a few options. One common technique is sliding a couple of 2×4’s or metal tubes under the cutout from the outside. When the top is cut, the cutout will just slide down these runners like a slide, landing on the ground.
Another option is drilling a hole or welding a bracket onto the top of the cutout, then tying it something higher up (like a D-ring). When the top is cut, the piece will fall a few inches and swing, but won’t fall all the way to the ground. Then you can move everything out of the way and slowly lower it.
Keep in mind that most of this guidance assumes you’re cutting the sides of the container. If you’re cutting out a section of the roof, there’s no way the cutout will hit you, but it will fall from 8+ feet with a loud crash. So, you’ll need to make sure everything is out of the way, and that whatever you’re standing on can adequately support you once the cutout piece is removed from the structure!
How to Measure and Mark your Container Cuts

Construction is full of folksy sayings, and ‘Measure twice, cut once’ is one of the favorites. It’s important because it’s true: making and marking a proper measurement will save you from rework.
However, you need to know what to measure. Most window and door manufacturers will include so-called ‘rough opening’ measurements with their installation instructions.
But this rough opening isn’t usually the size of your cut! You need to make your cut slightly bigger to accommodate the width of whatever steel you use to surround the perimeter of the cut, whether it’s an angle section or a square/rectangular section of metal.
For instance, let’s say you have a window that calls for a 4 foot by 4 foot rough opening (48 inches by 48 inches). And you’re using 3 inch by 3 inch by 1/4 inch thick angled steel to form the perimeter of the window cutout for structural support and mounting. If so, your cuts need to actually be 48.5 inches long (48 + 2 * 1/4), so that the dimensions of the rough opening inside the angled steel will be the 48 inches that were called for.
When in doubt, make your cuts a little bit smaller than necessary though. It’s always easier to go back and cut or grind off a little extra than it is to try to add material back.
To make a straight, accurate cut, you need to mark your measurements. And given the sizeable corrugations of shipping container walls, that can sometimes be a little tricky. Yes, a sharpie, chalk, or welding pencil can be used to physically mark the metal, but how to keep it straight across the ups and downs of the corrugations.
One option is to mark the ‘high’ points with a straight edge, then freehand the ‘low’ points. A more accurate technique is to make a cardboard tool that will bend down into the ‘low’ points and connect the high points, to ensure everything is straight.
However, some people like to use painter’s tape as their mark, since they can bend it down into the ‘low’ points as they place it. Whatever technique you use, try to get your eye level close to the line you’re marking, otherwise, it’s very hard to tell what is straight between the high and low points.
And, if you want to ensure your cuts are as straight as your marks, consider putting up a cutting fence. A ‘fence’ is a piece of straight wood or metal that you clamp adjacent to the cut and will physically guide your cutting tool as you apply light pressure against it. You’ll have to figure out how far to offset the fence from your mark depending on the type of cutting tool you’re using though, so be careful.
Best Tools for Cutting a Shipping Container
As we hinted at in the introduction to the article, there are a variety of methods you can use to actually cut out the walls of your shipping container. Just like everything in life, they each have their pros and cons. But we hope to give you a full picture of not only how to use these tools, but why you might want to (or not) given the specifics of your own personal situation.
Using an Angle Grinder to Cut a Shipping Container
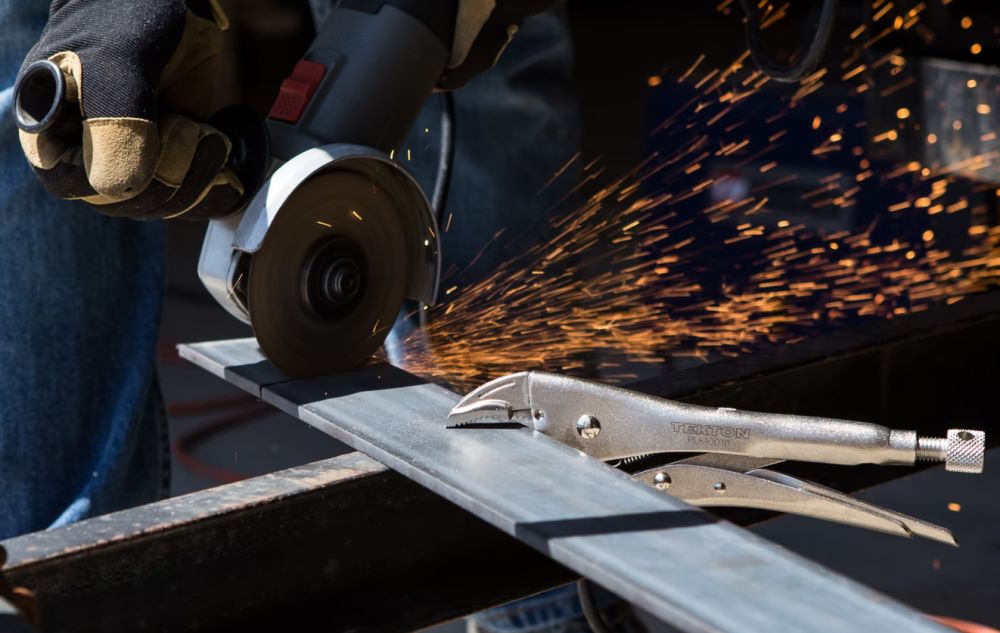
Angle grinders are tools that use a high-speed motor to turn an abrasive disk that cuts, grinds, or polishes metal. An angle grinder’s motor turns a gearbox that changes the direction of the tool by 90 degrees, thus giving the name.
The most common variety of angle grinders use a 4.5-inch diameter disk, although larger models that use 7-inch or even 9-inch disks also exist. The larger models cut faster, but are even heavier and have more arm-tiring torque to contend with.
Pros of Angle Grinders
- Angle grinders are easy to find in almost any home supply or superstore and are relatively cheap
- Angle grinders are easy to use, with no special skills necessary
- Angle grinders are available in both corded and cordless models (although cutting out a container will very quickly use up your batteries)
- Angle grinders can make precise cuts that are relatively straight
- Angle grinders can do flush cuts because the disk is at the edge of the tool
Cons of Angle Grinders
- The torque of an angle grinder motor tends to rotate your wrist, which can be quite tiring. Many angle grinders have a right angle attachment so you can use both hands on the tool for additional stability to counteract this
- The most common abrasive disks used in angle grinders can dangerously shatter
- The most common abrasive disks used in angle grinders wear down quickly, necessitating frequent disk changes
- Angles grinders make a ton of sparks and debris that need to be protected against and cleaned up
- Angle grinders are extremely noisy, requiring good hearing protection for the user and even people nearby
Tips for Cutting a Shipping Container with Angle Grinder
If you’re doing a large container build, we recommend purchasing the larger-sized grinders if you feel comfortable using them. They’ll cut and grind faster, and the disks will last longer between changes.
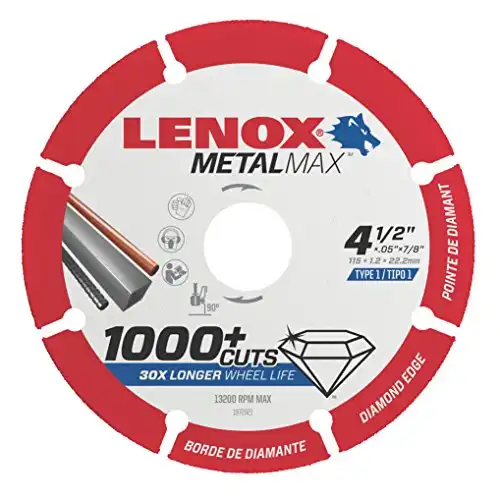
We also recommend purchasing a diamond-tipped metal blade made for cutting metal. These blades last much longer between changes and are much safer to use, with little risk of shattering like the cheaper abrasive disks. Several manufacturers make them in a variety of sizes, below is just one example for a 4.5-inch grinder.
Using a Reciprocating Saw to Cut a Shipping Container
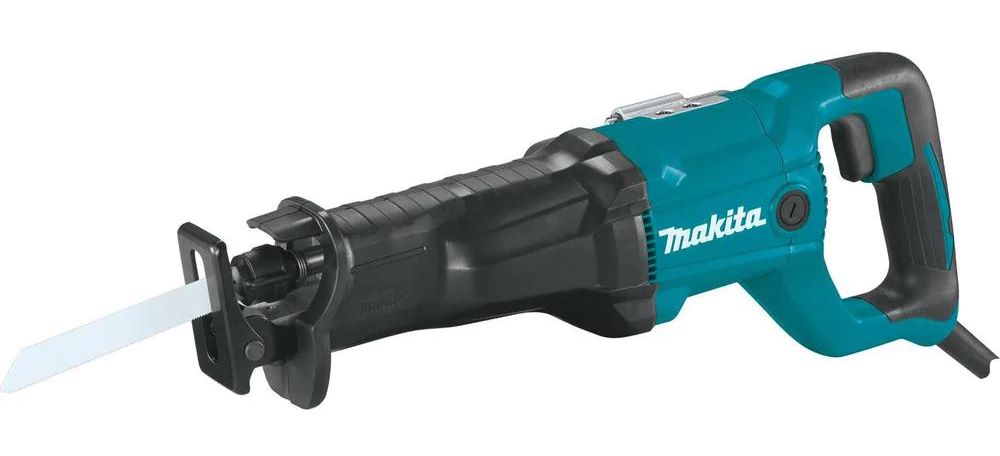
A reciprocating saw uses a long, skinny blade with teeth on one side to cut through a variety of materials. Though you often see them used for demolition work, with the right blades, they can easily handle the corrugated sheet metal of a shipping container.
Pros of Reciprocating Saws
- Reciprocating saws are easy to find and cheap to purchase
- Reciprocating saws are easy to use, with no special skills necessary
- Reciprocating saws can cut curves daily easily
- Reciprocating saws create minimal debris and offer smooth cuts
- Reciprocating saws are available in battery and corded models
Cons of Reciprocating Saws
- You can’t really do flush cuts with a reciprocating saw because the blade is in the center of the tool and blades used for cutting metal aren’t usually as flexible as those for cutting wood
- A reciprocating saw causes a lot of vibration in the saw, your arm, and material, which makes it hard to control and wears you out (this is especially true if what you’re cutting isn’t adequately secured)
- The most common, bi-metal blades in a reciprocating saw need frequent changes when metal is being cut
Tips for Cutting a Shipping Container with a Reciprocating Saw
Starting a cut into a flat piece of sheet metal without an edge is possible with a reciprocating saw, but it’s much easier to drill a hole big enough for the blade to fit in. Then, you can cut perpendicular to the material for the remainder of the cutting. Ensure that the hole is on the interior of the cut piece.
If possible, use a reciprocating saw with an adjustable shoe. An adjustable shoe allows the cutting part of the blade to be adjusted in or out, allowing a blade to effectively be used multiple times by utilizing different sets of teeth along its length.
When shopping for blades, keep in the mind the ‘throw’ of the saw, which is how far the blade moves in and out with each stroke of the saw. Look for the shortest blades that can go through your material without excessively flopping around at the end (most saws have around 1 – 1.5 inches of throw).
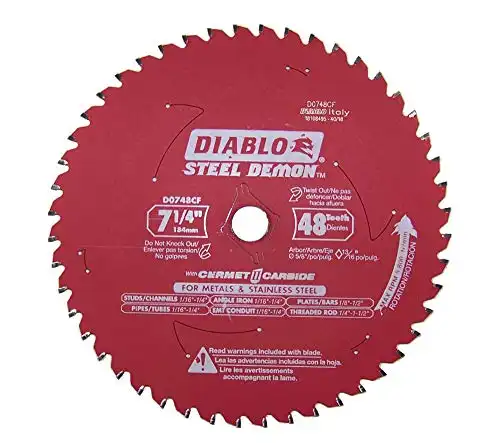
Finally, look for carbide, or even better cermet, blades, which cut faster and last longer than traditional bi-metal blades. Several manufacturers make them, below is one example.

Using a Cutting Torch to Cut a Shipping Container

An oxyacetylene torch is a gas-fueled tool that can melt, weld, and cut metal. It’s named for the oxygen and acetylene gases that power it. A mainstay of many metal fabrication shops because of their versatility, oxy-acetylene torches provide a way to cut a shipping container without using any type of abrasives.
Pros of Cutting Torches
- Cutting torches require no electricity or batteries, making them good for off-grid locations without easy sources of electrical power
- Cutting torches can cut for long periods of time without replacing the gas bottles (the main consumables)
- Cutting torches are low effort, as the torch itself is lightweight and maneuverable
- Cutting torches are fairly quiet
Cons of Cutting Torches
- The cutting torch equipment itself is mid-priced, with somewhat expensive gas bottles, though they tend to last for quite a while
- Of all the cutting tools mentioned in the article, cutting torches are arguably the most difficult to use ‘well’.
- While fairly easy to make ‘a’, making a ‘good’ cut requires some skill, and will otherwise require lots of time spent grinding afterward to clean up your cuts
- The combined unit of torch and gas bottles is pretty heavy if you have to lug them around upstairs, etc.
- While in use, a cutting torch will throw off a lot of molten metal and sparks behind the cut
Tips for Cutting a Shipping Container with a Cutting Torch
The main tip for using a cutting torch is to spend significant time practicing your cuts. In addition to getting more experience with cutting metal of the same thickness as the container wall, you also need experience cutting through corrugations. The distance from the tip of the torch to the cut material must be closely controlled, which is difficult to do with corrugations.
Using a Plasma Cutter to Cut a Shipping Container
One of the newest metal cutting methods is plasma cutting, which uses a pressurized stream of superheated and electrified gas to do the cutting. While it has some parallels to the cutting torch, a plasma cutter doesn’t use any burning fuel, only electrical power and compressed gas.
Pros of Plasma Cutters
- Plasma cutters are pretty easy to use, with a short learning curve
- Plasma cutters are low effort, as the torch itself is lightweight and maneuverable
- Plasma cutters are great at cutting complex shapes and curves
- Plasma cutters typically don’t have any consumables to purchase other than a few small pieces in the torch like a nozzle and electrode
- Plasma cutters are usually quieter than abrasive cutting methods (but compressor noise can affect this)
Cons of Plasma Cutters
- The cuts from a plasma cutter are typically better than from a cutting torch, but can still be a bit rough compared to other methods, while also requiring you to chip off some slag from the back of the cut
- To power a plasma cutter, you’ll typically need several dozen amps of electrical power, and larger models often use 240V
- A plasma cutter needs compressed gas to operate, either from a compressor (separate or built-in) or less commonly, a gas bottle
- Of all cutting methods, a plasma cutter is the most expensive as far as the initial investment in equipment, but with enough volume, it can probably, eventually pay for itself
Tips for Cutting a Shipping Container with a Plasma Cutter
When purchasing a plasma cutter, pay attention to the duty cycle, which will dictate how long you can continually use it without breaks. Also, note that electrical requirements 120V, 240V or dual-voltage and compare to what you have available at your building site.
Using a Circular Saw to Cut a Shipping Container
Circular saws use disk-shaped glades with teeth around the perimeter to cut various materials. In recent years, new blade technology has increased the potential of cutting metal with these saws, which are traditionally used for general construction tasks like wood framing. There are several types of circular saws (we’ll discuss below), but they all generally work the same way.
Pros of Circular Saws
- Circular saws are proving to be some of the fastest portable metal cutting tools available
- Circular saws chip away or machine pieces of metal away, instead of grinding it, meaning that the debris and the cutout piece itself don’t get very hot and the cut is smooth
- Circular saws typically have a larger diameter blade than even an angle grinder, allowing them to cut straighter lines more easily
- Circular saws have a base plate that keeps the position of the blade fixed relative to the cut material, making them easier to hold and control compared to an angle grinder
- Circular saws are available in battery and corded models
Cons of Circular Saws
- The weight of a circular saw can be on the higher end compared to some of the other cutting tools discussed
- Circular saws are the worst tool for cutting any kind of curve
- The blade of a circular saw has large teeth that can catch on the material being cut, so you need a good grip on the saw to keep it under control
Tips for Cutting a Shipping Container with a Plasma Cutter
You may already have a circular saw handy, but it is not necessarily ideal for cutting metal. Most of the metal cutting blades do best with saws that turn a lower RPM than is typically used for wood-cutting saws. Most circular saws don’t have variable speeds, they are simply either on or off with no in-between.
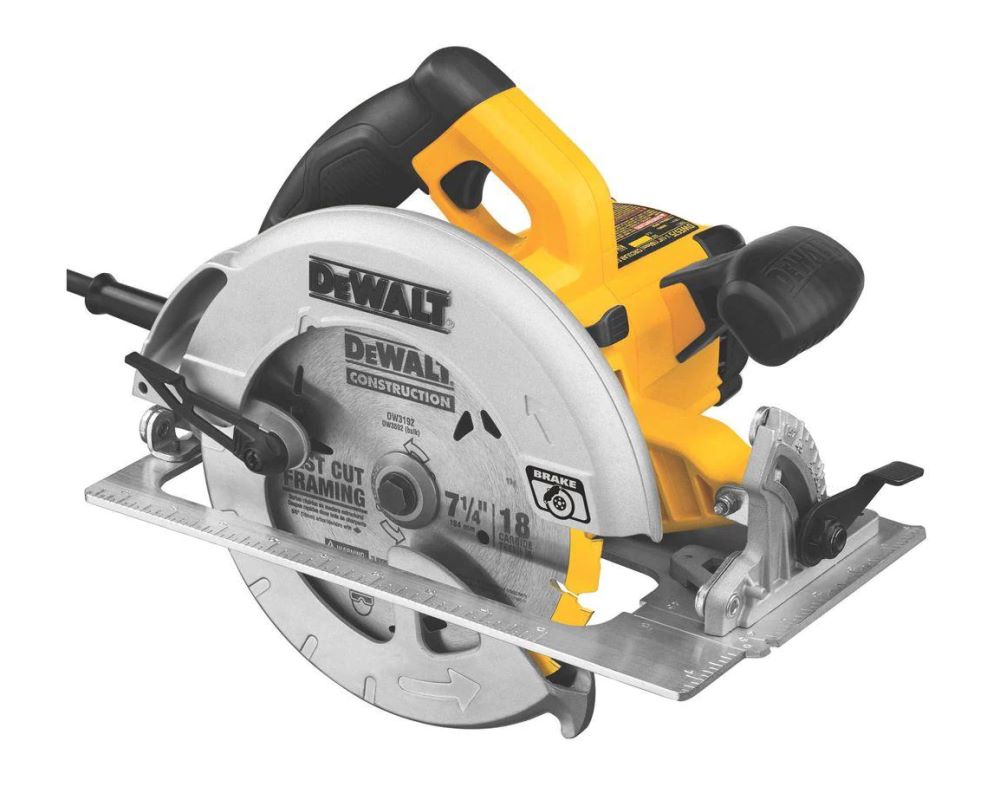
The most common size of circular saw uses a 7-1/4 inch diameter blade and turns around 5000 to 6000 RPM. Circular saws of the same size made for cutting metal typically turn below 4000 RPM.
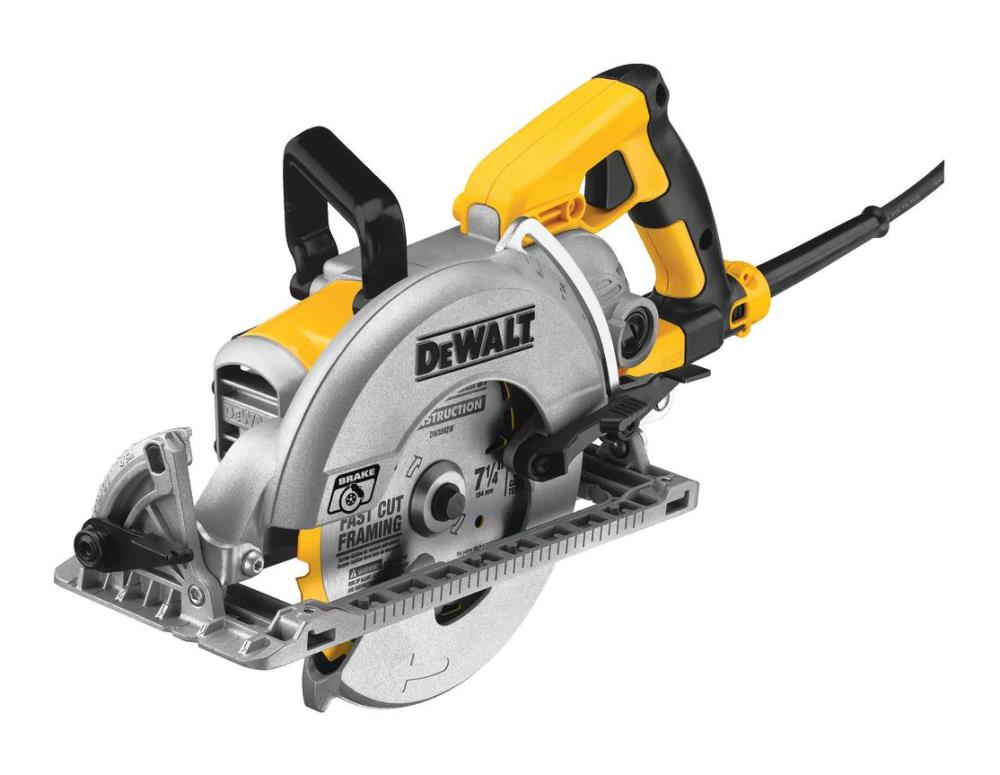
In the middle are worm drive saws, which turn the motor at a 90-degree angle to the blade and slow the blade down a bit with worm gears. These saws typically turn around 4000 to 5000 RPM.
Why does it matter? A blade that is turning too fast will have a high tip speed at the cutting edges. This will cause the blade to overheat itself and the material, throwing sparks, and damaging cutting teeth.
As a result, cuts will be less smooth and the blade will quickly wear out. The manufacturer of a blade will specify the maximum RPM for that particular blade. But in general, a saw that turns slower while still having good power is best.
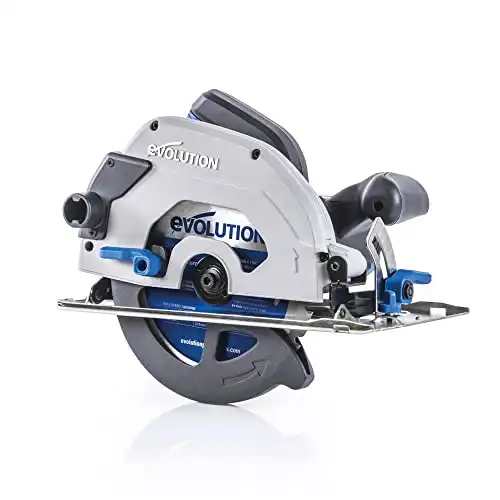
Some tool manufacturers have created special circular saws that are designed just for metal cutting. In addition to a lower blade RPM, they also have heavy-duty construction and a closed housing that is designed to deflect and in some cases collect the metal shavings. Below is a good example, though they are a few options from some of the bigger name brands as well:
When it comes to circular saws, unlike with angular grinders, bigger isn’t necessarily better. A circular blade that has a larger diameter will have a higher tip speed than a smaller blade. And as we just discussed, a high tip speed is bad for cutting metal. So, the larger you go with the blade, the lower you need to go in RPM to make up for it.
Most importantly is choosing the correct blade. Just like with the reciprocating saw blades, for a metal cutting circular saw, you want a blade with cermet or carbide teeth for longer life and great cutting speed.
Next Steps After Cutting Your Shipping Container
When the final cut is made, your work is actually just beginning. Let’s discuss what you’ll need to do after you have completed cutting your shipping container.
Moving the Cutouts
In one of the previous sections above, we addressed handling the cutout material from your container. And whether you choose to slide it down wooden rails, swing it down from an overhead pulled, and some other method entirely…you still need to get the cutouts out your way.
Depending on your cutting tool of choice, the cutouts might be hot, will likely be sharp, and will definitely be heavy. So wear good gloves to maneuver them, and we recommend either dragging them, using a dolly to roll them, or asking a friend for help to carry them.
The cut edges are bare metal, so if you think you might use them for something else, consider giving the cut-edges a coat of primer. Many people go on to use their cut-outs for porch coverings, interior accents, etc. But if you just want to take your cutouts to the metal recycling yard, that’s completely fine too.
Cleaning up your Metal Cuts
Once again, your choice of a cutting tool will play a large role in how much prep work you need to do next. But almost everyone should plan on doing at least some grinding of their cut edges to smooth everything out and get the metal window perimeter frame fitting as it should.
The condition of your container with regards to paint and rust might also necessitate that you grind or wire brush off some of the surfaces near your cuts to get a good weld for the window frames. But keep in mind, if you do some of this cleaning and grinding, then have to wait a few days before you can weld in the frames, you’re going to give corrosion a chance to form. So best to try to do all the cleaning, grinding, welding, and finally priming n the same day if possible.
Cleaning up the Worksite
It’s not fun or glamorous, but keeping your worksite clean is important for not only your personal safety but also for the quality of your build. You don’t want little metal shavings blowing around inside your container home, falling into places they shouldn’t be, and getting ground into horizontal surfaces by your boots.
Better to take a quick pass with a broom, and maybe even a magnet sweeper, to get up the majority of the debris. You don’t have to make it as clean as an operating room…it is a construction site after all. But do your best to get most of the trash and cuttings, and your future self will be thankful.
Reinforcing the Opening in your Shipping Container
While making permanent structural modifications to your container is beyond the scope of this article, we do need to at least touch on reinforcements. The walls of a container are integral to the overall structure. Cutting out a piece of the wall is reducing the strength of your box.
In a lot of cases with smaller cut openings, this isn’t too big of a deal. Containers are so strong, and loading from use as a home is so comparatively light, that the strength lost often isn’t enough to worry about.
But if you’ve made substantial cuts to your container, you’re planning to move your container into final position after cutting, or if your design includes stacking and cantilevering your container in unique ways, you’ll definitely need some reinforcements.
And at the very least, you might want some temporary reinforcements until you get the container into its final location. In fact, for people cutting out entire sides of a container, reinforcements are actually a good idea to add before you cut. Otherwise, the container can deform and it will be difficult to get it back to its correct shape.
The specifics of when, where, and how to reinforce are complex and vary based on factors as vast as your foundation and your weather. It’s a decision best left to a professional who can analyze everything about your design and overall project. But when in doubt, add reinforcement.
Protecting the Opening
The last thing we’ll mention is protecting the opening you’ve just cut in your container. If the opening is on an exterior wall, you may need to think about covering the opening. On one hand, there is the security of your container to think about, and you don’t want intruders or animals making their way through an open doorway or future site of a window. The other concern is weather, and future rain or winds could damage some of your interior materials, or at least make everything into a damp mess.
Your location, current weather, phase of building, and other variables should inform your decision of how best to proceed. For some, a simple taped-up tarp will suffice. Others may want to build a plywood cover for their openings. Use your best judgment here, but don’t neglect to take this important step because you don’t think you have the time.
Conclusion
Almost every type of container customization is going to include some cutting, which is why the contents of this article are important for all of our readers. We appreciate all types of container modifications but want to ensure you build them as efficiently, safely, and economically as possible. If we’ve missed any points about cutting a shipping container that you think are important, let us know in the comments!
12 Responses
Hi.
Can mobile home exterior doors and windows be installed in a container?
Anything can be made to work with enough persistence. A common issue is condensation on metal door/window frames though, so that’s a potential area to watch out for.
Kan ik de kopse kant van een container er volledig afzagen zonder dat de container inzakt? Mijn container moet namelijk 1 meter ingekort worden en daarna zal het stuk van de kopse kant er weer terug aan gelast worden.
De staanders worden dus tijdelijk verwijderd en dan word er een stuk van de container afgehaald en dan komen de staanders er terug aan. Mits ik zekerheid heb dat de container niet inzakt.
It is best to weld in some bracing before cutting off the end. Without the container may not collapse, but it could shift, buckle, twist etc. and will be hard to get back into position.
If I butt two 40′ containers together on the long side, weld them together on the exterior (top and ends) and cut out both long walls to create a 16’x40′ room, can I gain additional structural integrity by welding angle iron along the entire upper joint INSIDE, joining the two containers together at the top?
That certainly won’t hurt, but may not be enough. Typically, when people cut out the entire side of the container, either a few columns are added down that long side, or a decent beam is added that can span the 40ft length. The problem is that the upper side beams built into the container aren’t all that big, and a lot of the roof support comes from the wall that you’re removing. While a structural engineer can give you a more exact answer, if you’re trying to avoid that, you definitely want to over-engineer your support, and a small piece of angle iron is probably not going to be significant enough.
Can the entire 40′ wall be cut out of a container? One side only
Yes, but we’d recommend some type of reinforcement (either a ceiling beam or a few pole columns) to structurally reinforce the container.
Can the entire wall in the long direction be cut out of a 40′ container without adding reinforcement?? Thank you
Yes, but we’d recommend some type of reinforcement (either a ceiling beam or a few pole columns) to structurally reinforce the container.
Use an angle grinder for making a starter hole when using a recip saw instead of a drill.
Thank you for this information.
Please send more information soon re: how to mate exterior/interior insulation to the window frame/door frame.
The panel that was cut out of the wall, with suitable size reduction, can be welded into a frame made of 1/4 inch x 2 inch? steel, that fits into, and is bolted into the window/door frame. This will restore the security of the shipping container, and will restore the weather seal if it is calked around.
Richard