Elements
Size
Age
Levels
Note: Map location may not be exact. Click to open in Google Maps.

It’s not every day that you meet someone in the United States that lives on a bamboo farm, but Shanti’s story only starts at bamboo. Through hard work, patience, and a love for repurposing surplus materials, she built two container houses on her property.
While she didn’t originally intend to use her container homes as short-term rental units, their flexibility has allowed her to get rental income now and plan for other uses later. Read our interview below to learn how she did it and what she learned in the process that you can apply to your own container build!
I love that when building with a container, it already has a floor, roof, and walls. It makes the construction process less overwhelming when these basic building elements are already in place. The other thing I love is that a shipping container is inherently a very solid structure. You can make your design super detailed or very simple, but the underlying containers are really strong and durable.
Shipping containers are blank canvases and can have multiple functions in their lifespan. It’s the same reason I’m attracted to permaculture. Using one item to solve multiple problems is something I am passionate about in every aspect of my life.
Personally, I really like the industrial feel of shipping containers. The drawback is they can look very trailer-like in some cases without a bit of enhancement. I find that rooflines and exterior details are key. Landscaping can soften lines while vines can cover imperfections.
After developing this interest in containers, the natural next step was finding out what purpose they would serve. My idea was to build a container home for each of my three children that they could one day move to another property.
At the moment though, my kids would rather have financial support than extra space. They are living with me in my 1000 SF traditionally constructed house while we rent out the containers which are on the same property.
I have one child in college, one getting ready to start college in a few months, and the third in high school. The income from the rentals helps me pay for college, cars, and other things they need. An added, unexpected benefit is how much I’ve enjoyed having interesting people come and stay on our land.
The great thing about my containers is that they are so flexible. Unlike a trailer, a container home can be easily renovated unlimited times and can provide a safe place to stay during severe weather. They are rentals now, but won’t be forever, and I could see myself living in one!
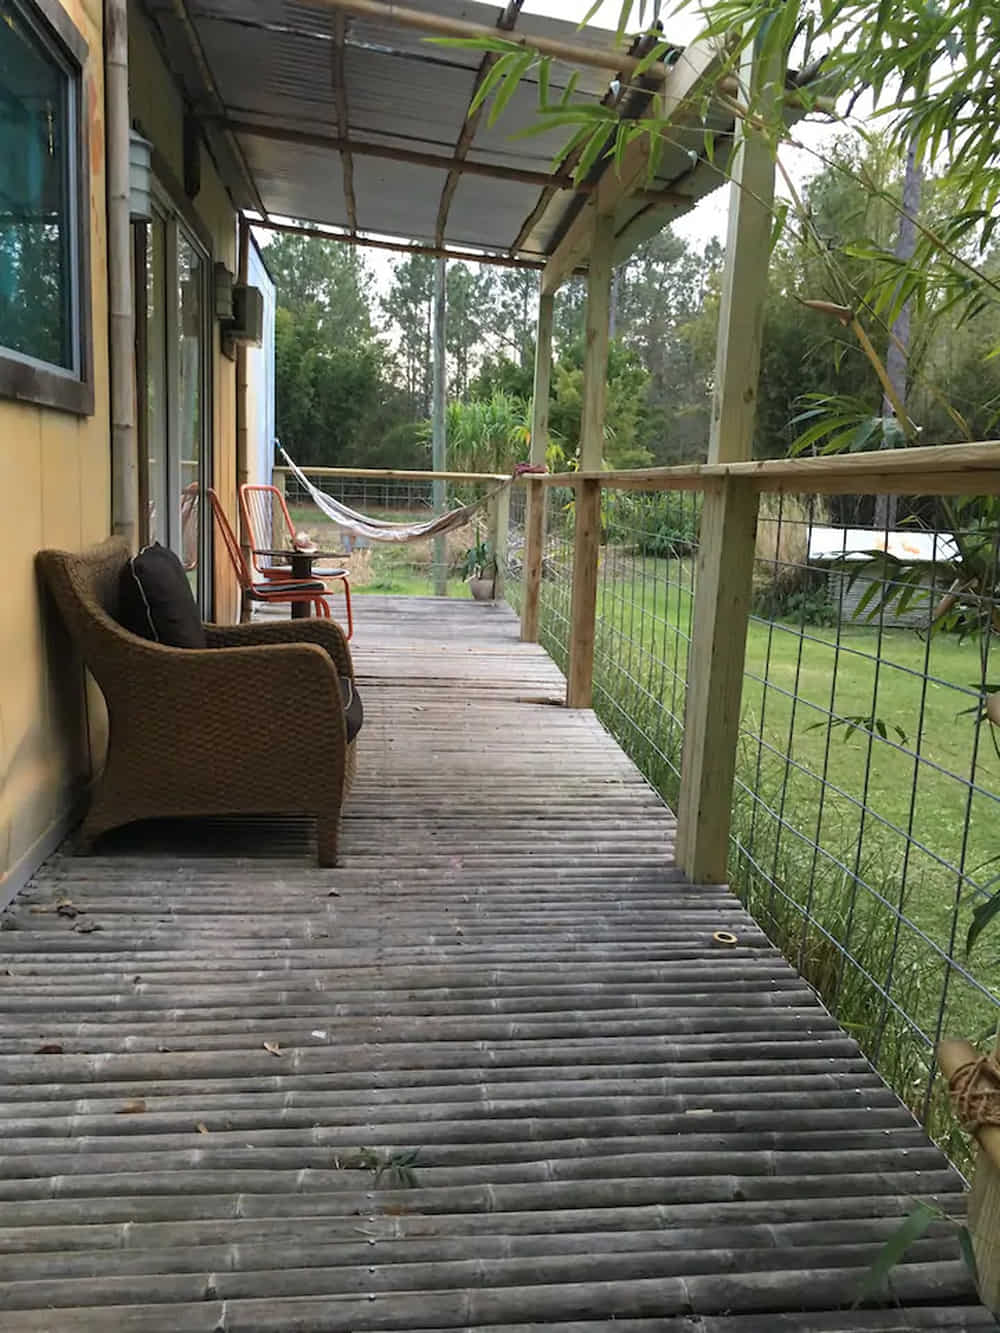
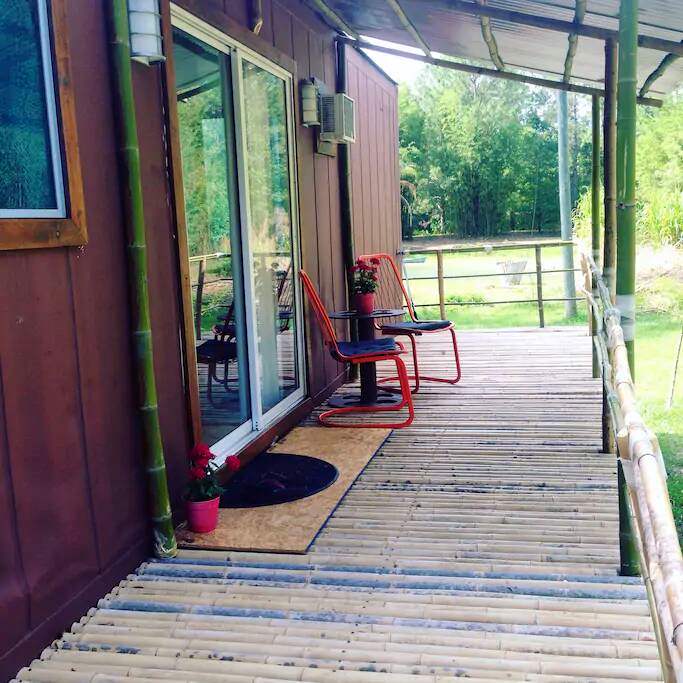
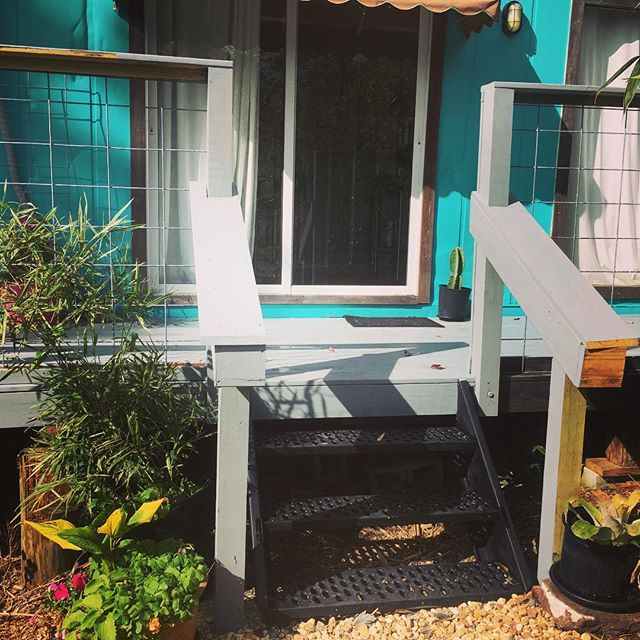
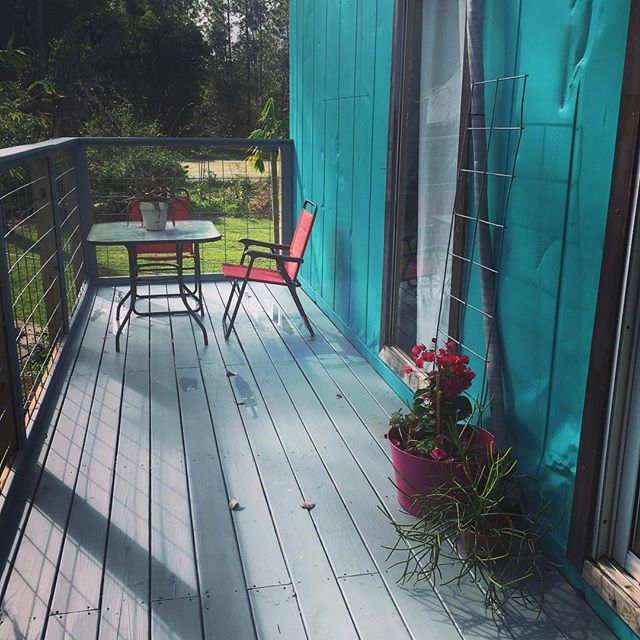
Converting shipping containers into houses gives new life to something that can easily provide a home for 1-2 people. Since they both have decks with porches, there is additional outside space for relaxing. In a world where housing is out of reach for many, container homes are a great alternative to apartment living. And, it’s a fairly easy way for someone to gain rental income with minimal work.
My ex-partner and I both had a lot of construction experience between us, so the idea of building container homes wasn’t a huge stretch. He is a welder by trade and I’ve worked in the construction/landscaping industry for over 20 years. While I don’t have a huge skill set, I know how things get put together, I am comfortable with getting projects completed, and I love the process of creating.
The first container house he and I built together. The second one, I built without his help and instead occasionally worked with different skilled workers. I knew what I wanted to create and hired people as I needed help while being involved in almost everything to some degree. The only exception was the electrical work, which I didn’t help on at all. As a general rule, I like to be included in the details and decisions so that I know how things work. After all, I will be the one to fix them later.
Another factor that motivated my decision to do things myself was my desire to reuse building materials I’ve collected over time. I feel that the containers represent an opportunity to showcase what can be made from materials that would otherwise end up in a landfill. It’s similar to the actual containers themselves which can no longer be used for international shipping but still have a lot of life left in them.
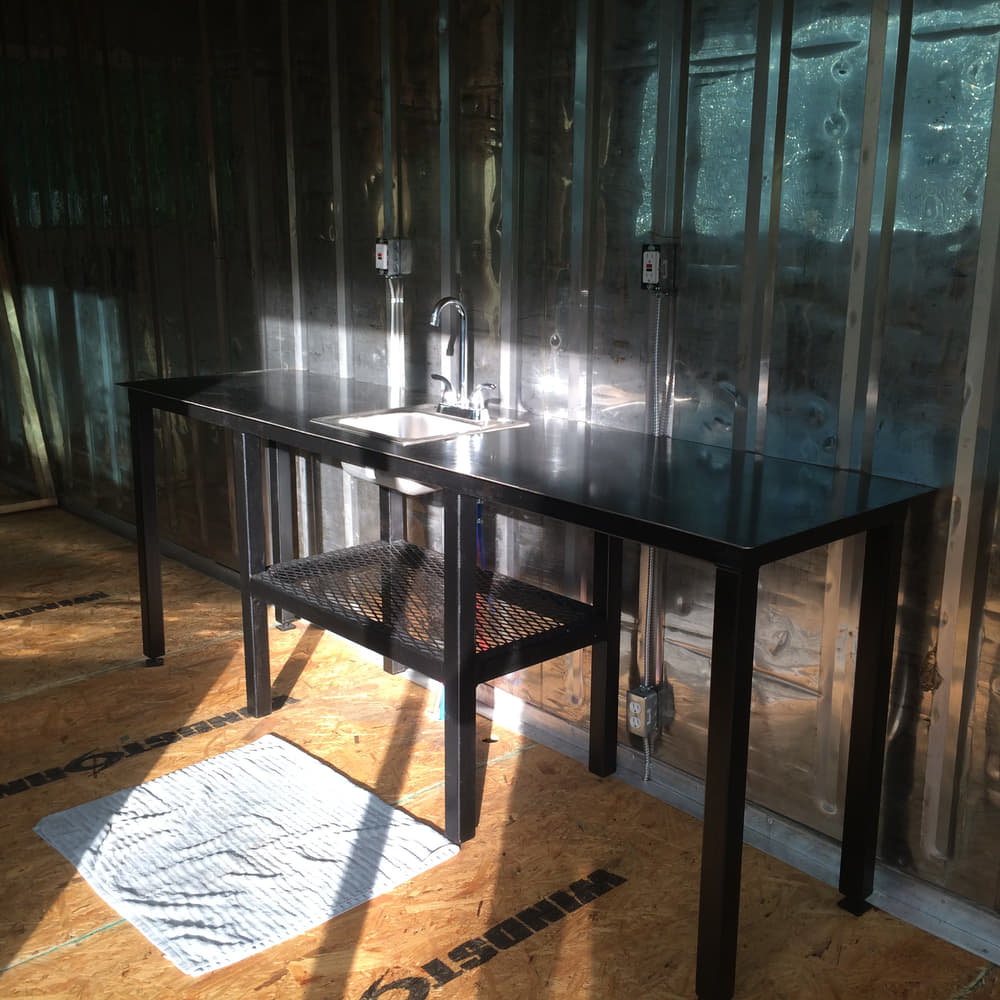
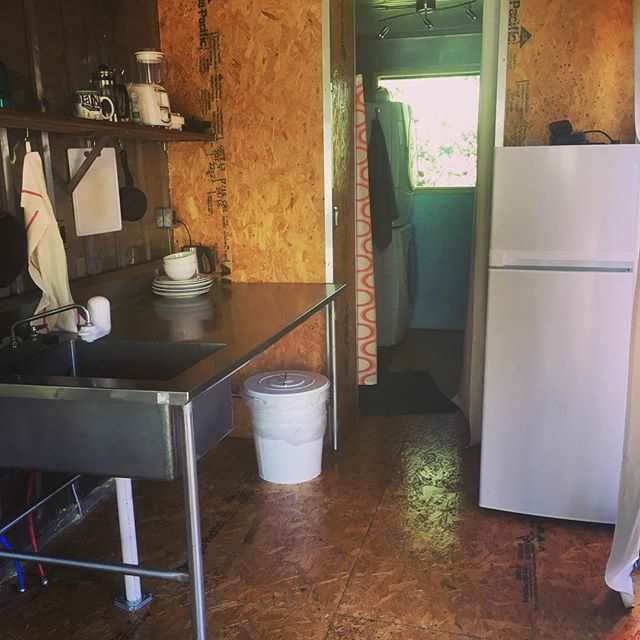
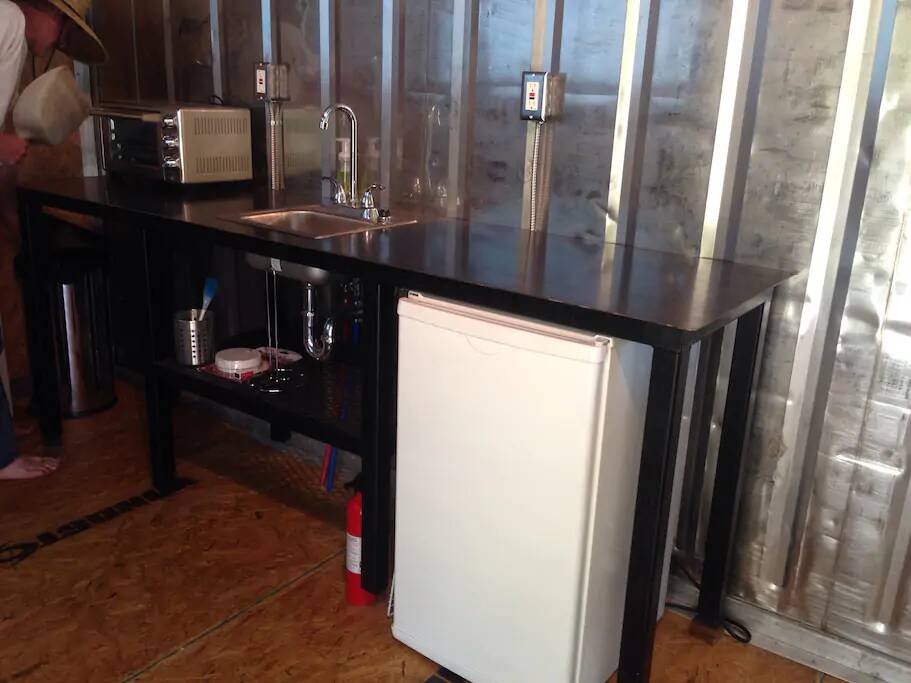
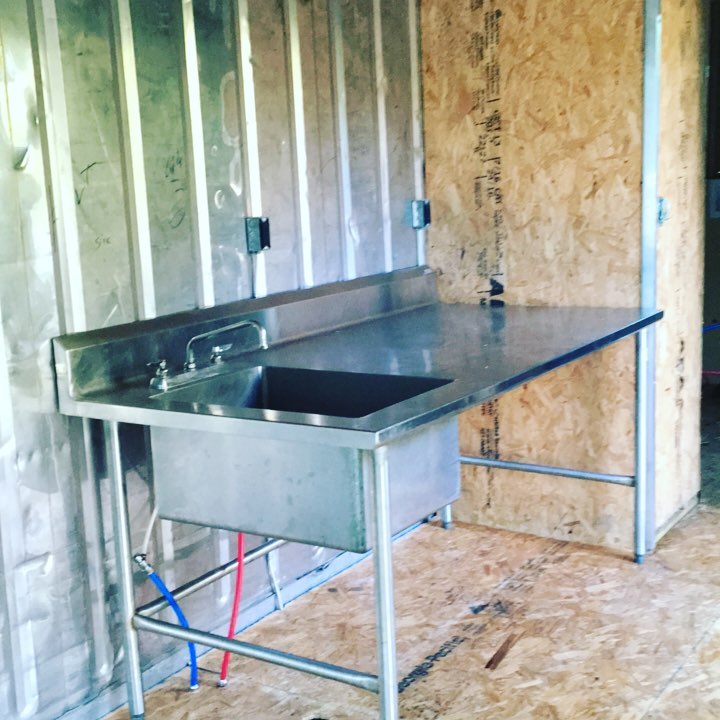
As examples, I used an old sink from a restaurant for a kitchen sink and used a broken sliding glass door for windows. It’s easy to find small amounts of materials on Craigslist, Facebook Marketplace, or Offer Up for little or no money. So much is thrown away and with a little creativity, it could be built into something that can generate income. The design had to remain flexible because you never know what you’re going to find, and being a DIY project enabled that flexibility.
Cost was the last factor that impacted the project and is always a consideration in my life overall. The container home probably wouldn’t have been feasible for us if not for the free materials and items that I had located. Trying to build a house with just a few hundred dollars here and there sounds impossible but it’s not! We are surrounded by excess, it’s just a matter of putting things together in a cohesive way.
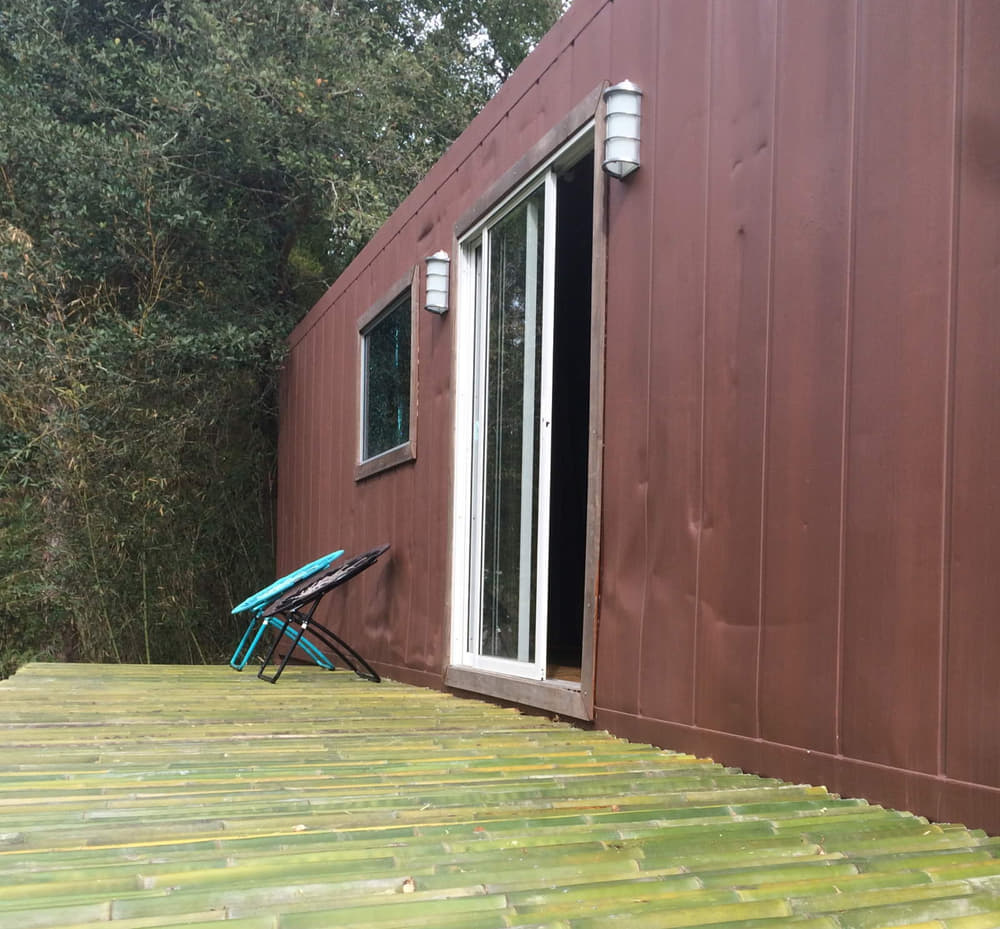
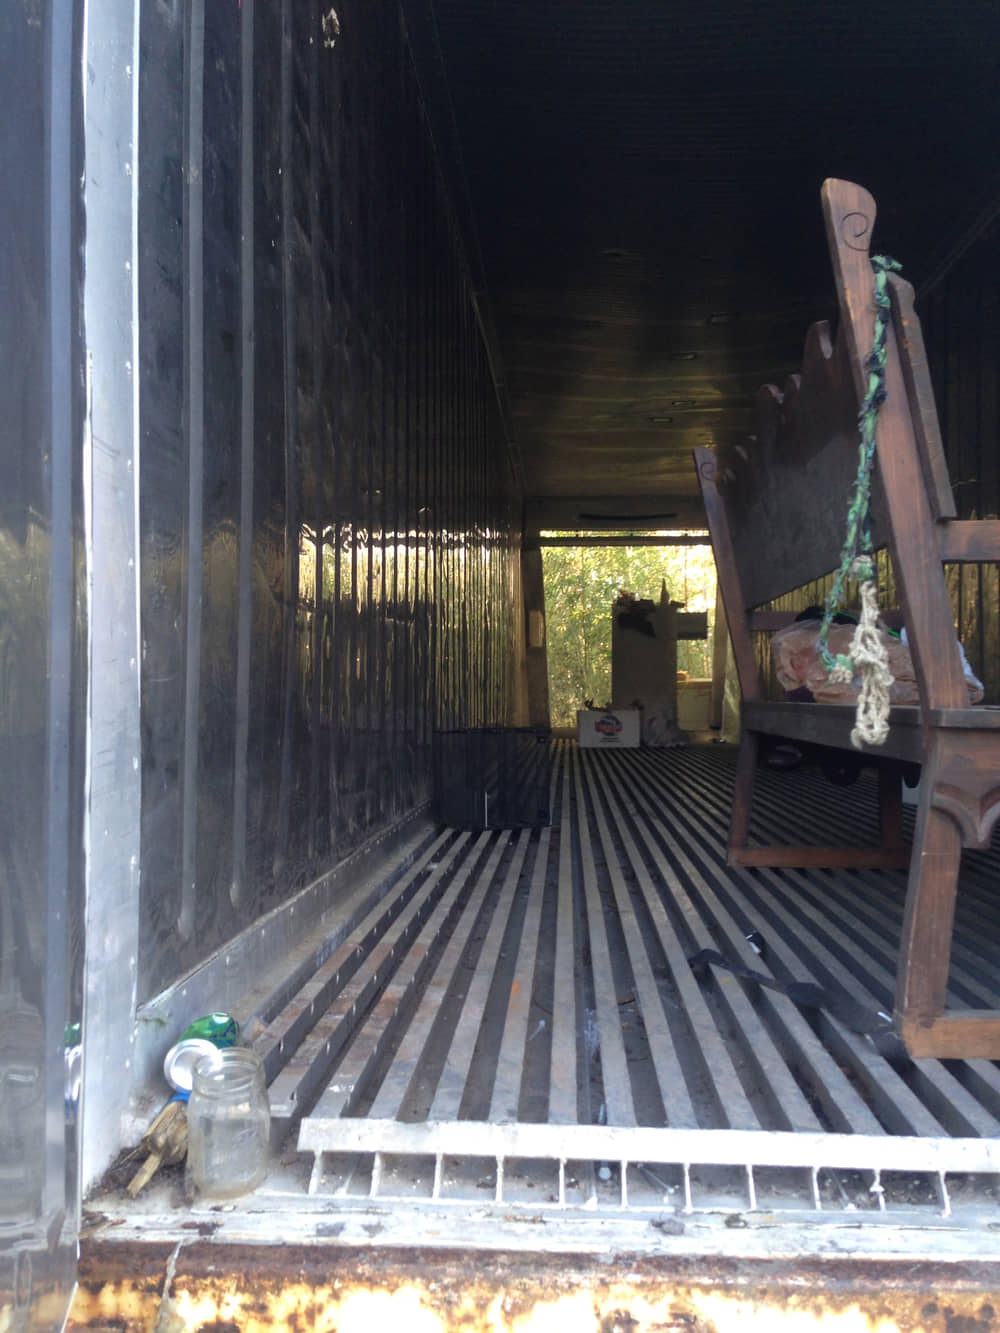
The most obvious part of the design is the size and type of containers I used. Each house is made from a 40-foot container that is a refrigerated unit. I have found them to be great for the humid area where I live. They are insulated and have stainless steel walls and an aluminum ceiling. I love the dings and dents on both the interior and exterior. These containers have traveled the world and their story is in these imperfections.
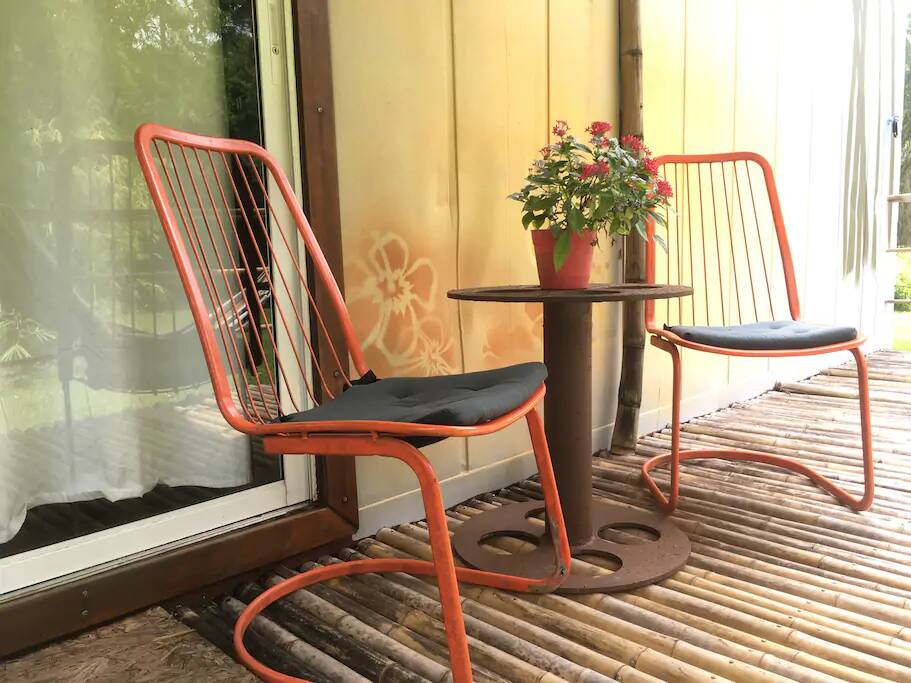
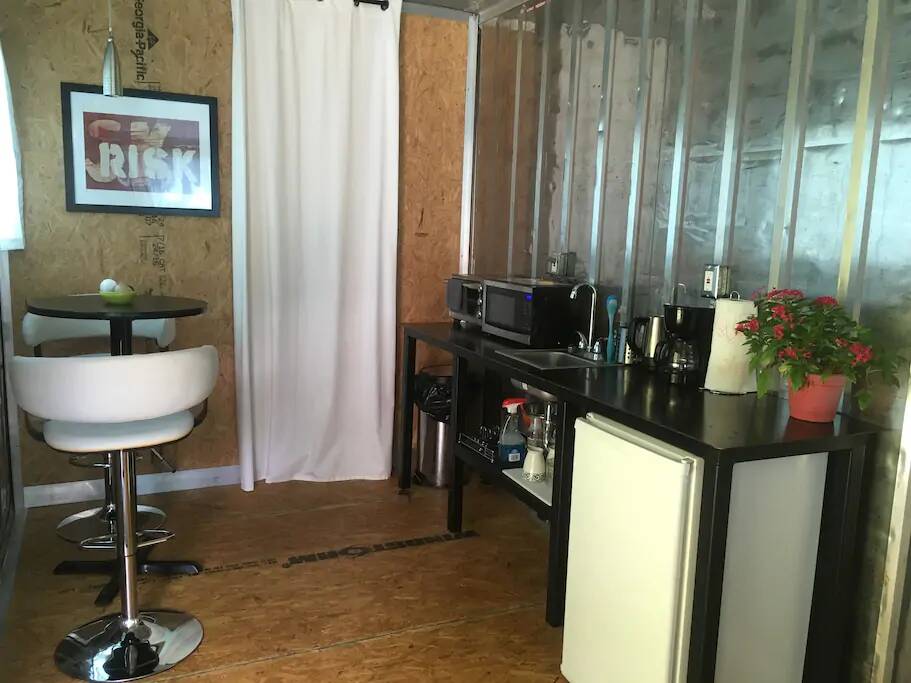
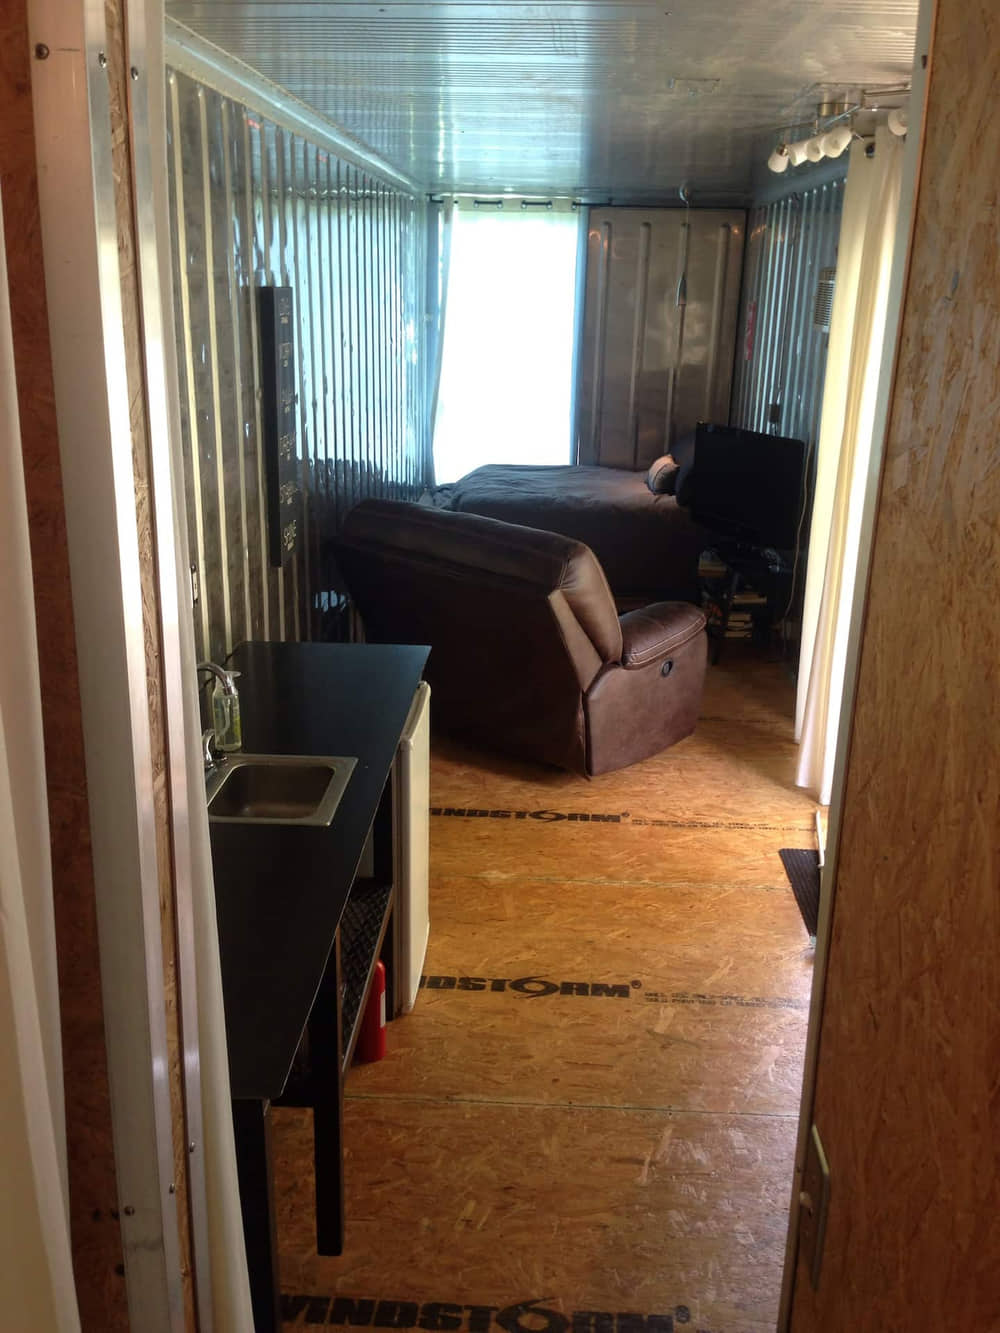
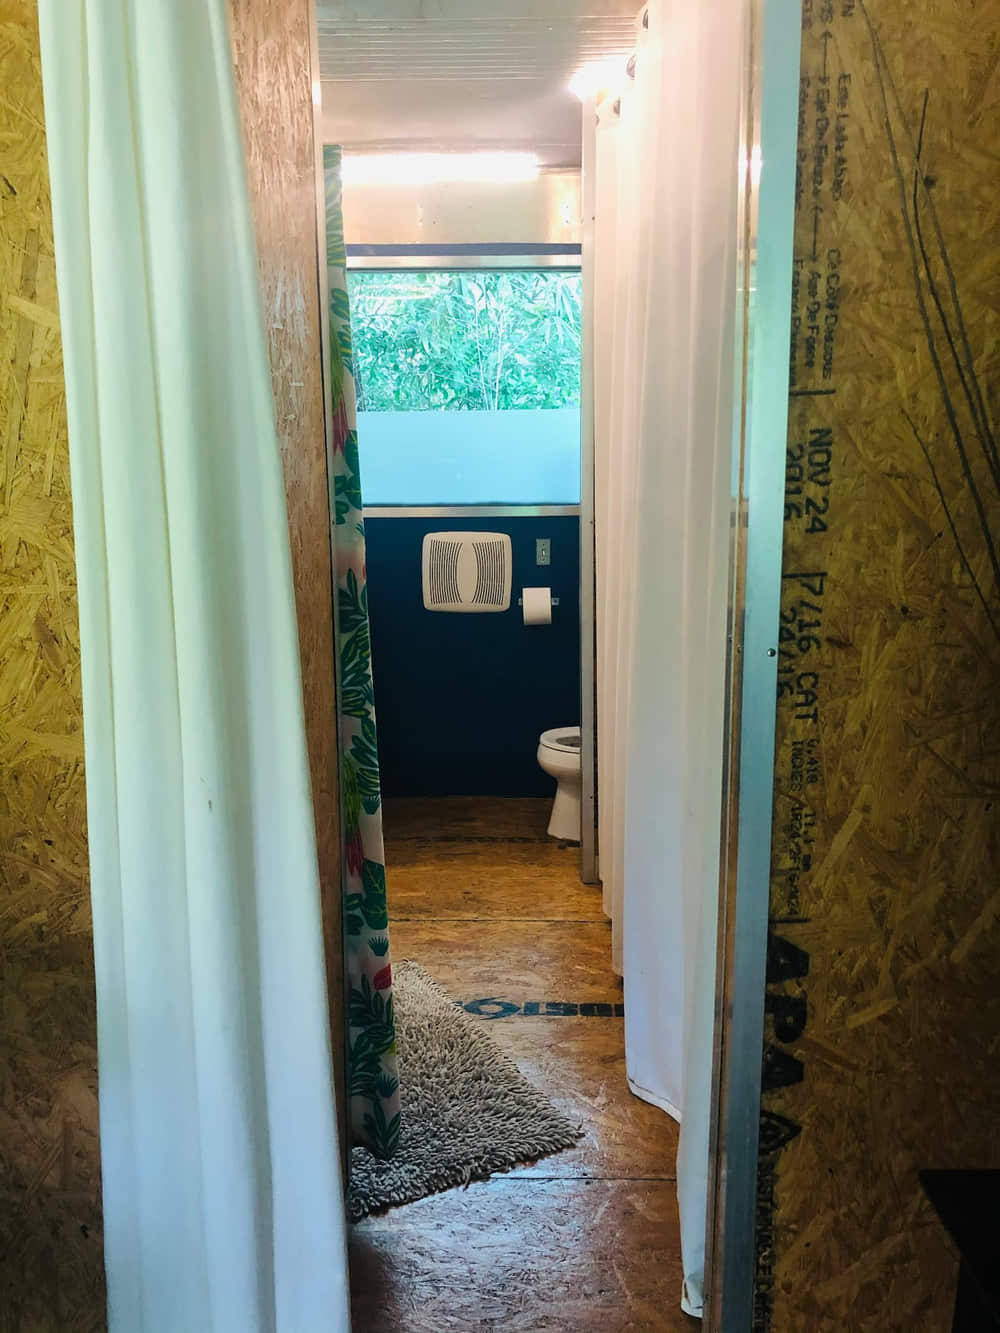
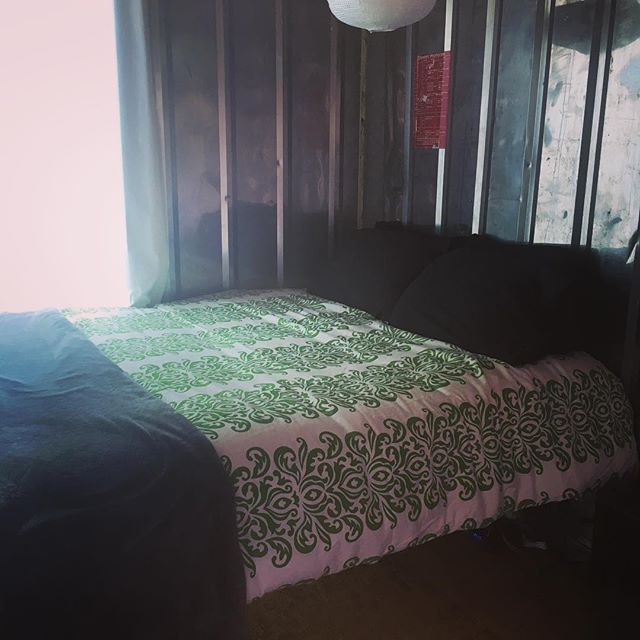
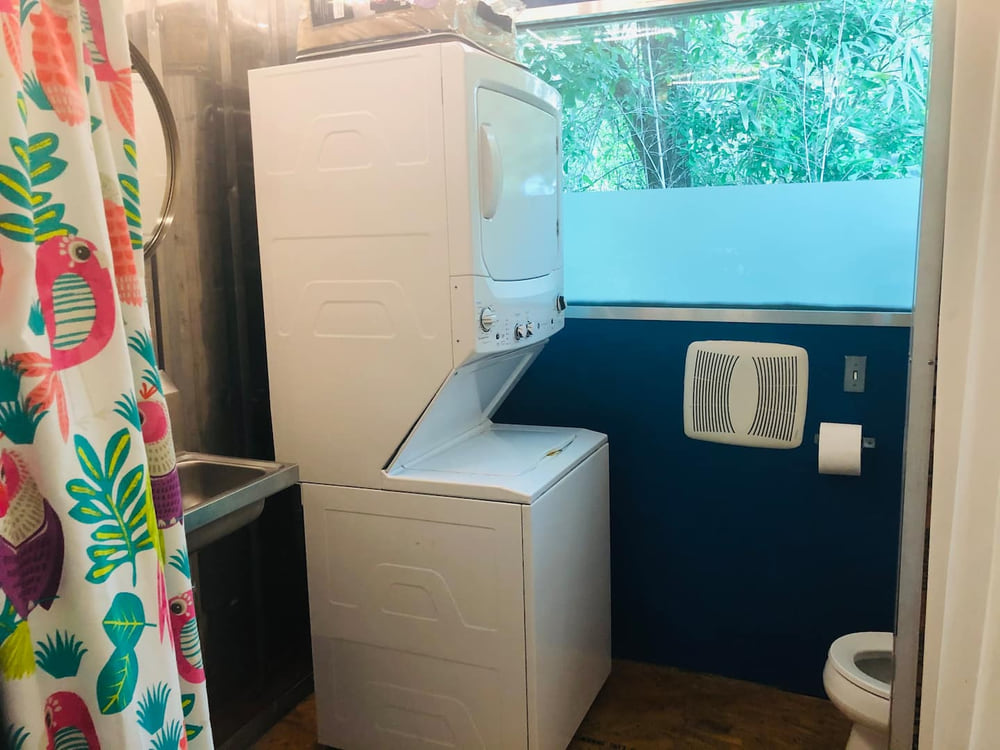
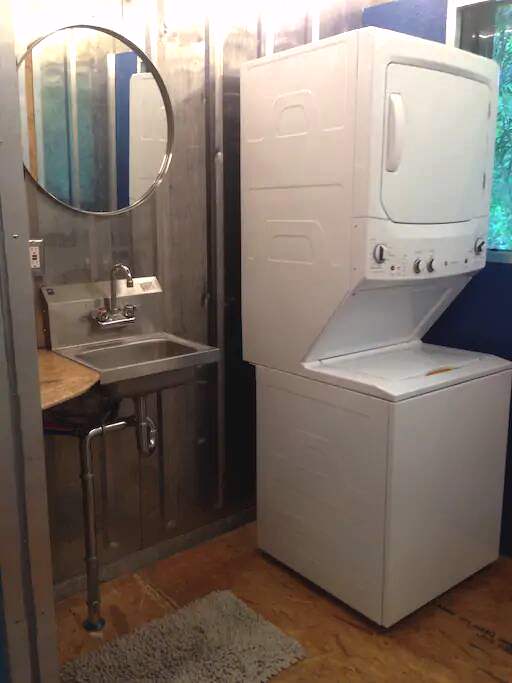
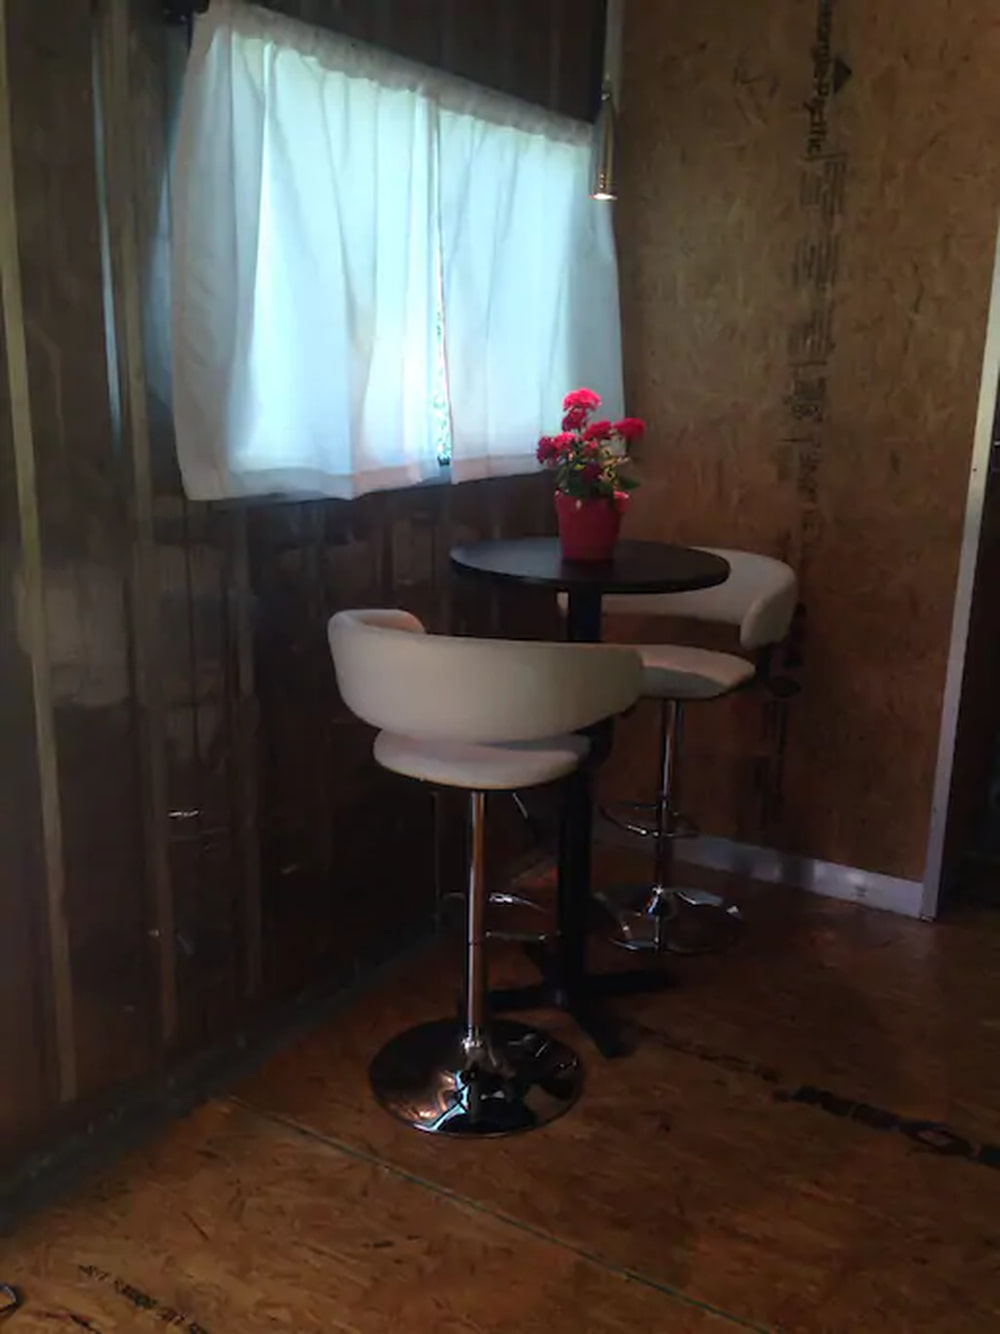
Containers are great for DIY building projects. Each of my units is a separate, temporary structure with quick connect attachments. They could be picked up and moved very easily if needed. I did not use any designers and don’t think they are needed for a relatively simple build like mine. I kept everything as simple as possible. Each unit has a kitchen, a queen size bed, and a tv and sofa area. The bathroom in both units includes a full-size shower and a washer/dryer.
My design theme was industrial meets skate/surf shop, but with some flexibility based on what materials I was able to source for free or cheap. This design idea has worked really well as a rental because the space is open and has just the basics. I loved the layout so much I did the same thing for the second one.
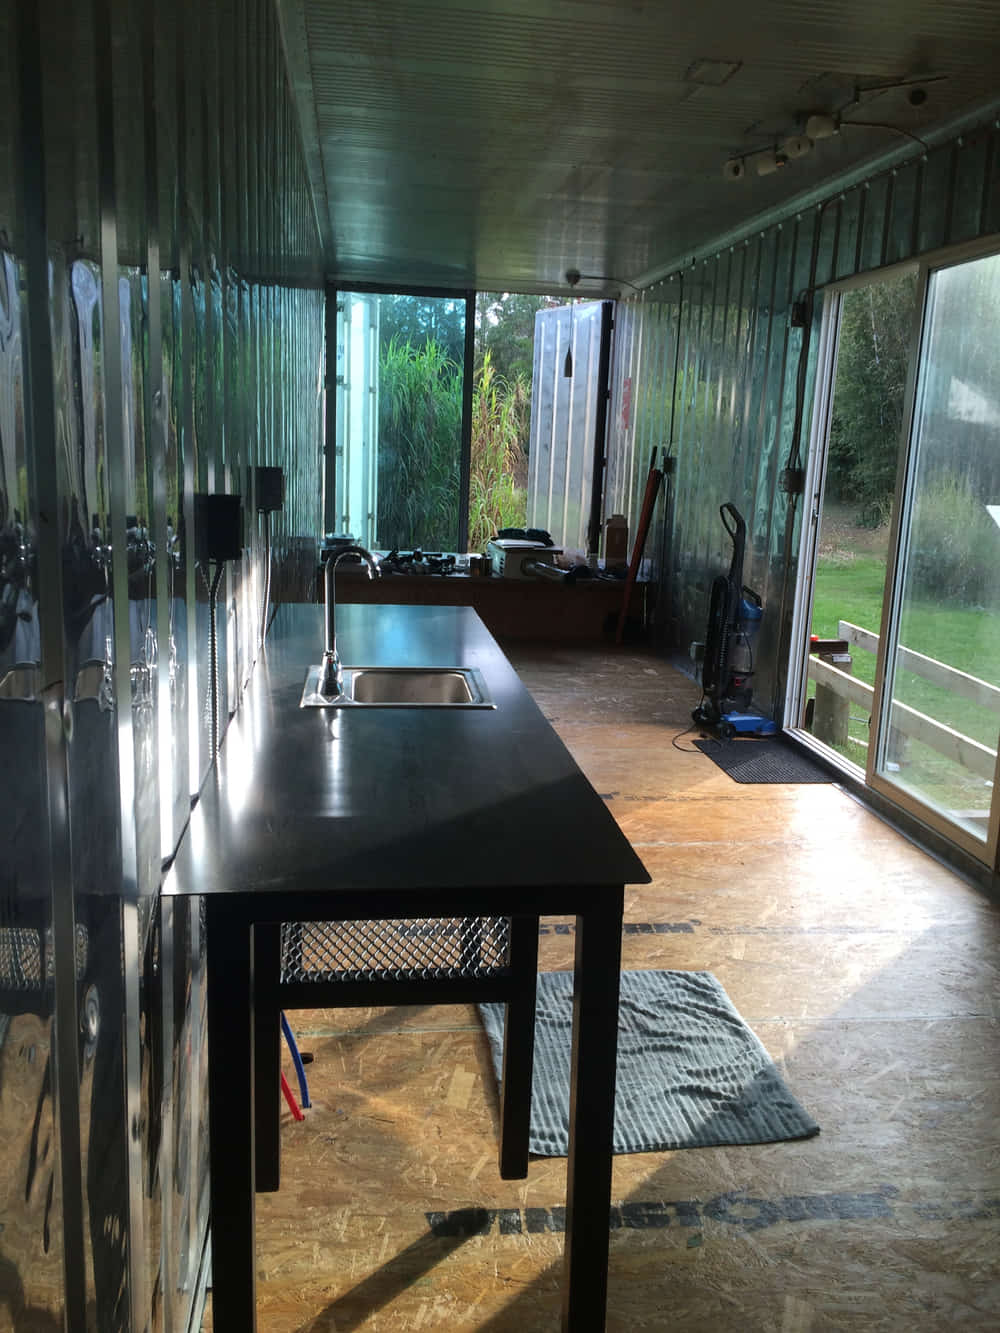
The only interior wall is the one that sections off the bathroom with the rest being open. As each container house is built from a single container, I wanted to avoid the tendency of the space to feel like a hallway. Keeping it open and using big windows really makes it feel bigger! I also knew it would be important to have space for ‘stuff’, as many of my visitors do quite a bit of shopping on their holiday given my proximity to Disney World.
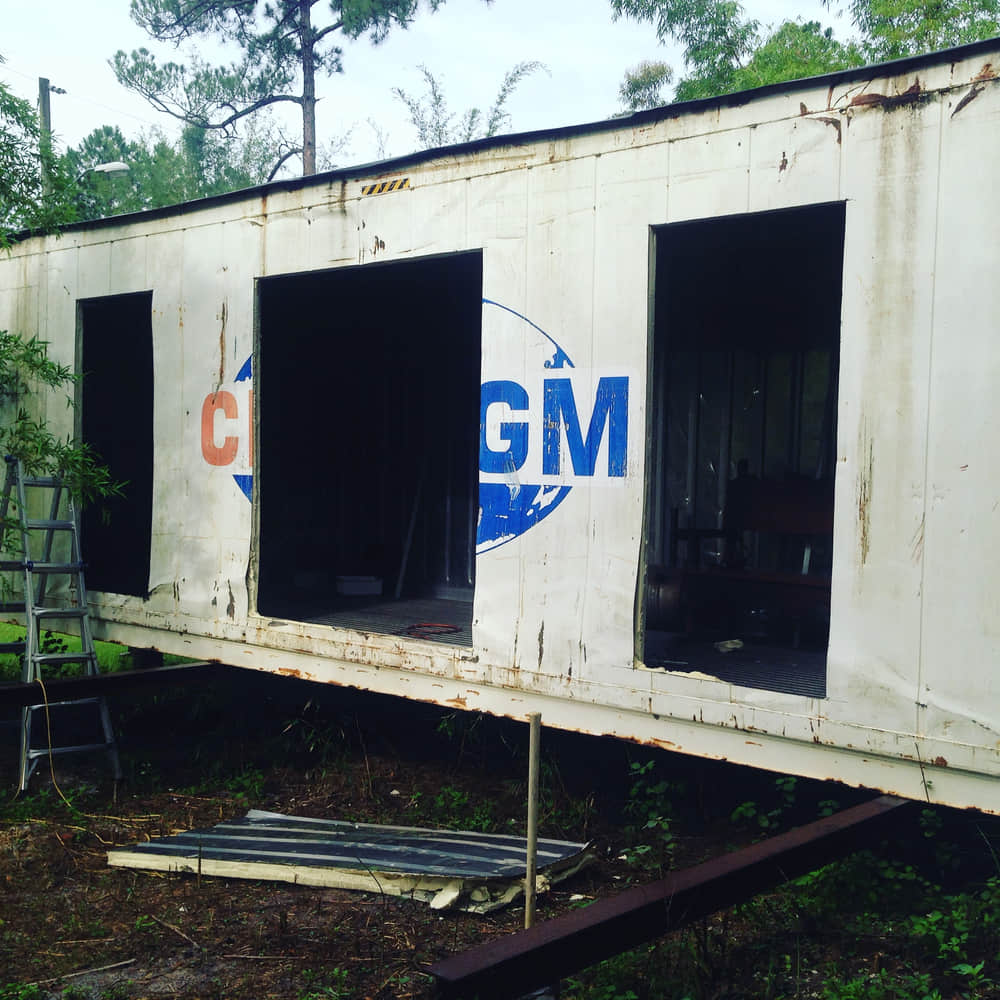
I’m so onboard with the idea of container homes that I’ve actually already purchased my third container and am planning to transform it into a home as well. It’s a 20-foot standard container which is totally different – shorter, uninsulated, all steel, and of course half the size. It’s currently empty as I’m feeling out the space and how the design will work.
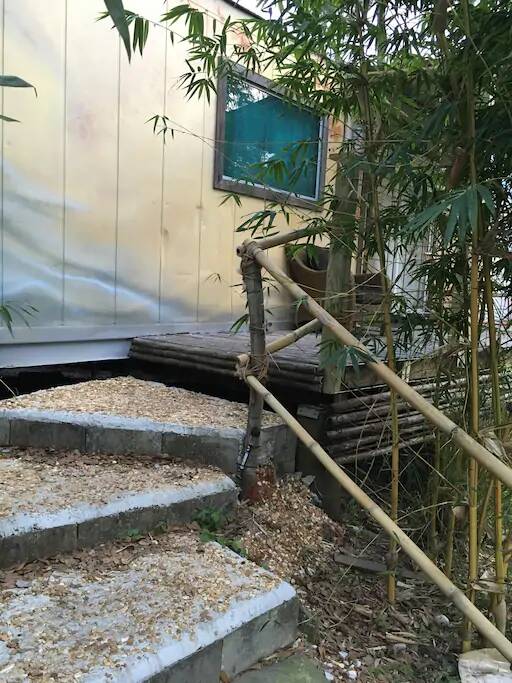
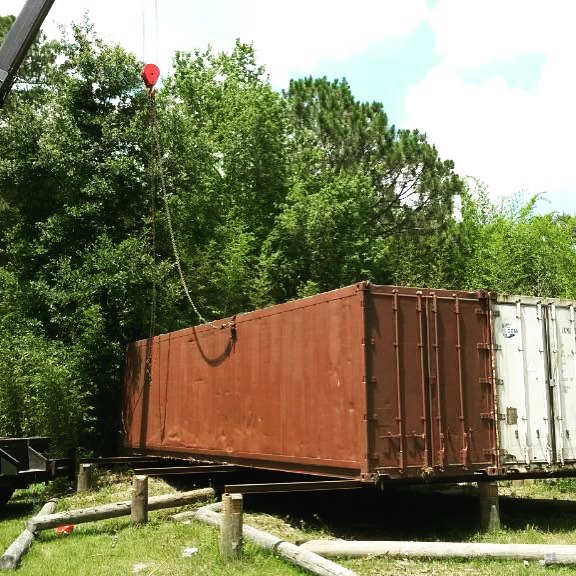
After purchasing the containers, the first order of business was placing them on site. We decided to use the remnants of a past project as the start of a container foundation.
At one point in the past, my ex-partner had wanted to build a regular house on our land, elevated above ground level. He installed nine 30-foot telephone poles into the ground at a depth of 10 feet. They were arranged in a 30-foot grid pattern. The project was basically abandoned after that.
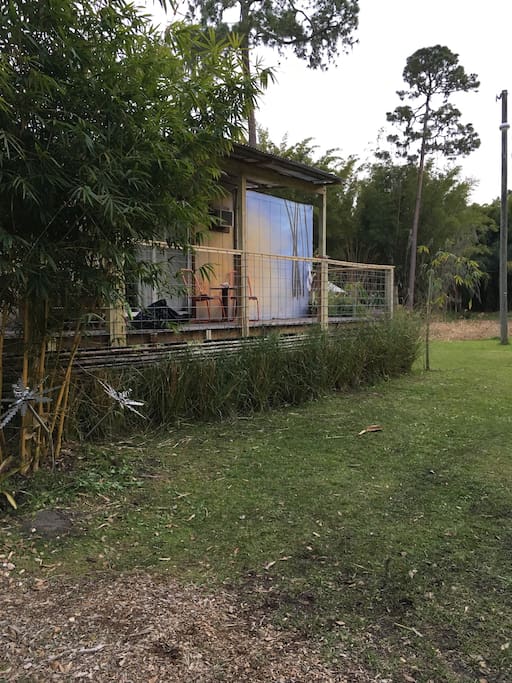
We cut these nine telephone poles four feet off the ground and added three steel beams across them. I had a friend with a crane help me to place the two 40 foot containers on top of these steel beams, parallel to but facing away from each other. I wanted each container house to feel like it was private and not have a view of other buildings. My land is a bamboo farm, so the views were focused on green spaces.
We lucked out with an existing solution for utilities as well. When I bought my farm, it had an RV trailer situated at the other end of my property with a separate utility service and septic system. The trailer is now gone, so I was able to use both of these hookups for the containers instead. This was a big bonus!
Both of my containers were refrigerated and came with the refrigeration units that I was able to remove and resell. The refrigeration units are worth between $300 – $1000 each depending on the shape they are in and if they are working or just sold for scrap.
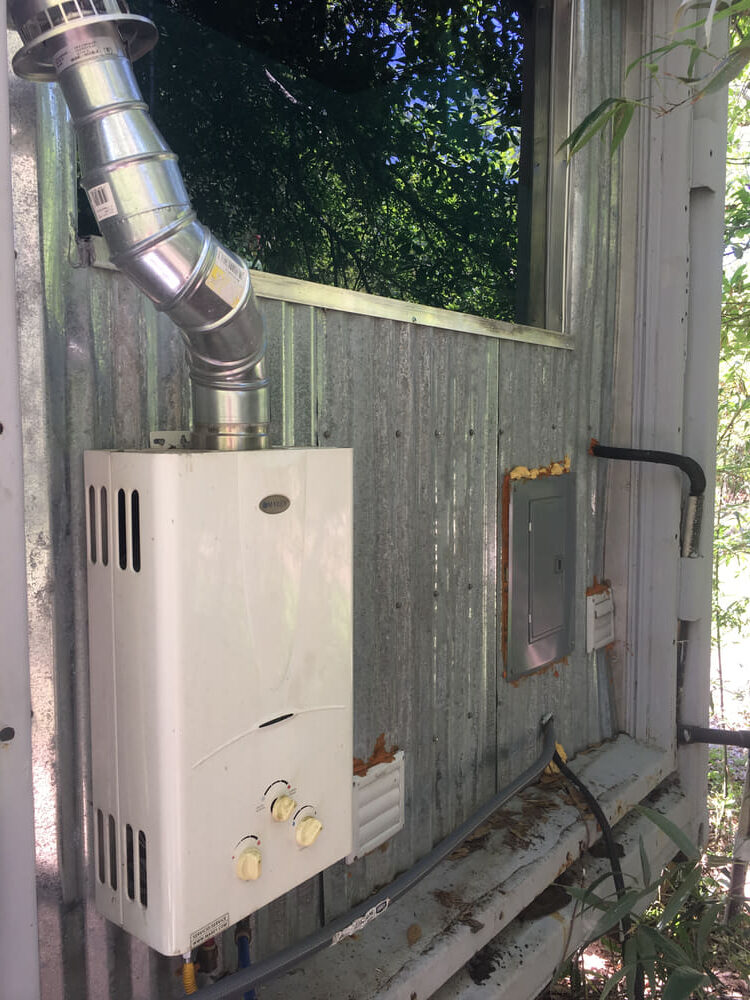
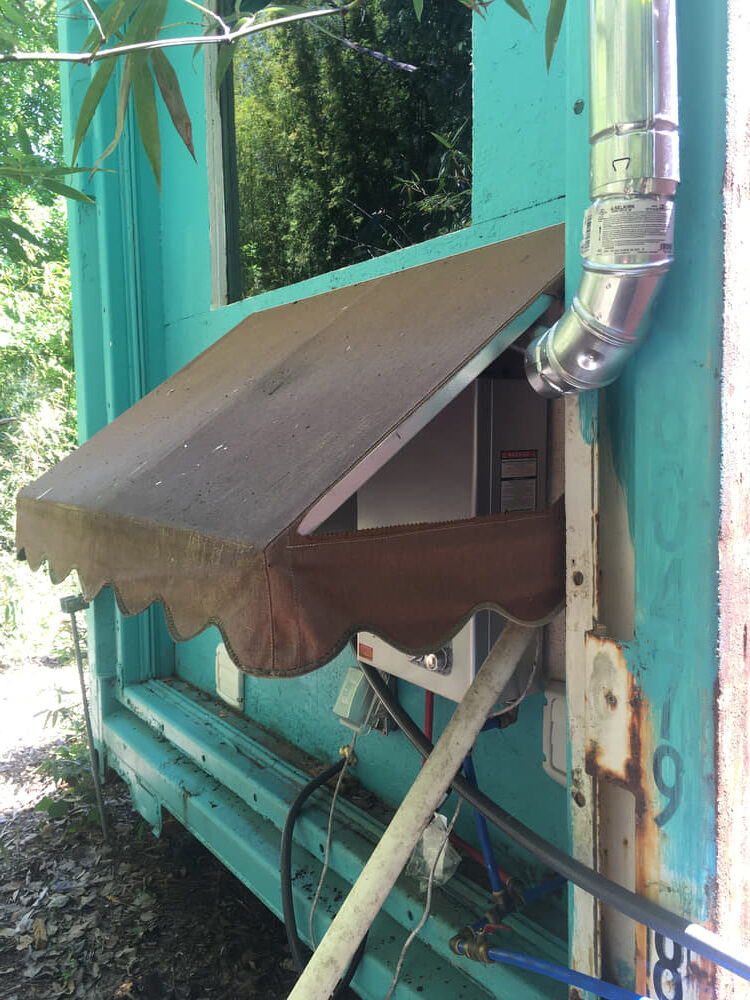
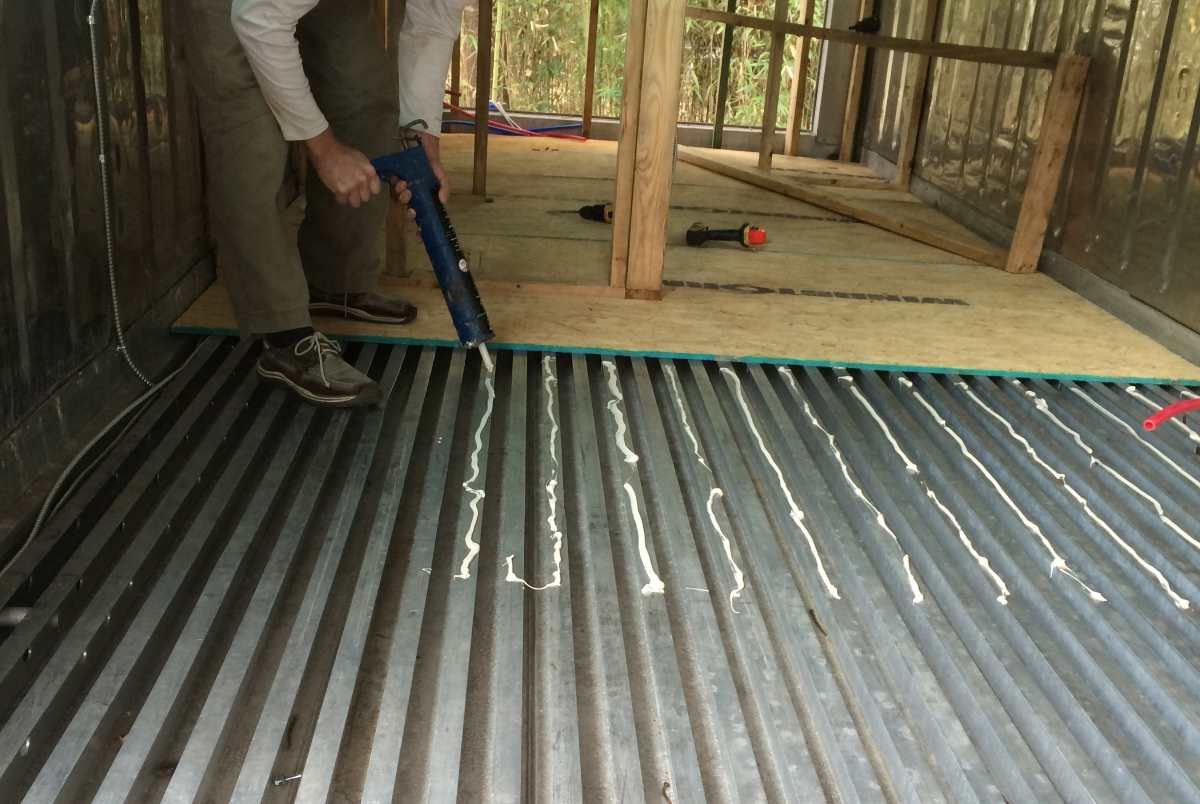
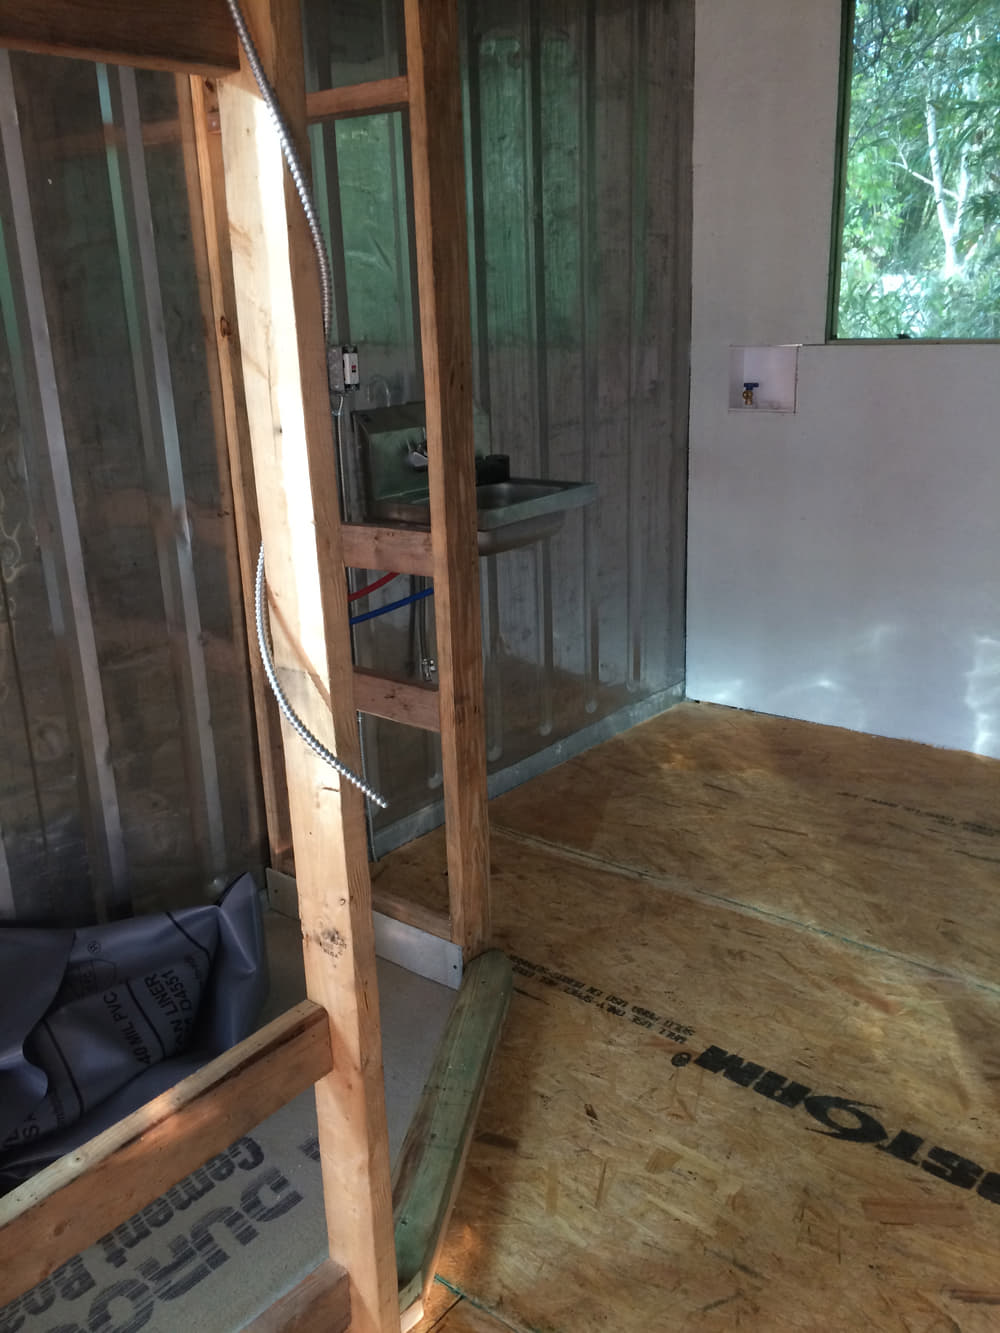
When you remove the refrigeration unit, you’re left with a hole at the end of the container which I decided to take advantage of with my bathroom design. I framed out a wall to cover this hole that included a large window as well most of our utility penetrations.
It worked well since it was easier to build everything there than cutting into the container doors on the other end. The wall is traditional 2×4 construction with plywood on both sides and a bit of spray foam in the middle for insulation.
We placed the electrical boxes and on-demand hot water heaters on the exterior of the wall. On one of the container houses, I built a small roof over the water heater, and on the other, I covered the plywood sheathing with corrugated metal.
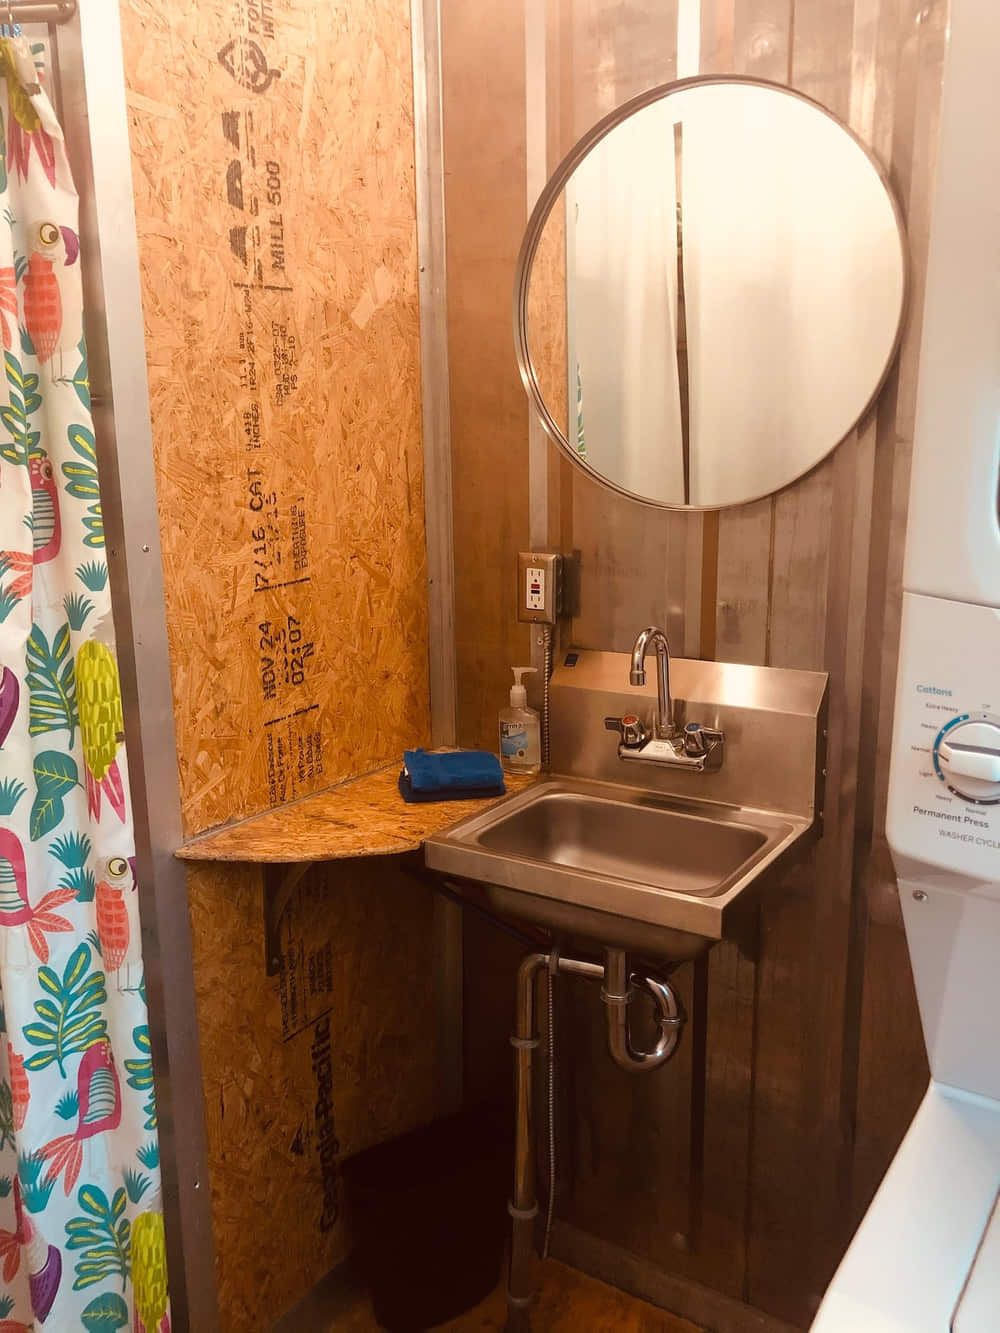
The interior side of this wall is where the washer/dryer unit and bathroom fan are located. The bathroom is basically open other than a small closet for a toilet.
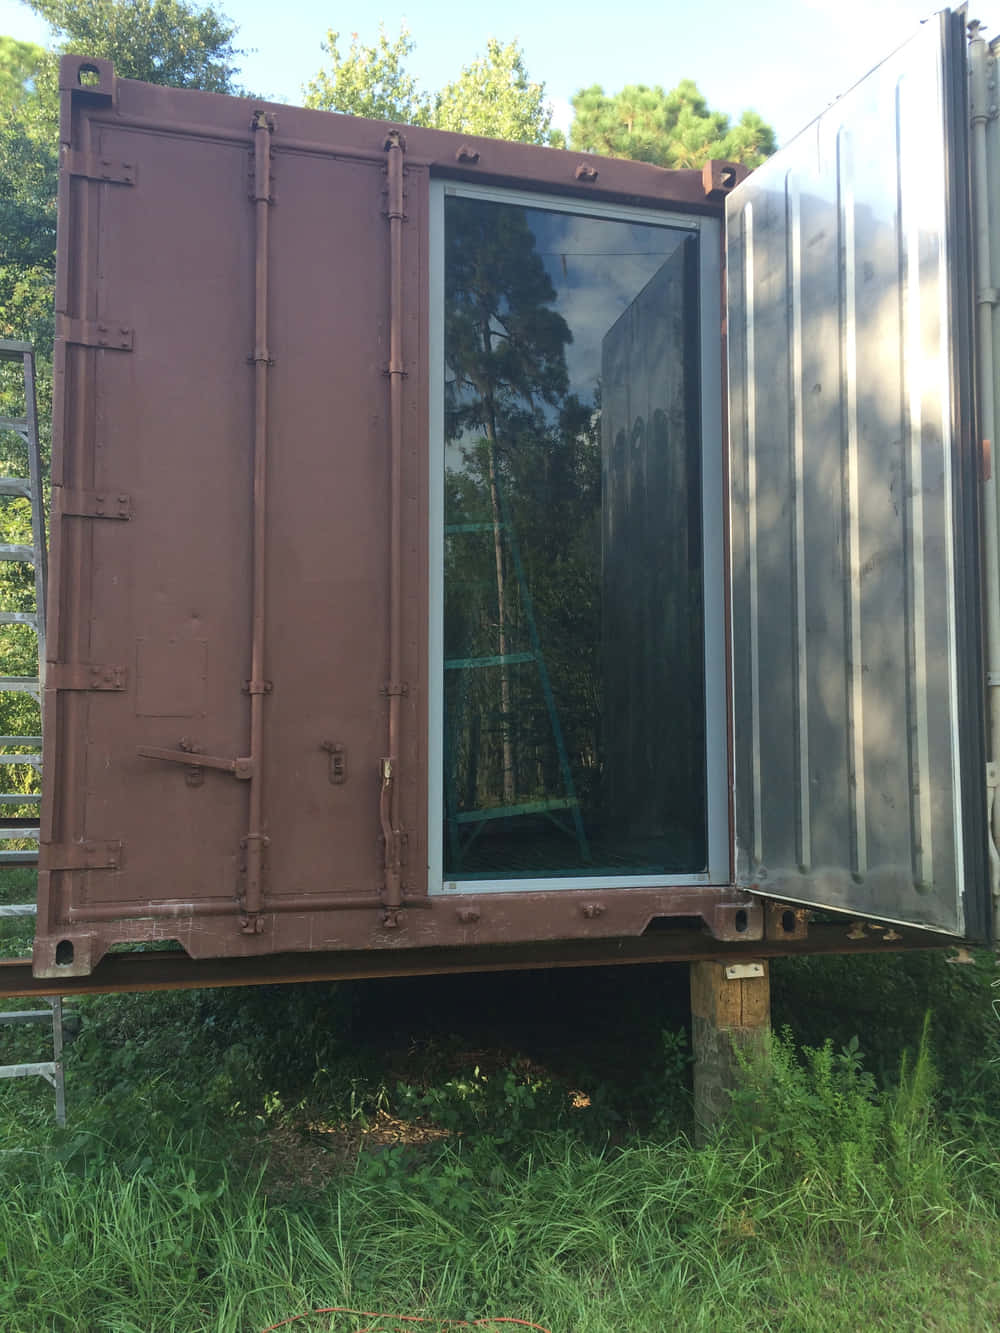
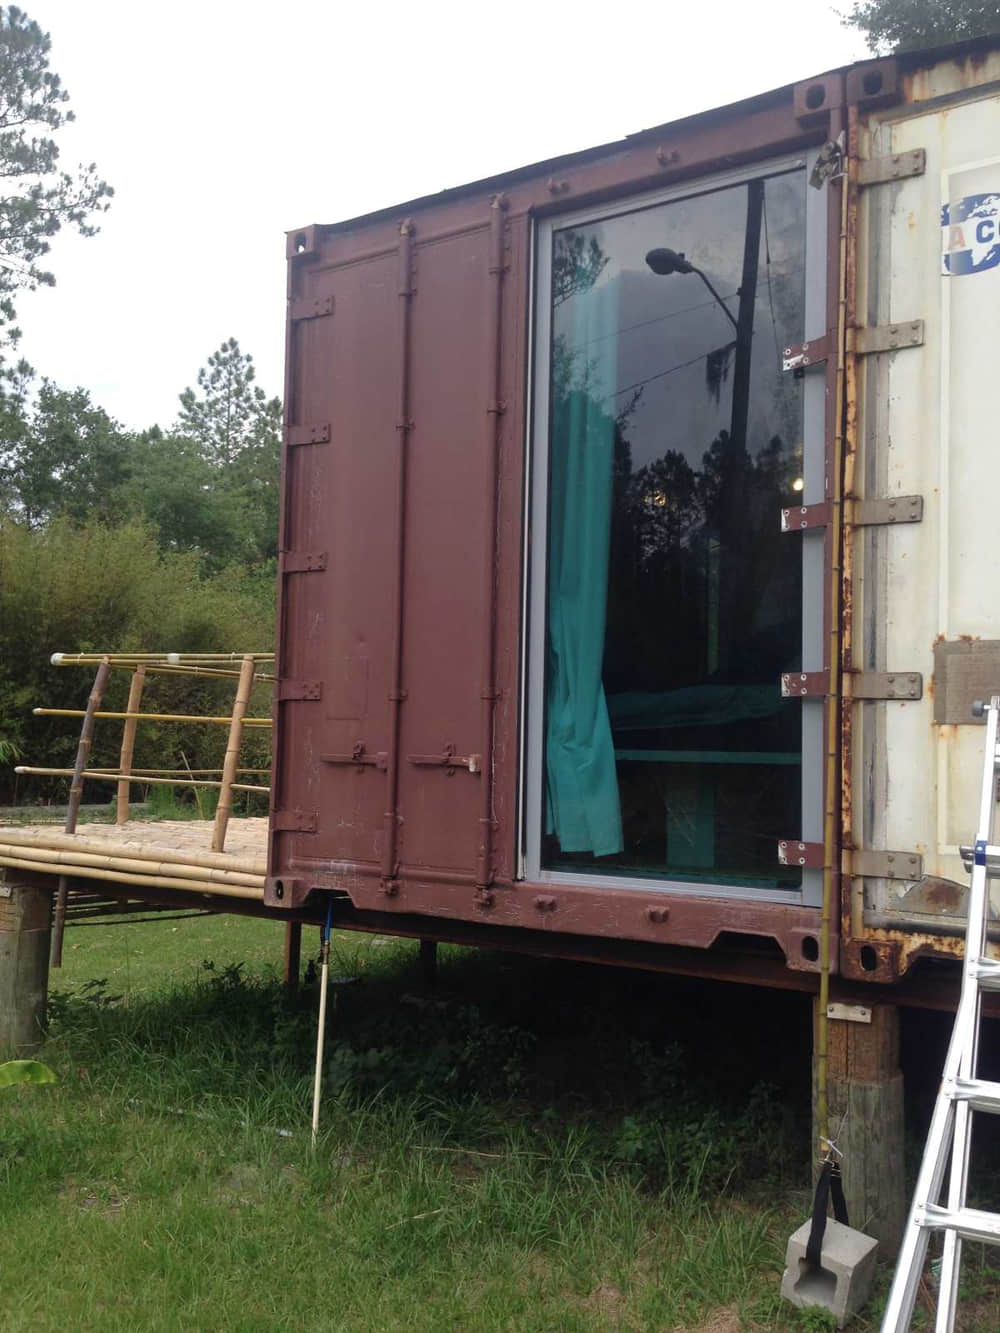
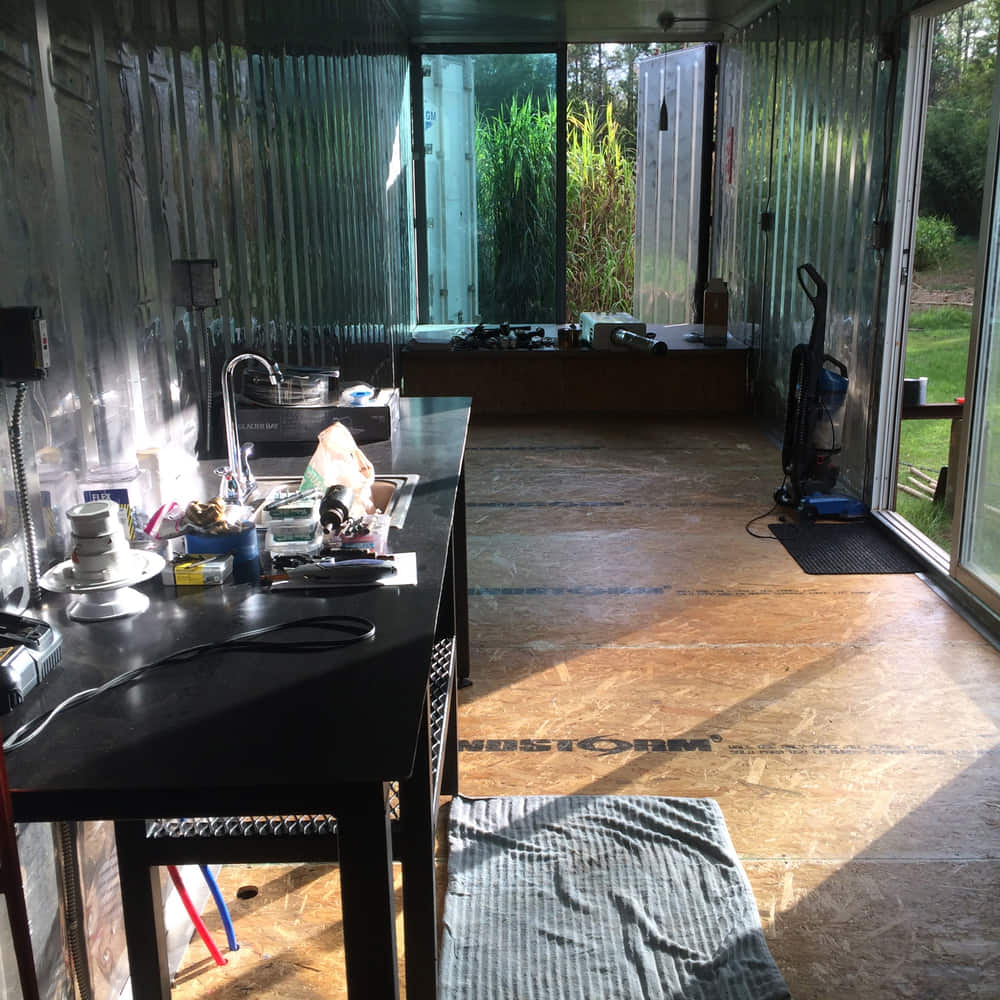
We put the bedroom area at the other end of the container where the two doors are normally located. One of the original container doors remains, while the other has been replaced by a floor to ceiling window.
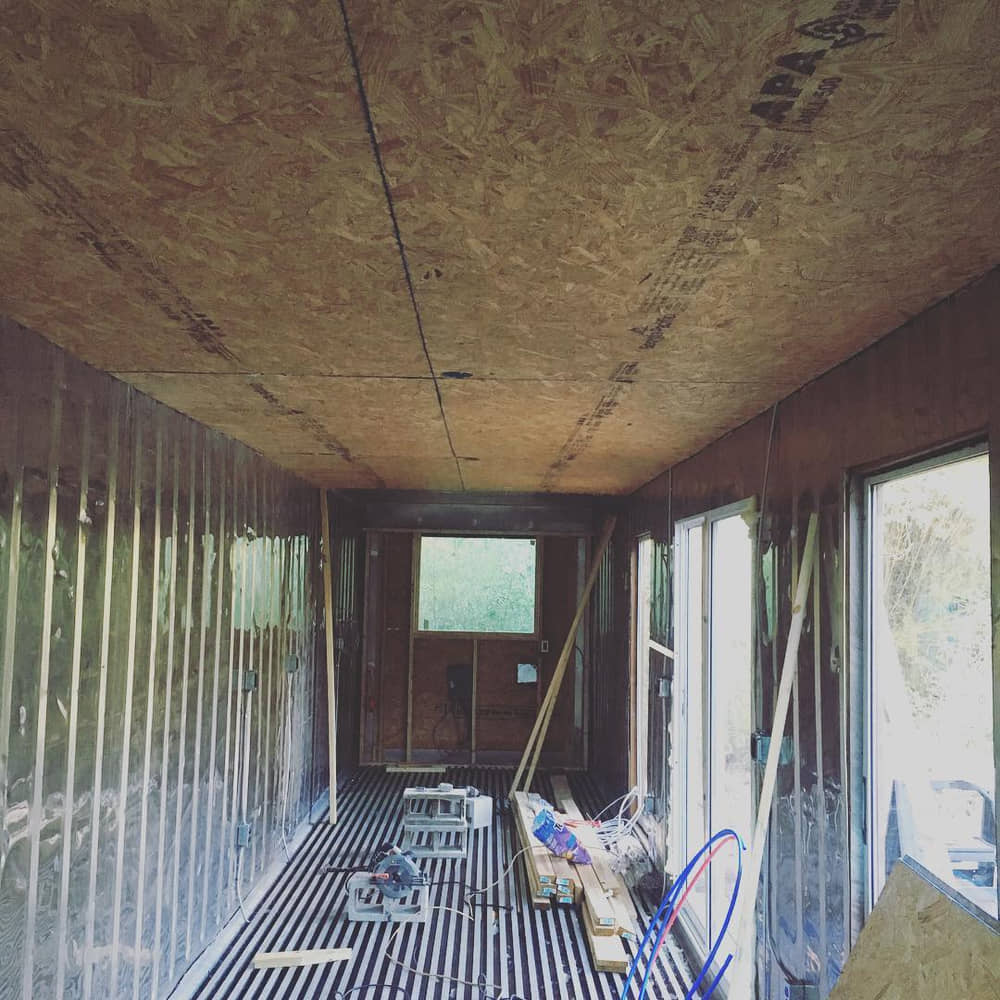
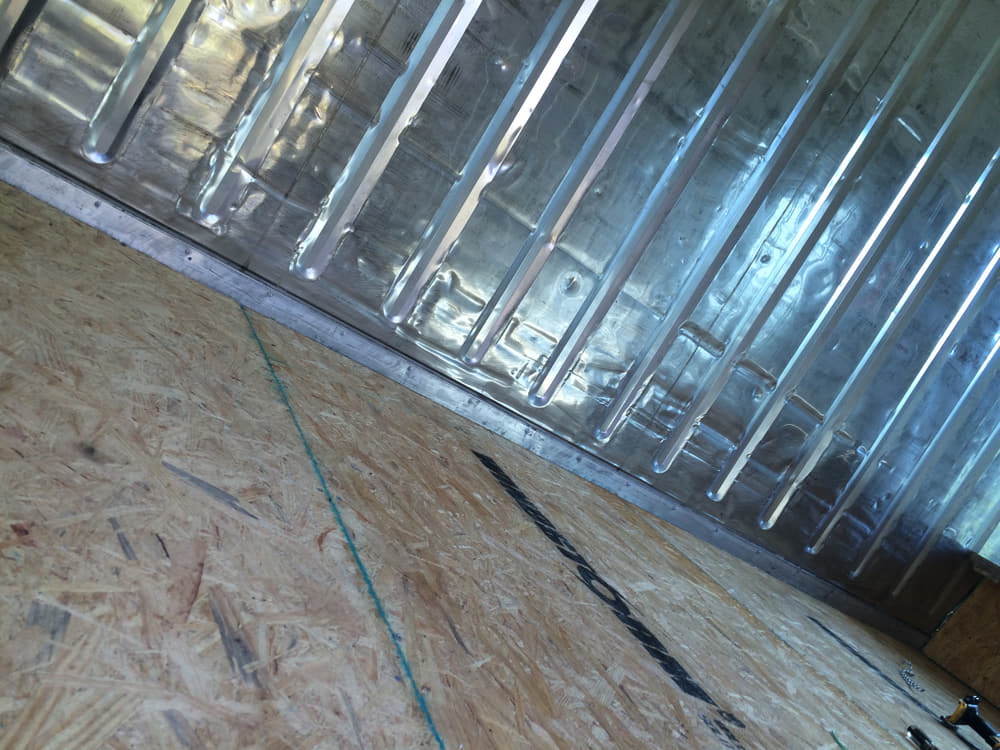
The floors of a refrigerated shipping container are aluminum T-channel which isn’t very useful for a dwelling. So, we covered it with Oriented-Strand Board (OSB) attached to the aluminum underneath and finished with a clear coat. The interior wall separating the bathroom is also covered in OSB to give a consistent look and for durability.
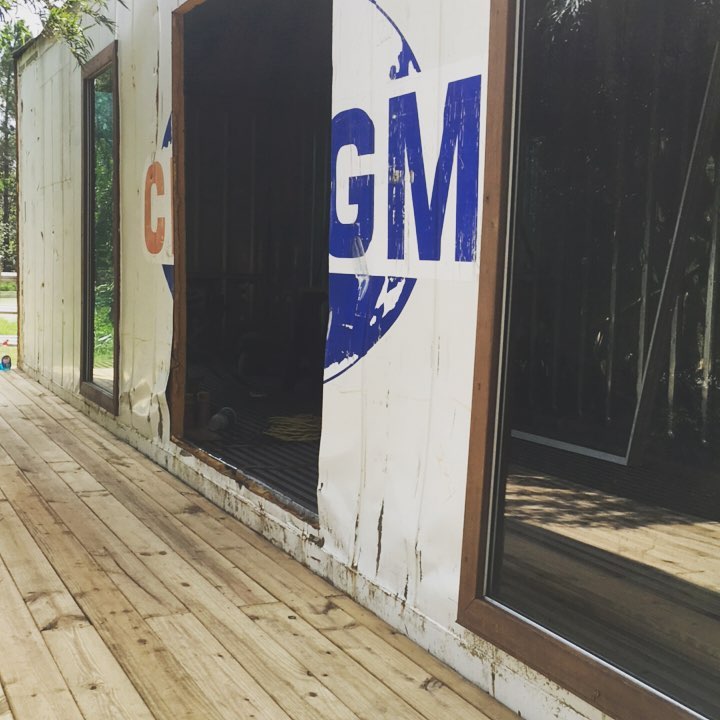
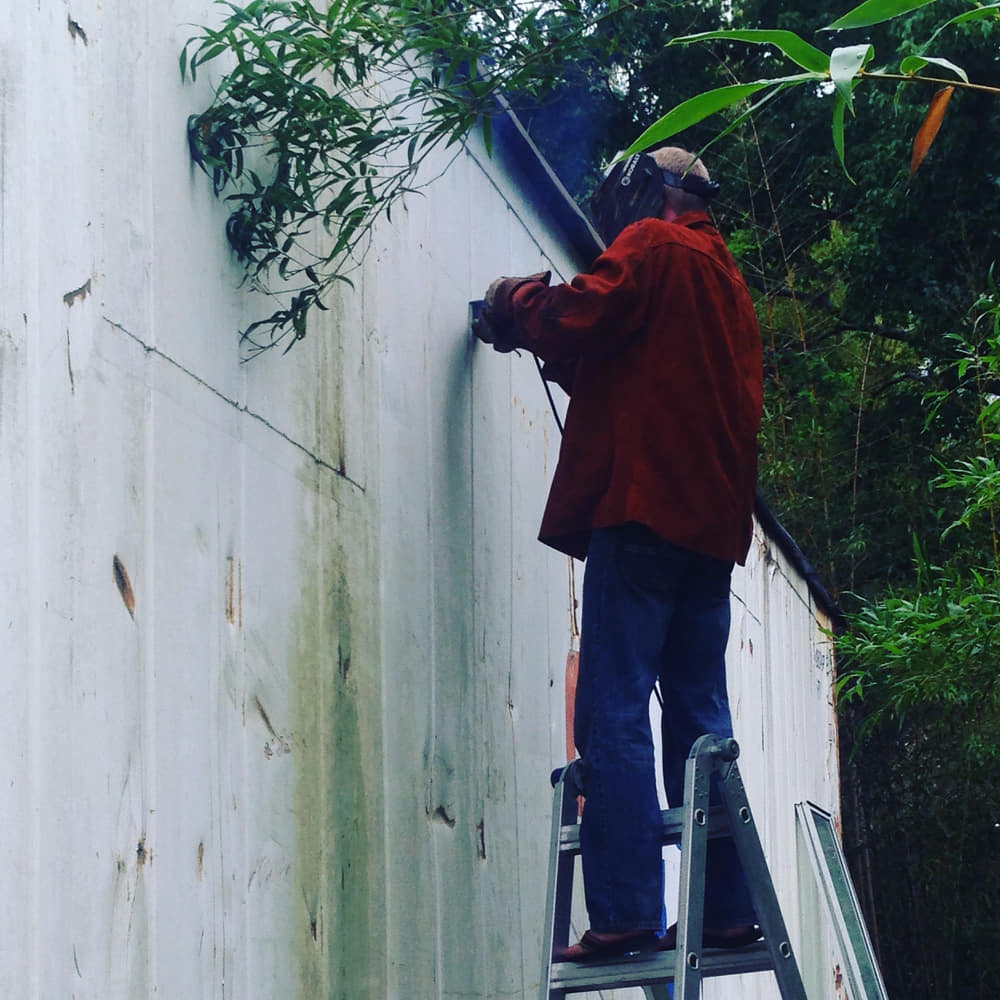
Despite having the end wall that covers the hole from the refrigeration units, our design did call for some cutting to make additional windows and doors in the sides of each container. The cuts were made with a grinder as well as a reciprocating saw with a metal cutting blade.
Cutting the refrigerated container walls was a bit tricky because they have flat metal inside the insulated wall sandwich that spans between the inside and outside metal surfaces. Our containers also had a bit of exterior damage that we had to cut around. After the cuts were complete, we framed around the door and window openings with 2×4’s them trimmed them with Ipe (Brazilian Walnut) wood.
I built the inside of the units to accommodate a bit of flex in case I wanted to move the container to another location. For instance, the shower walls are Hardee board covered with epoxy.
I wouldn’t say either container house is 100% finished, but then again nothing really is. I keep going back and making tweaks and adjustments on both containers. For instance, I want to change the roofs a bit to further cover the deck space and I have some additional trim details I’d like to do.
As far as the overall construction process, my situation dictated that it be completed in small increments. It ended up taking me a year to build each one of my two container homes. The timeline was drawn out due to a lack of both money and free time. If I had been able to work on the container houses 40 hours a week and had the money to purchase all the materials at once, I probably would have finished each of them in a month. Instead, I mainly worked a day here and a couple of days there.
Each container house cost me about $11k
- $4000 net for a 40 foot refrigerated container (Around $4250 minus what I gained from selling the refrigeration unit)
- $7000 for build out. About $5000 of that is construction materials such as wood for the deck. The other big constituent part is the contracted electrical work.
Note that the septic system and foundation system were already existing on the land that I already owned, so these aren’t included in the cost.
I had several months in between finishing the first unit and starting construction on the second one. This gave me a lot of time to sit with the first unit and also to get feedback from my guests. Everyone including myself has loved them, though there are a few changes and modifications I’ve made.
The second container house is very similar to the first one other than three small differences/changes. The 2nd unit has a slightly smaller shower. Due to the layout, a bigger shower means a smaller door into the bathroom. In the first unit, I added a washer and dryer into the bathroom, then built the wall and doorway afterwards. The washer and dryer couldn’t fit through the doorway, but my thinking was that in five years or so I could remove the bathroom wall to replace them. Well, two months into renting the unit the washer was broken by a guest and I had to have a repair man fix it on site. Luckily it was repairable in place so we didn’t have to take out the wall! Based on this experience, I made sure that the door to the bathroom on the second container house is big enough for the washer and dryer to fit through.
The second difference is related to the ceiling. My containers were purchased used and obviously had some damage here and there, most of which was cosmetic. However, I noticed after completing the second container that I had a small leak in the roof. This caused water to pool between the roof and the aluminium ceiling. After drilling holes to let the water out the ceiling still sagged. So we installed 2×4 beams that run up to the bathroom wall then we added an OSB ceiling. This means that the second container lost 4” in the ceiling height. I put elastomeric roofing over a peel and stick cover, so for now the leak is repaired. I will have to put a more durable roof on in the future as this is only a temporary fix.
The last major difference between the two units is the kitchen area. I found a huge stainless steel sink from a restaurant that also makes for a bigger counter and working space. In the first unit, the sink is really too small to live with longterm but it works great for short term renting. I wasn’t worried about the size of the sink because my son (who eventually will get that container house) is not someone who cooks and most people who rent from us don’t do a lot of cooking either. The larger sink in the second unit is more suitable for long term living, but I still love the layout of both.
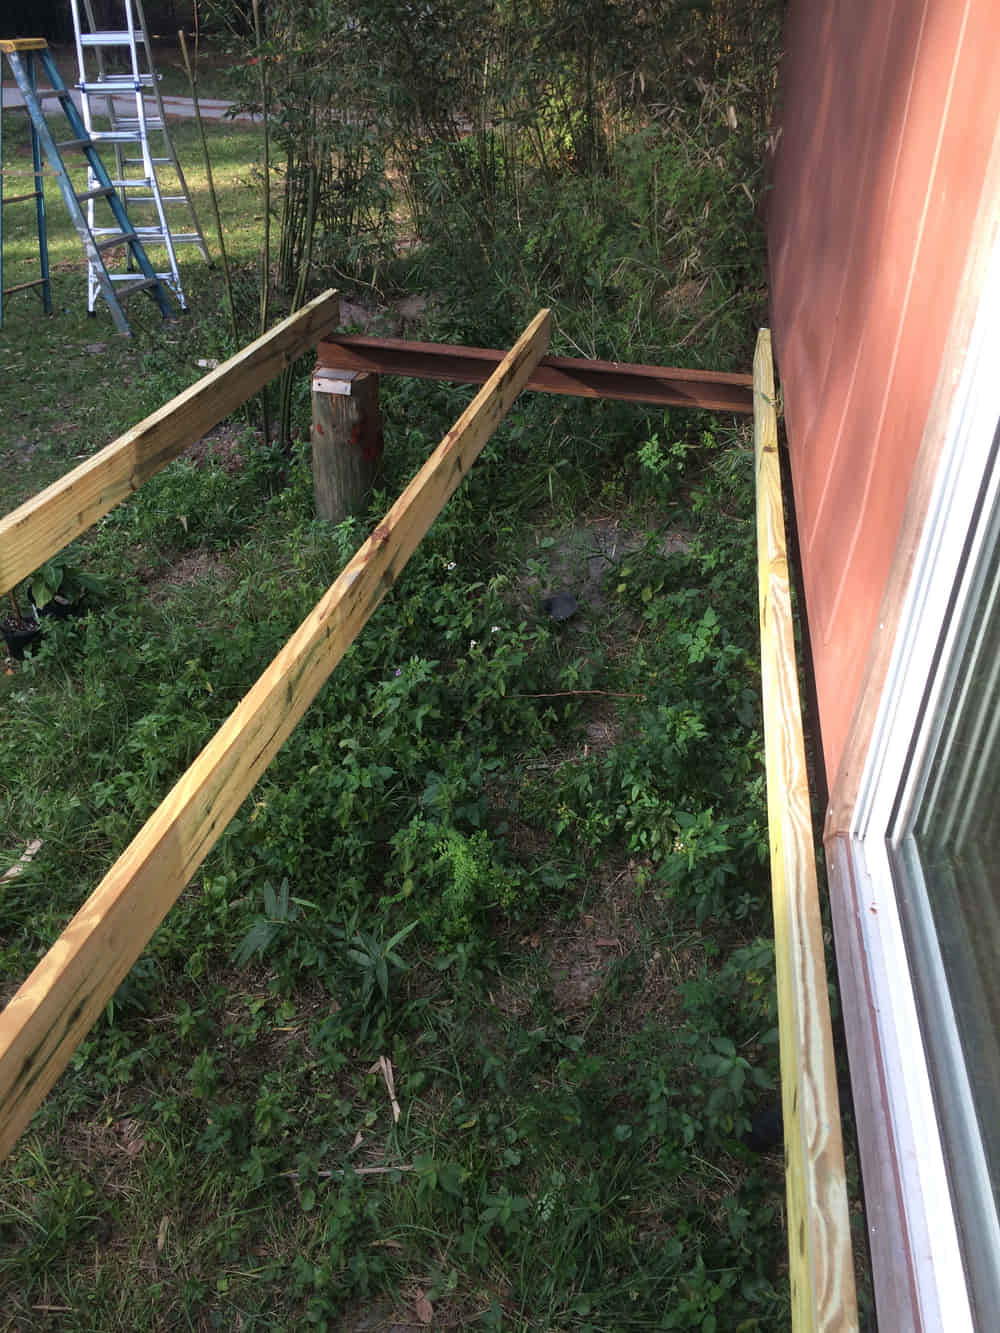
I mentioned earlier that I placed the two container back to back on the steel beams that were placed on top of the buried telephone poles. The containers were physically touching each other, and pretty early on I realized that you were able to hear from one to the other.
After finishing the first container I decided that the second one had to be moved. I still wanted room for a deck so I estimated that 16” of separation was my magic number. We again lifted one container with a crane and moved it 16” out from the other container, still parallel and facing away from each other.
I am now attaching foam board to the outside of the containers to further muffle any sound, but I think adding the space between them did the job. The lesson learned was to not put containers back to back and touching, even if they are insulated. This is more specific to my situation of having each container be an indepedent living unit, and not two parts of one larger unit.
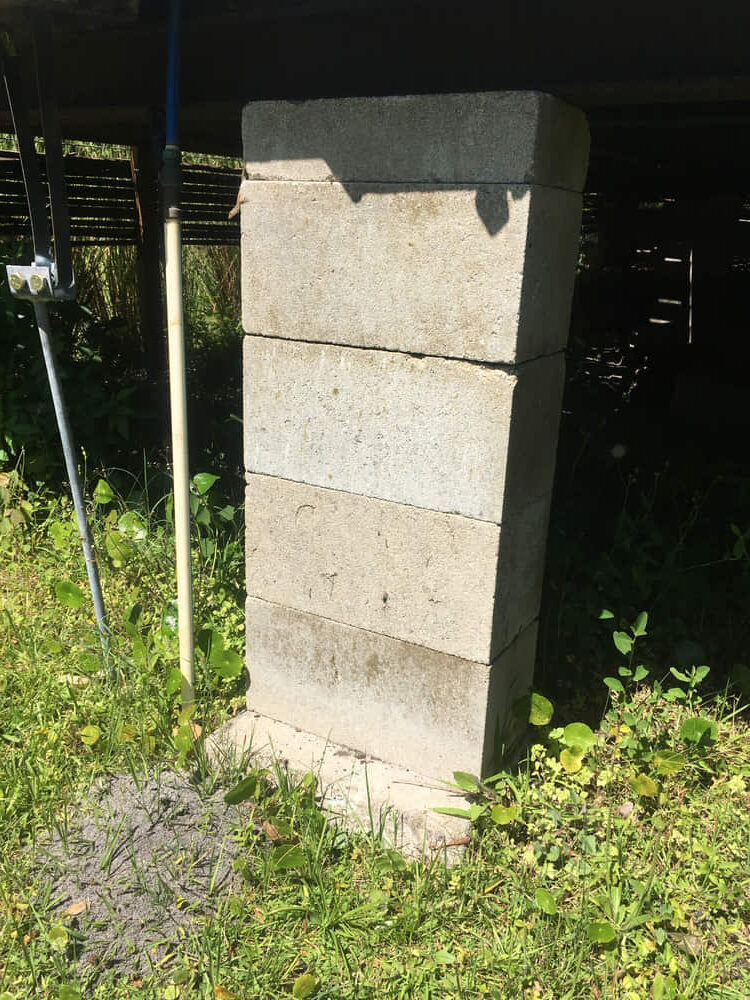
The steel beams I mentioned earlier that held the containers were not quite big enough for the job and so a few months ago I devised a solution. We jacked up the containers and built supports with concrete block in the same way you would support a trailer or mobile home. This has worked really well so far.
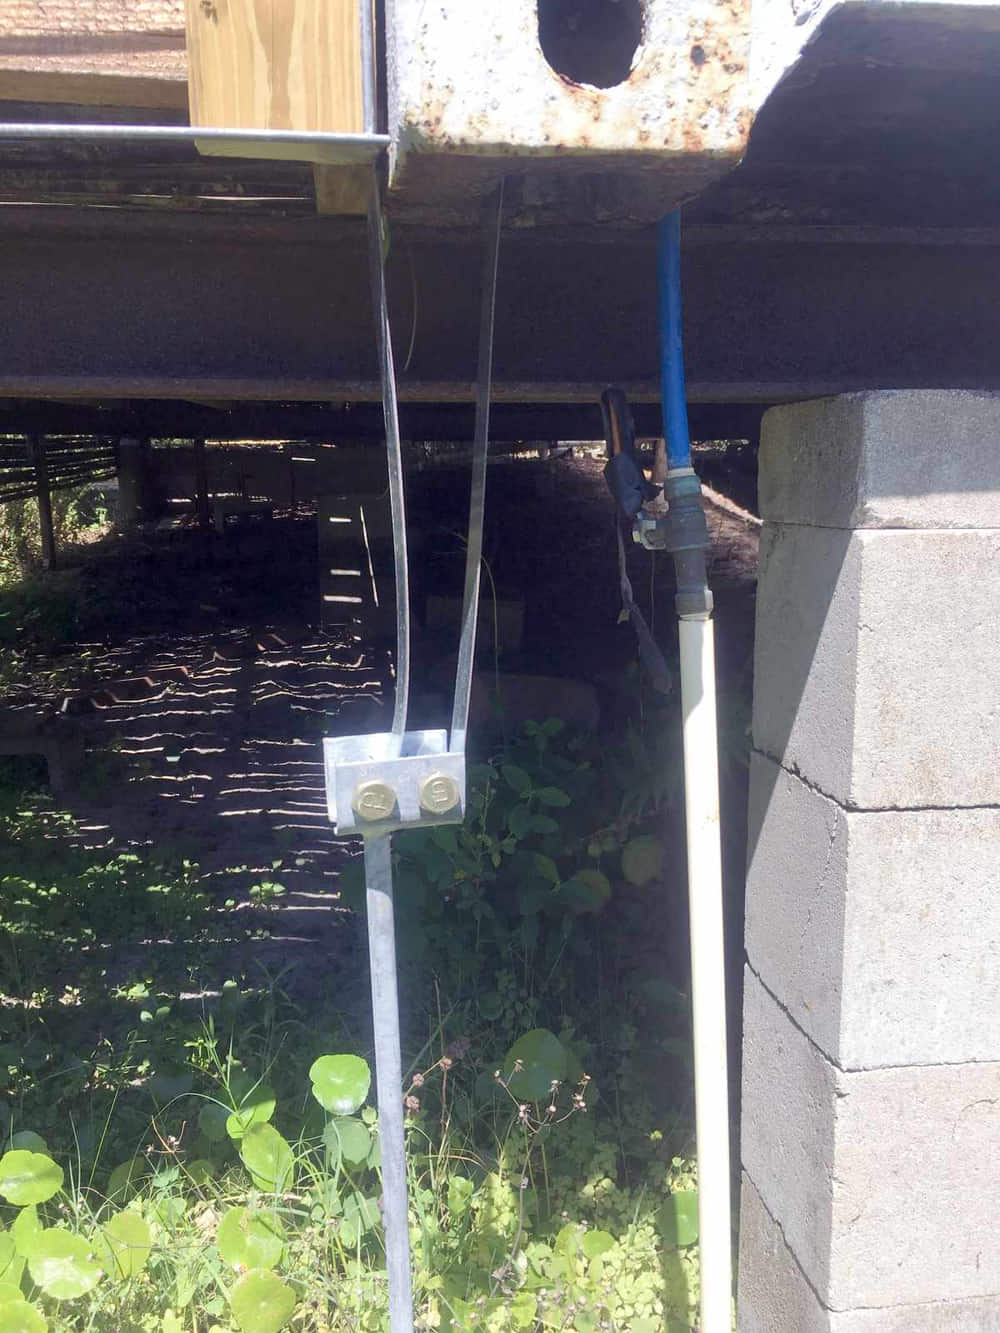
We do tend to have extreme weather here, so I’ve made a few adjustments to account for that. In case of lightning, I had my electrician install grounding straps from the containers to a grounding rod driven into the ground. I also decided to install hurricane straps that are wrapped through parts of the containers and secured to the ground. The containers are quite heavy and probably not in danger of moving but I like everything to be extra safe so I added the strapping just to be sure. I even had people stay during the hurricane last year and I had no worries about their safety.
I love renting these units! The extra cash has been a blessing and it’s been easy to incorporate the customer service into my life. My two container homes are single units so they are 320 SF each and are the perfect size for short term rentals. I am only housing 1-2 people in each unit, which makes for easy clean up and a quiet atmosphere. I also don’t allow pets in consideration of people with allergies and this also helps with keeping the space clean.
A lot of people comment that the units feel bigger than they expected and I think this is because the floor plan is so simple and open. I’ve been renting them for about 1.5 years now, and I have people contacting me to come stay again. Clearly, the container houses are working out well for both me and the guests. Containers are durable and the refrigerated units with the stainless steel walls are quite hard to damage. I used wood and metal for my build out for extra durability and less maintenance.
Given that I live on a bamboo farm and rent shipping container homes, I tend to get interesting people as guests. I host a wide range of people, some passing through and a few who are interested in building a tiny home or container home of their own. Most people are interested in the uniqueness of the spaces and the surroundings of my property.
I use Airbnb exclusively for my rentals and on average have about five unused days per month. After the cleaning fees, local taxes, and Airbnb fees, my container rentals are comparable to a one night stay at a local hotel (although I recently raised my rate a bit as I now have WiFi and Smart TV’s in each unit).
I prefer to have shorter stays as I like having people come and go, so I don’t give discounts for longer stays. People on short stays are mainly focused on activities and tend to not be as focused on building imperfections. Also, I collect more cleaning fees with short stays, and I think it helps with staying fully booked. I believe that places are to be used.
Thanks to Shanti for sharing her story with us. While most people use plain containers for their container homes, Shanti showed some of the benefits of using a surplus refrigerated container.
Update: Shanti appears to have sold one of her container homes, so only one Short Term Rental container is shown in the Airbnb link in the Contact Information.
Interested in Container Homes? You need our FREE cheat sheets to help decide if containers are right for you!