Elements
Size
Age
Levels
Note: Map location may not be exact. Click to open in Google Maps.

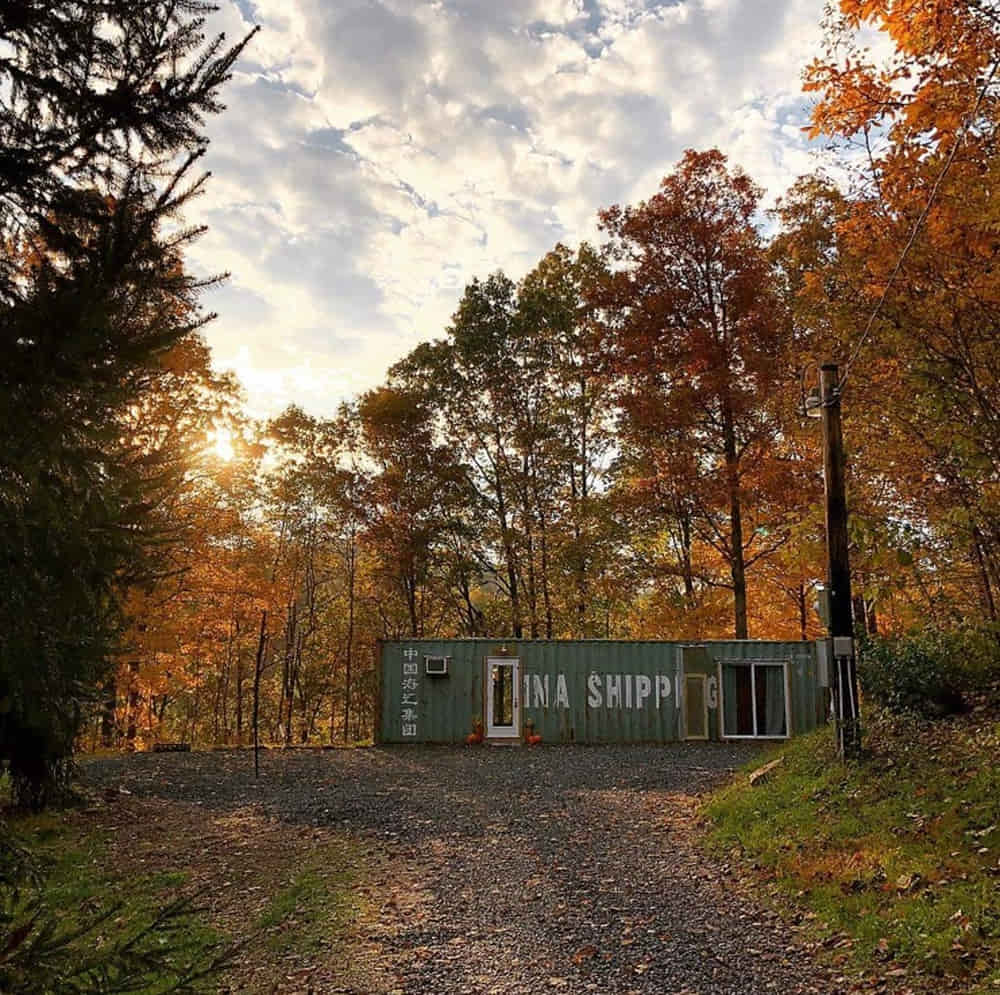
What do you do if you have an amazing piece of land for a short-term rental, but want something a little different than the competitors around you? If you’re Ryann, you look to a shipping container home.
We’ve all been sitting around with friends, thinking about good ideas and saying “one of these days, I’m going to do that.” Only, Ryann actually followed through on her idea and didn’t let obstacles like financing or a difficult to access site get in her way. Read our interview with Ryann below to find out how building her fun container cabin rental, Riverside Hideout, was a family affair that is paying dividends.
We own a piece of Ohio property near the Tuscarawas River that I knew would be great for a short term rental. The property has a view of the river and is near to hiking trails, canoeing, and several lakes.
Our proximity to Amish country has inspired several others to offer barn-style tiny house rentals, and I found myself brainstorming with coworkers one day about doing something similar. However, I knew that I wanted something out of the ordinary and unlike the other rentals in my area. Part of the goal was offering something that would be an experience for guests and was a destination in itself.
I ultimately chose a shipping container as the basis for my design. Compared to some of the alternatives I looked at, a container home seemed a bit cheaper, offered more interior space, and allowed me to create the layout I wanted.
I did all the research into container construction myself, then created the design including the room layout and associated “engineering”. Most of our materials were bought locally or at resale stores. The actual build was accomplished on free evenings and weekends by my family: my sister, brother-in-law, father, mother, children, husband, and I. We did not pay any outside contractors.
We are a family of builders and are confident in our construction abilities. My parents do various types of construction: everything from homes to homewares (including things like tractor beds, playhouses, and rocking horses for our kids). My sister and brother-in-law gained their experience by remodeling an RV camper inside and out.
My family members just have a lot of experience with building, and I thought this was a project we could accomplish together. It wasn’t easy, but we did it.
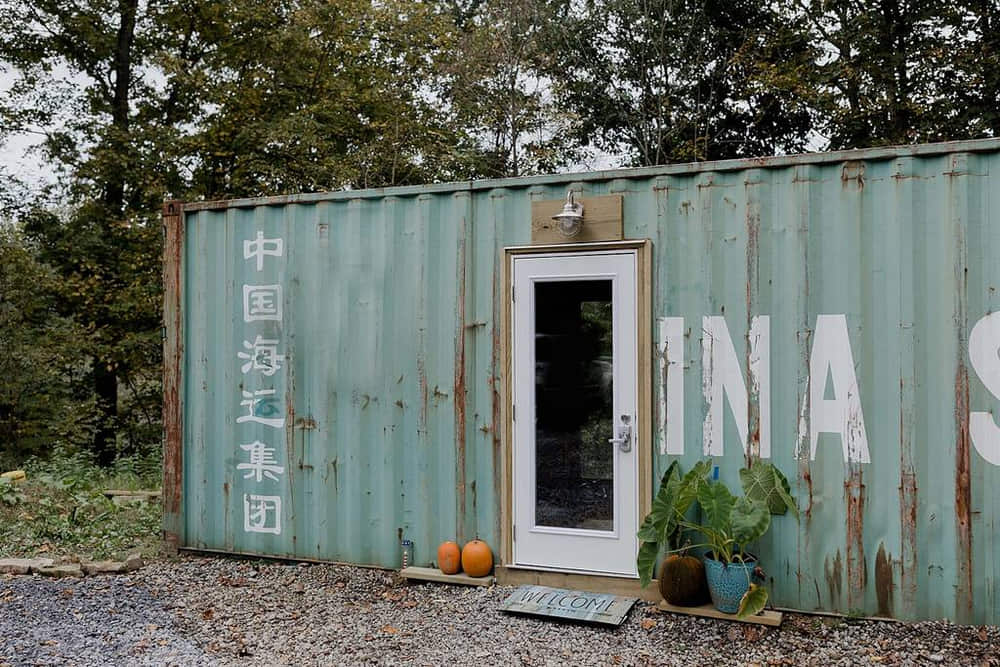
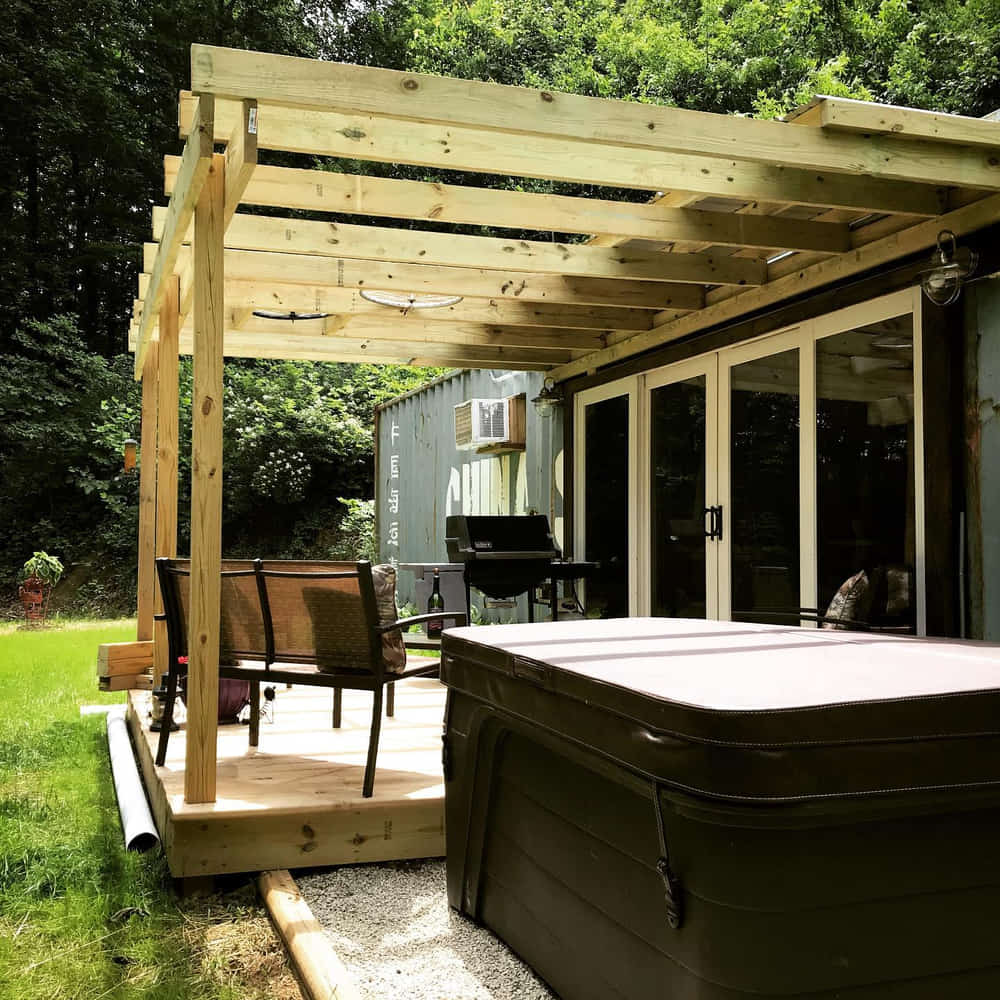
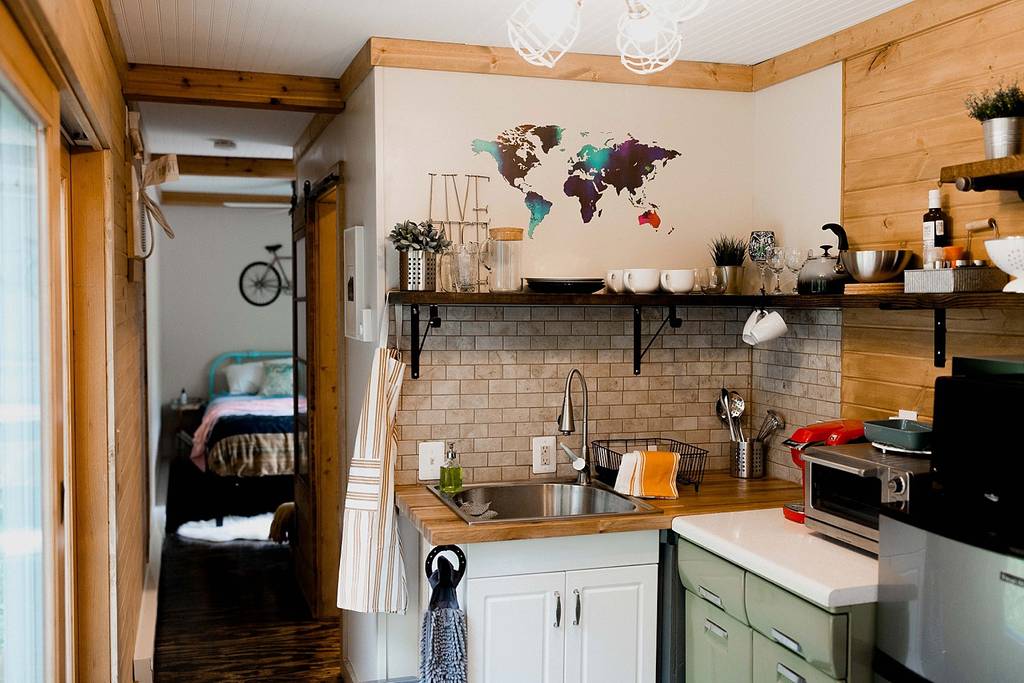
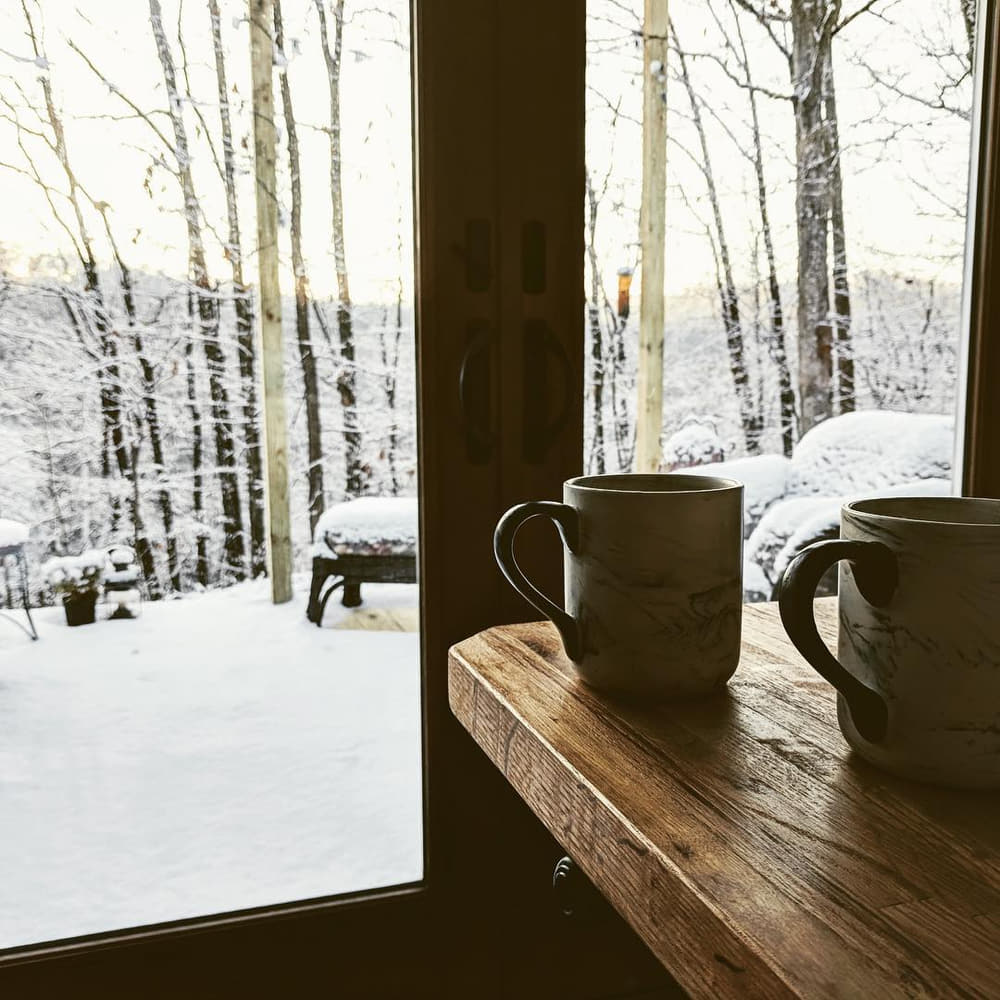
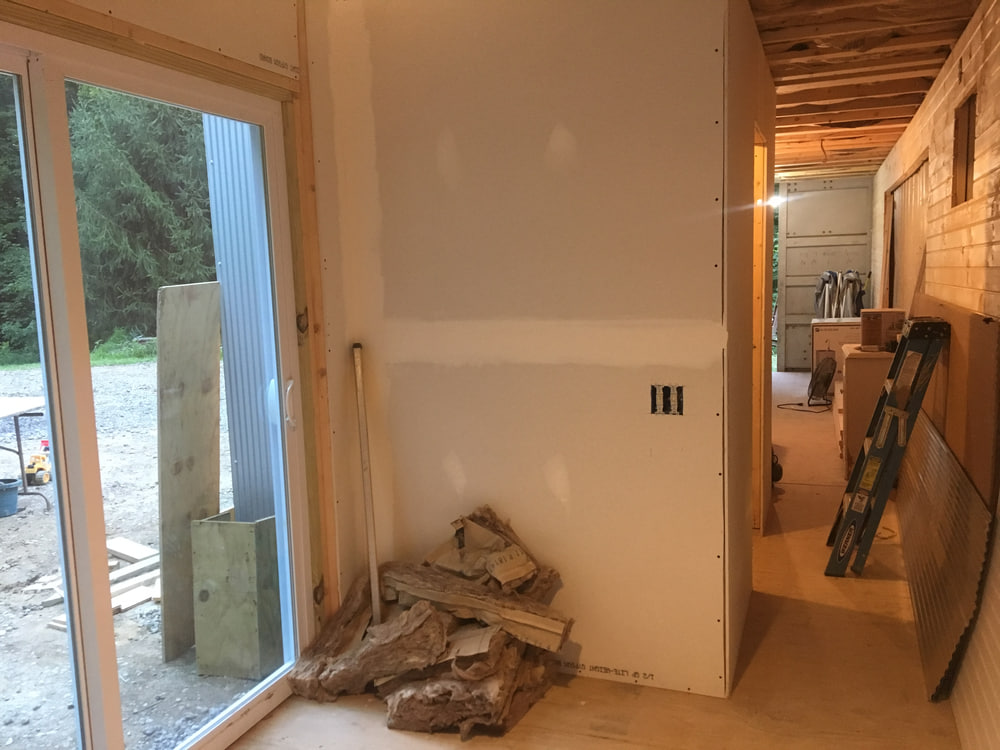
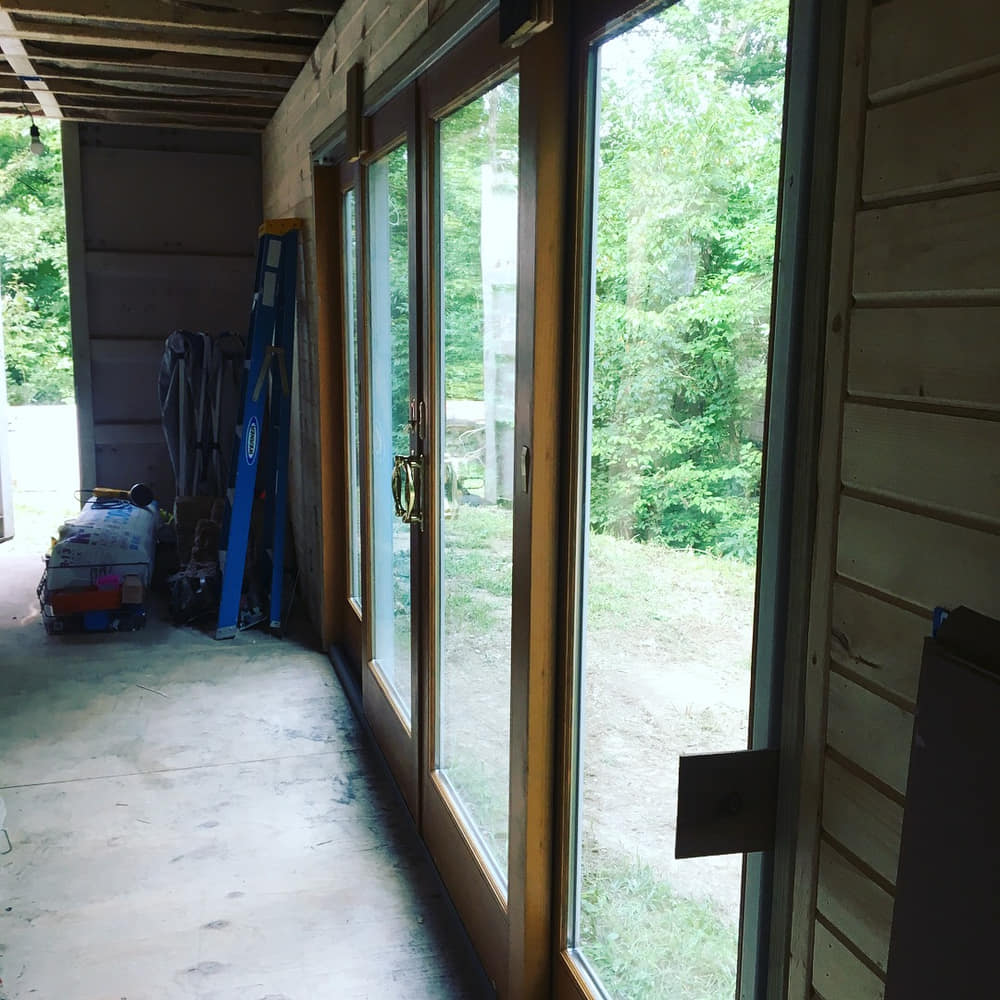
Our container home was purpose-built as a short term rental using a 40 ft high-cube container. While I did include some storage and hanging space, it’s probably not enough for someone living there full time. An interesting thing to note is that the house doesn’t have any windows, only a number of glass doors that given plenty of natural light and outdoor views.
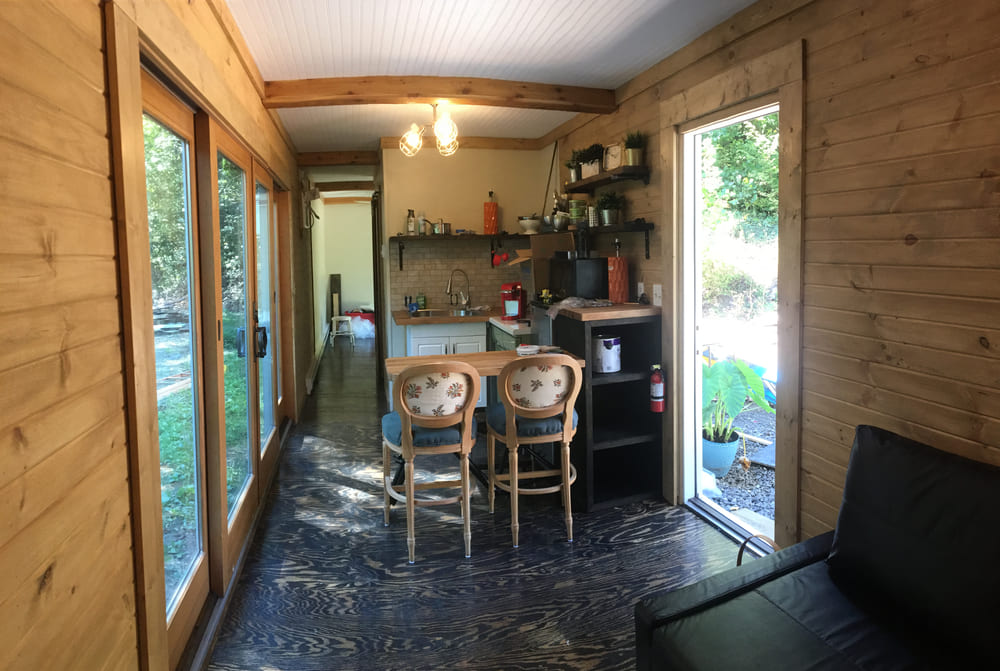
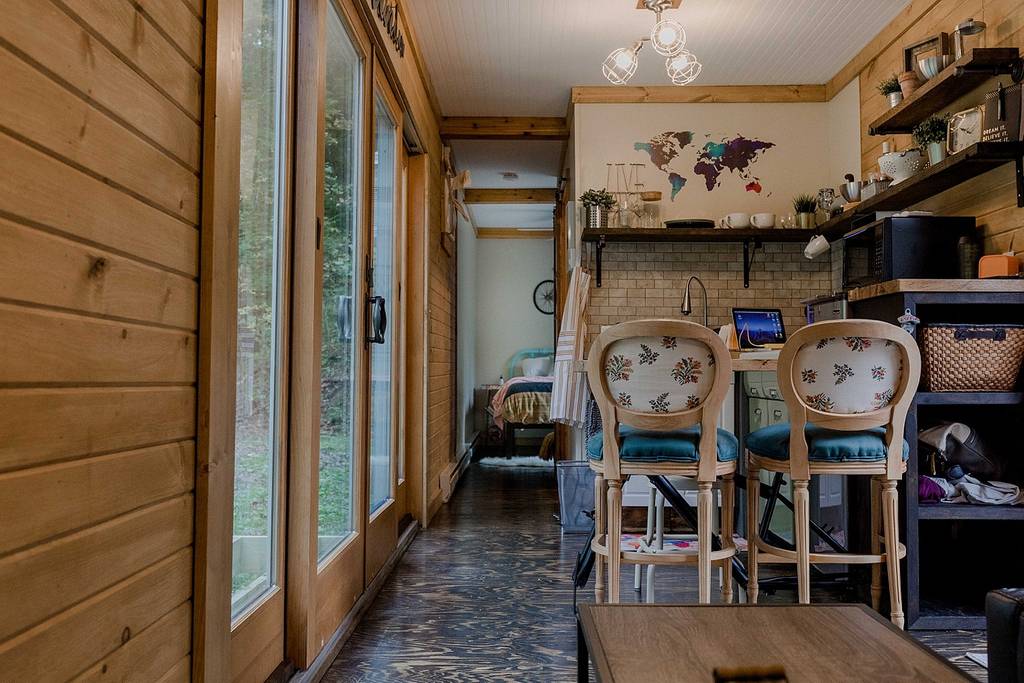
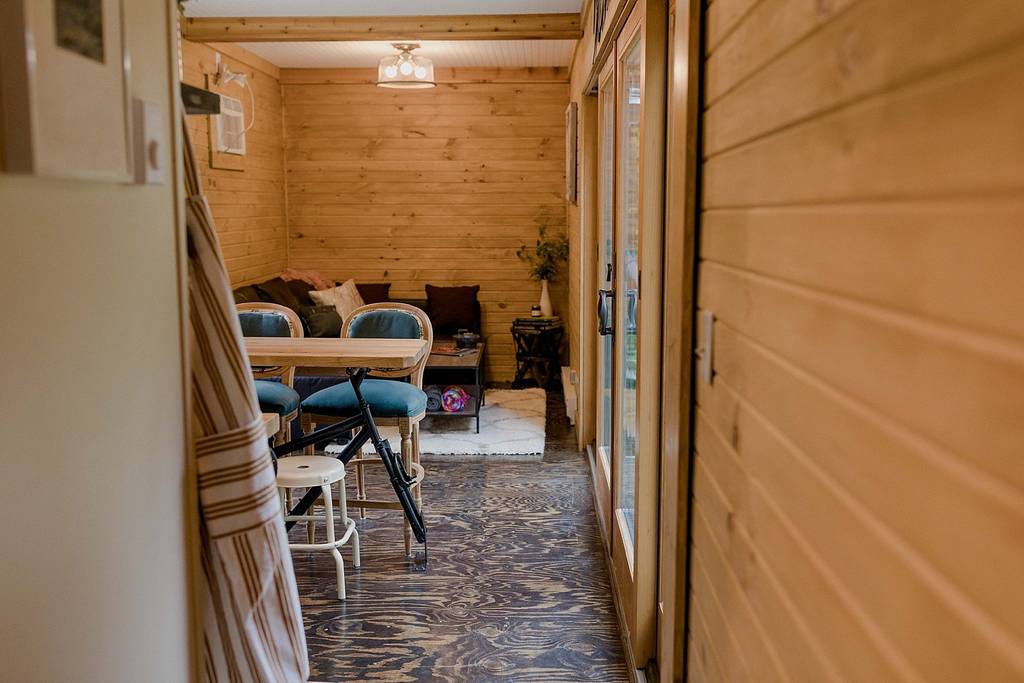
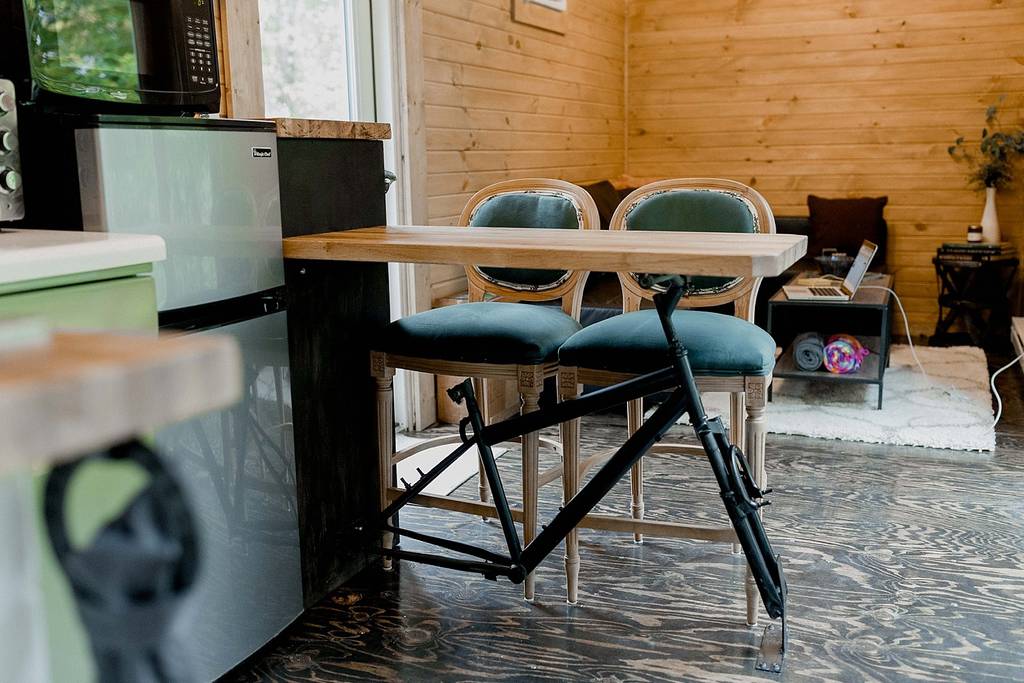
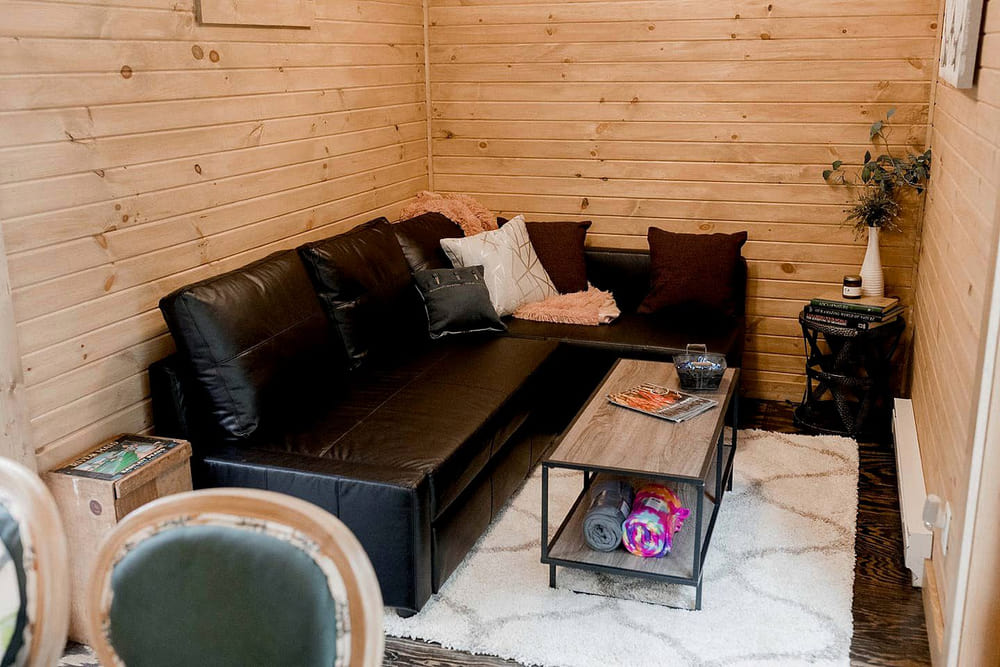
One end of the house has a living room with a queen-sized fold-out couch. It’s a cozy place to sit, with great views out the back of the house through the sliding glass doors.
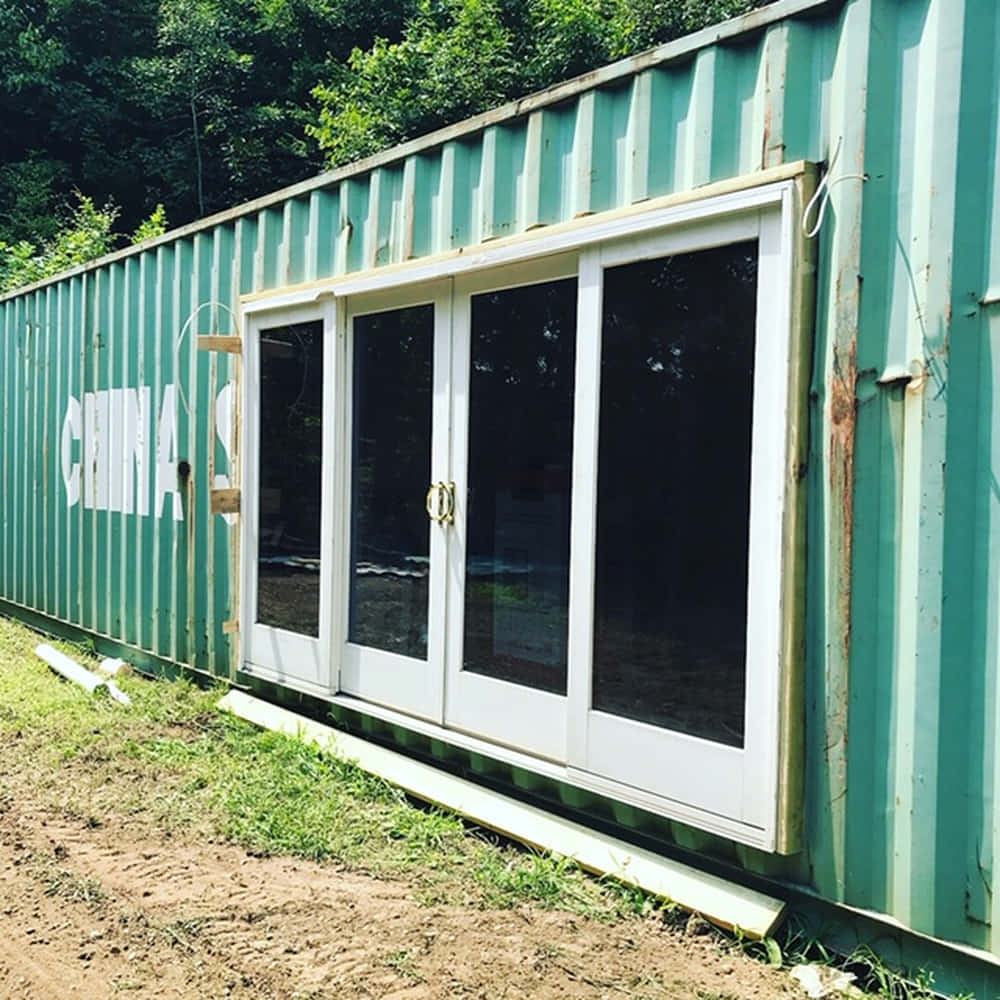
Given our location, we expect guests to spend at least some time outdoors. The gateway to the outside is the back deck which is accessible via the huge, double sliding glass doors bordering the living room and kitchen.
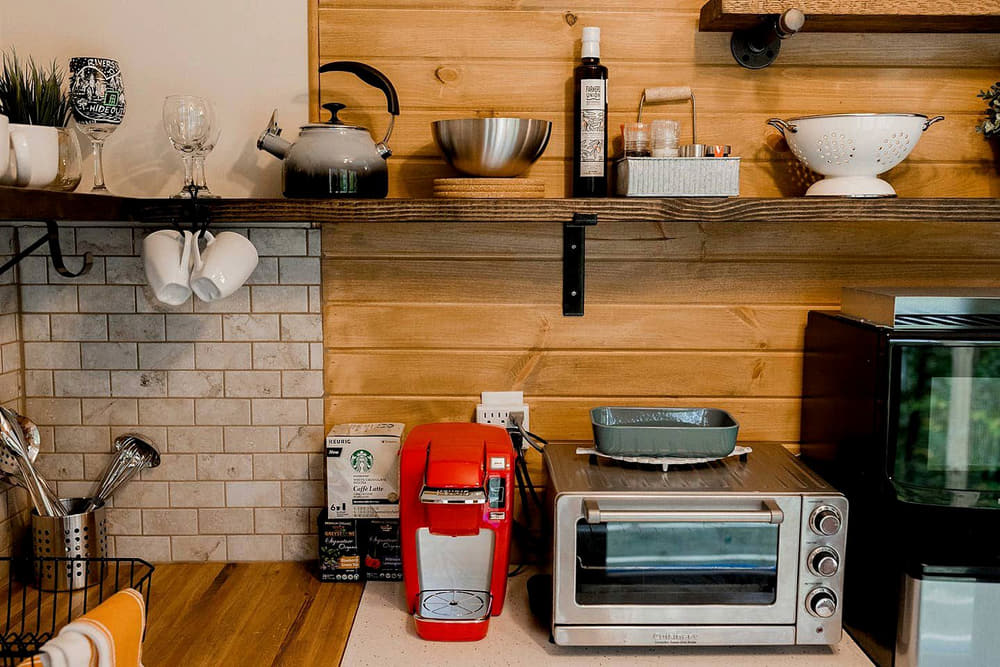
The open kitchen includes 12 feet of open shelving along with a handful of drawers, cabinets, and countertop spaces. An important feature we incorporated is a locking cabinet that holds cleaning supplies, towels, and sheets.
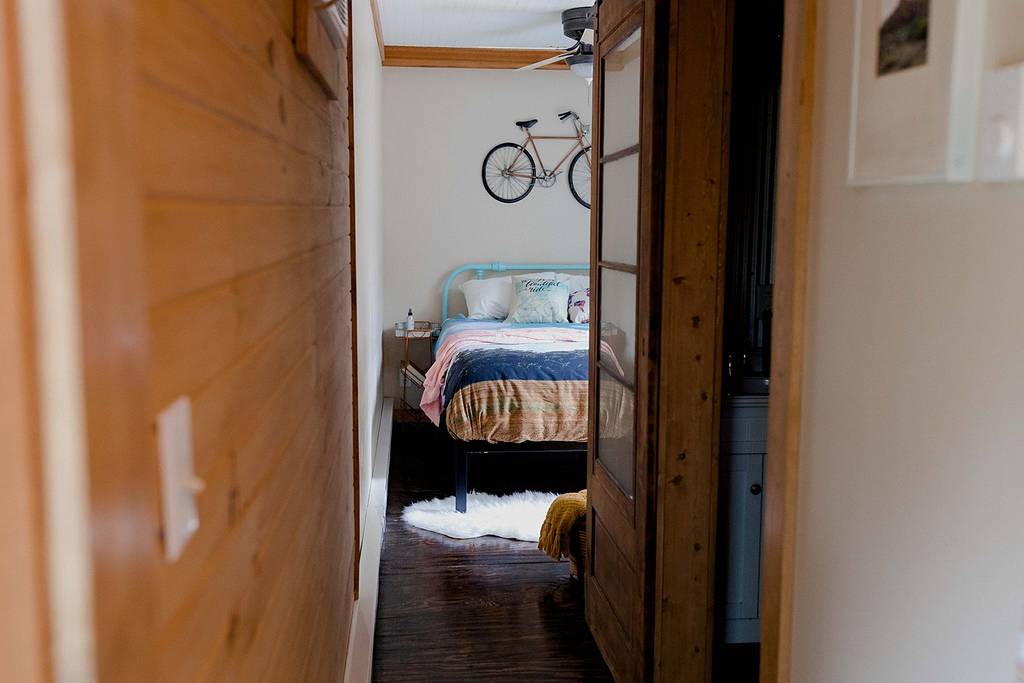
I also really like the two-person bar area we created with a countertop supported by an old bicycle frame.
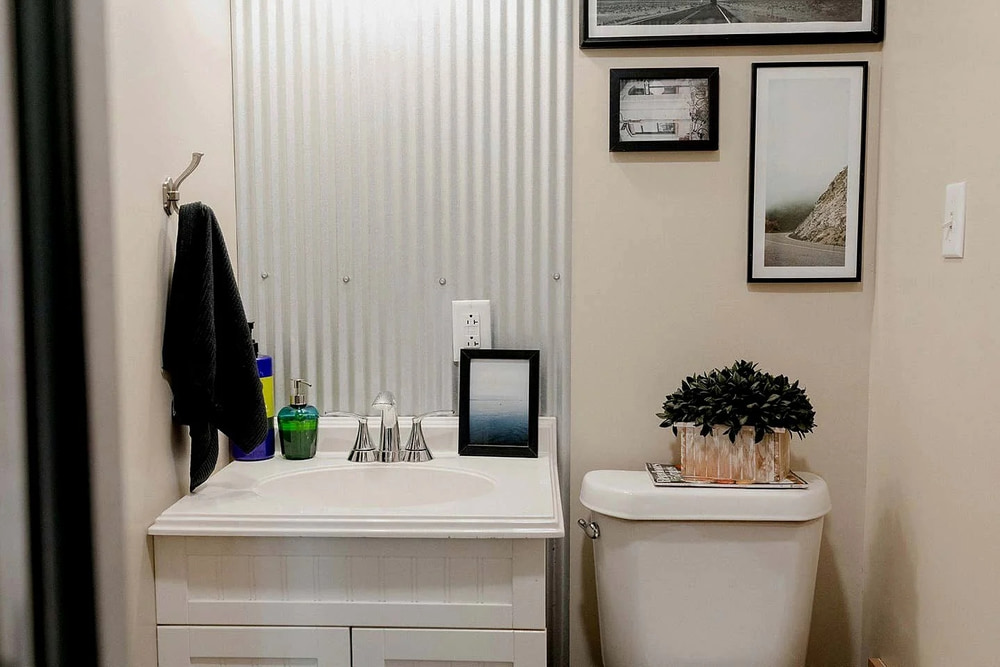
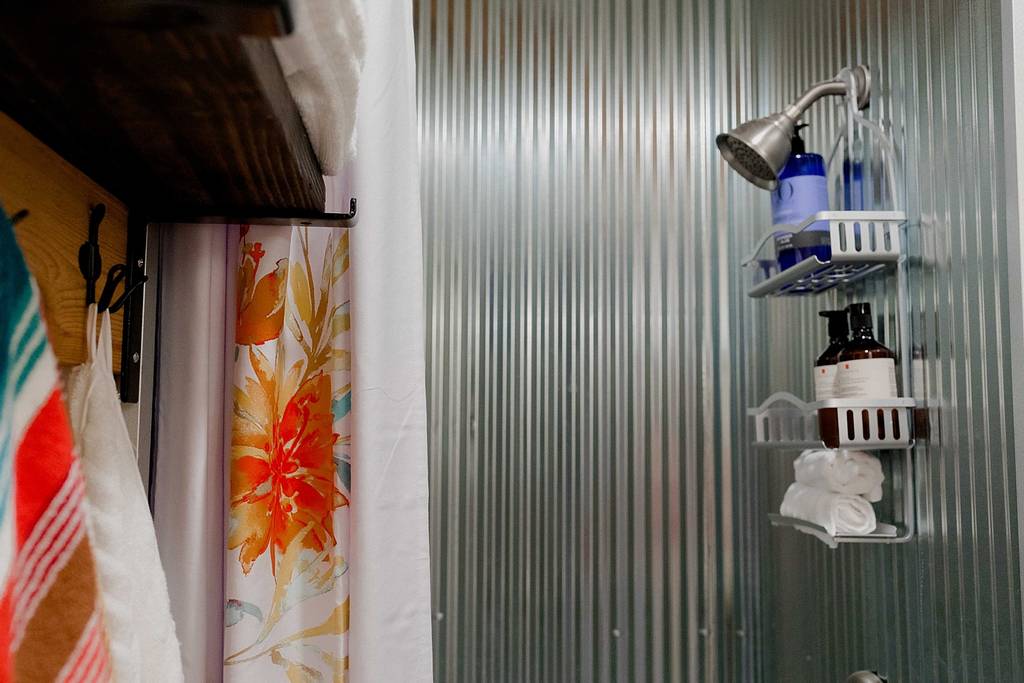
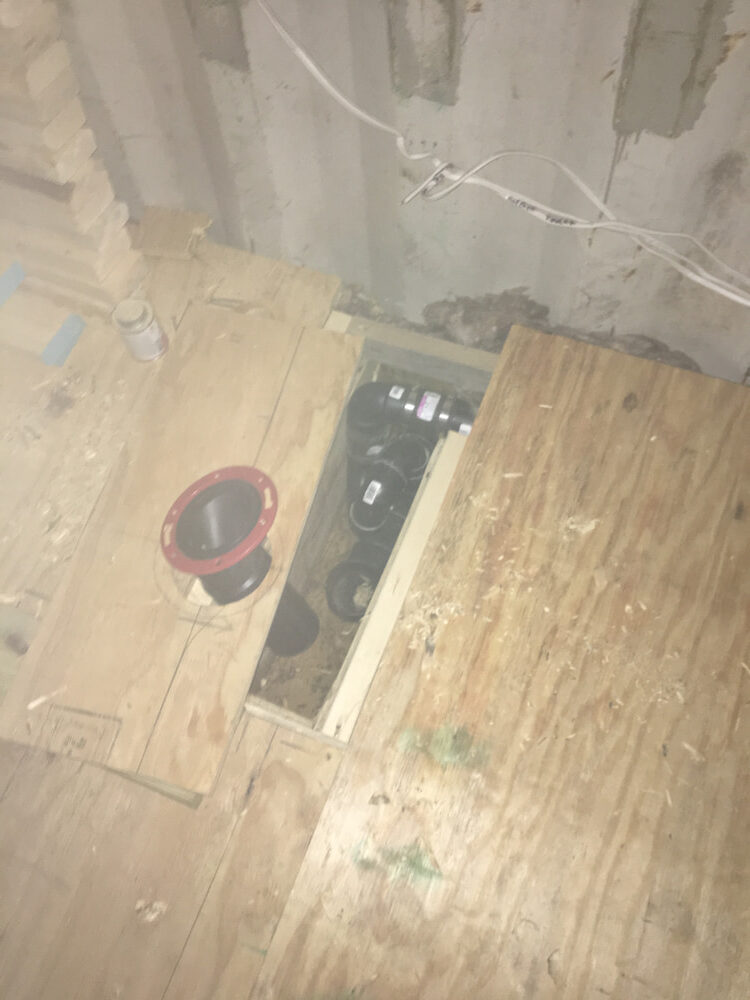
Past the kitchen is the hallway bathroom that has a corrugated metal shower surround and is accessed via a sliding barn door. I laid out the container so that the plumbing was condensed to one area and not against the outside wall to prevent freezing pipes. Therefore, the bathroom and kitchen plumbing both go through a shared interior wall.
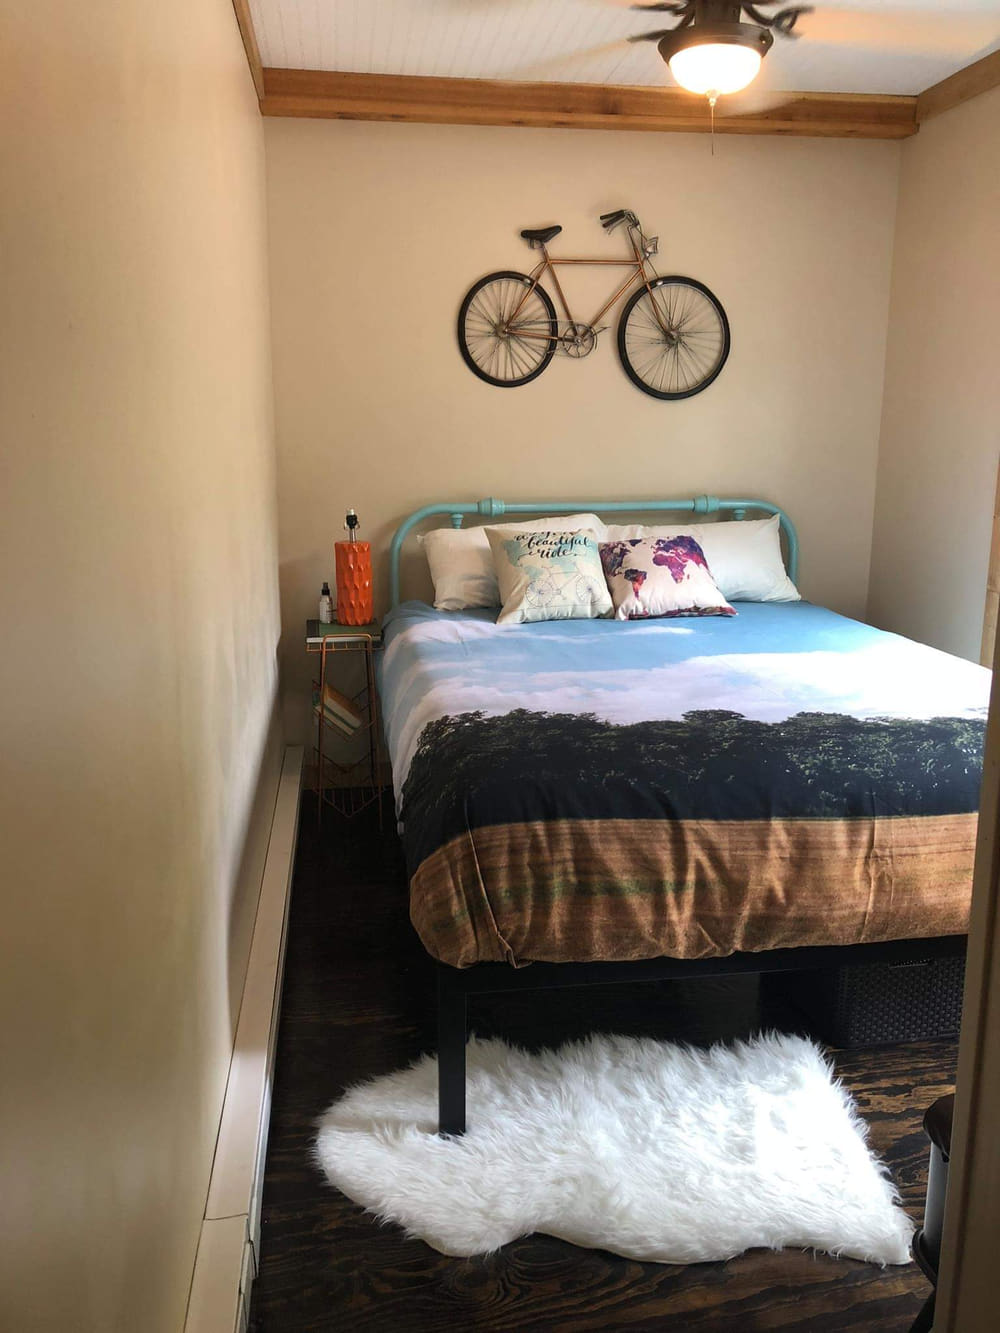
After the bathroom is the simple bedroom. Given that we usually only have two guests at a time, we decided not to use the additional space of a bedroom door.
The house is climate controlled with two wall air conditioners as well as electric baseboard heaters.
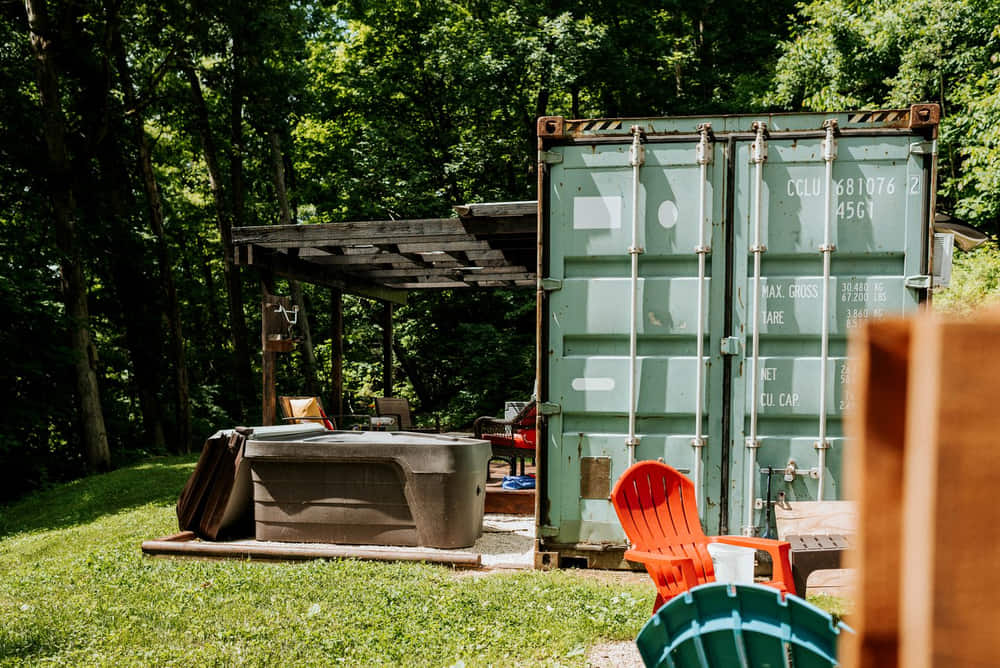
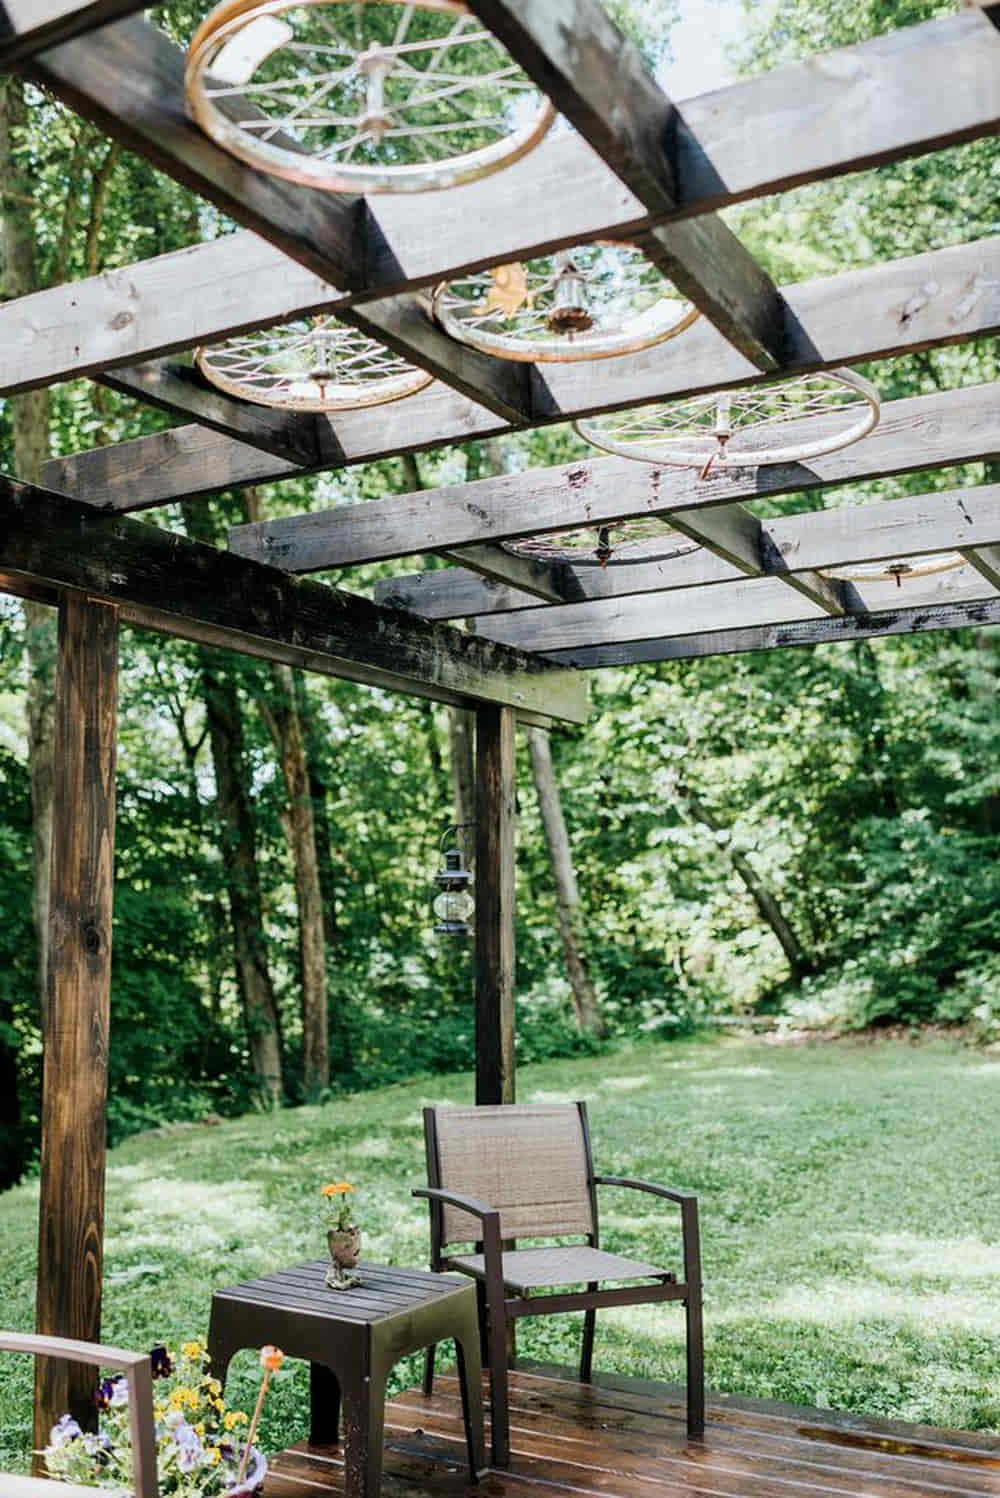
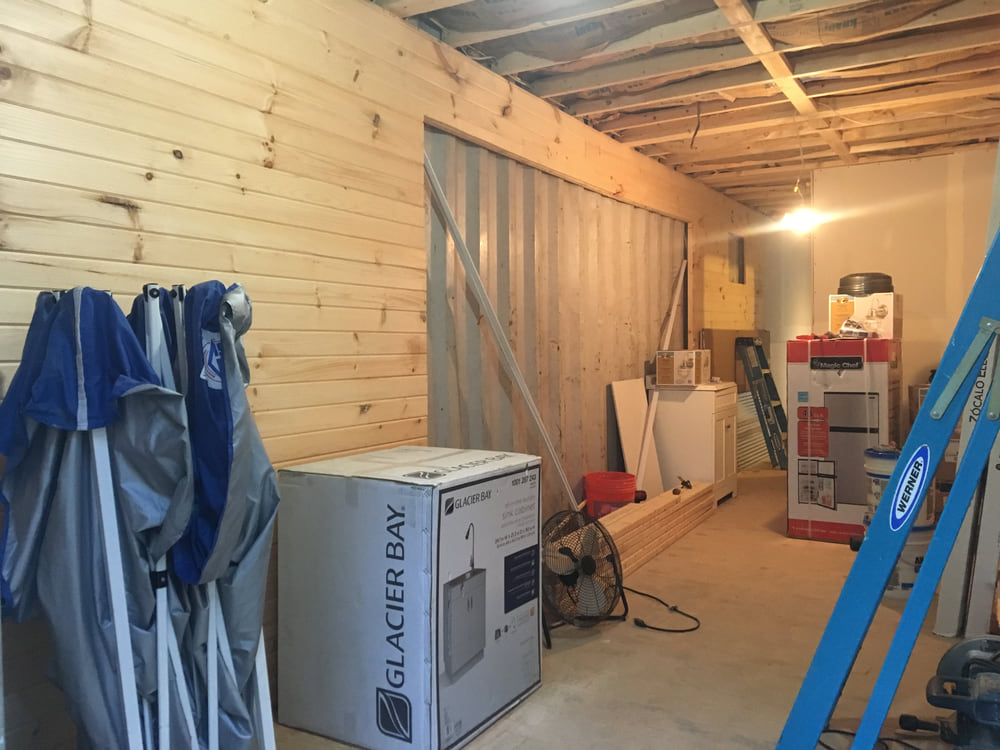
While the container rental is open for business, we do have some improvements in mind. One upcoming addition is a pergola (made out of bicycle rims) over the deck. We’re also planning to build a small overhang that shelters the front door entrance using corrugated metal we salvaged from the container cutouts. Later we’ll be adding rough cut cedar to trim out the exterior side of the doors, and we even have a good amount of landscaping in the works.
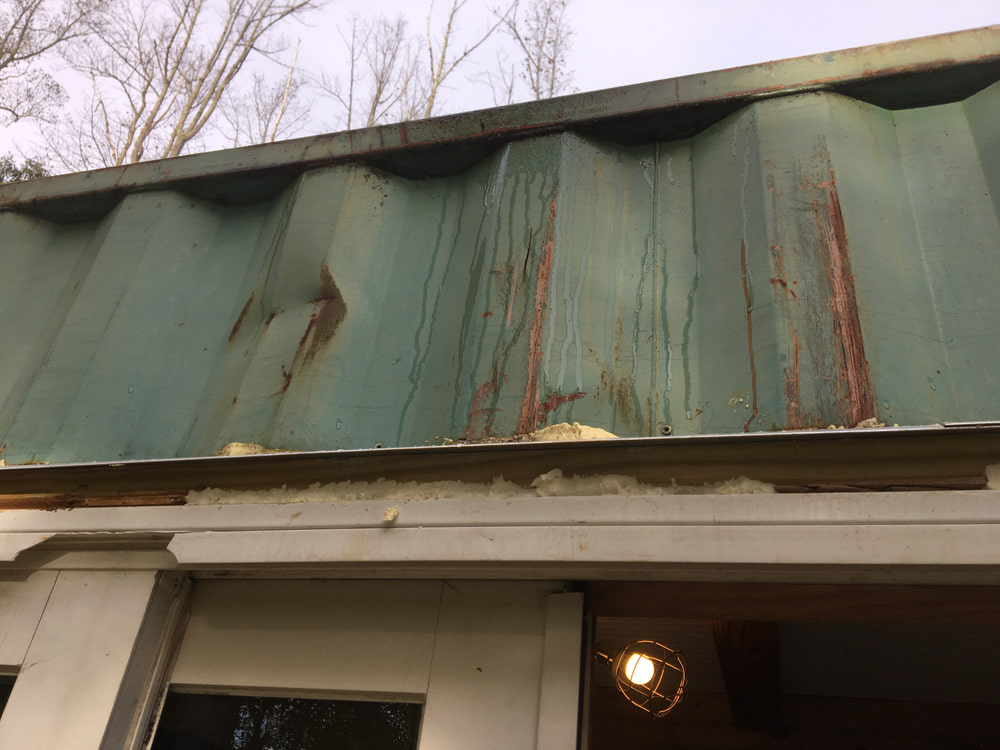
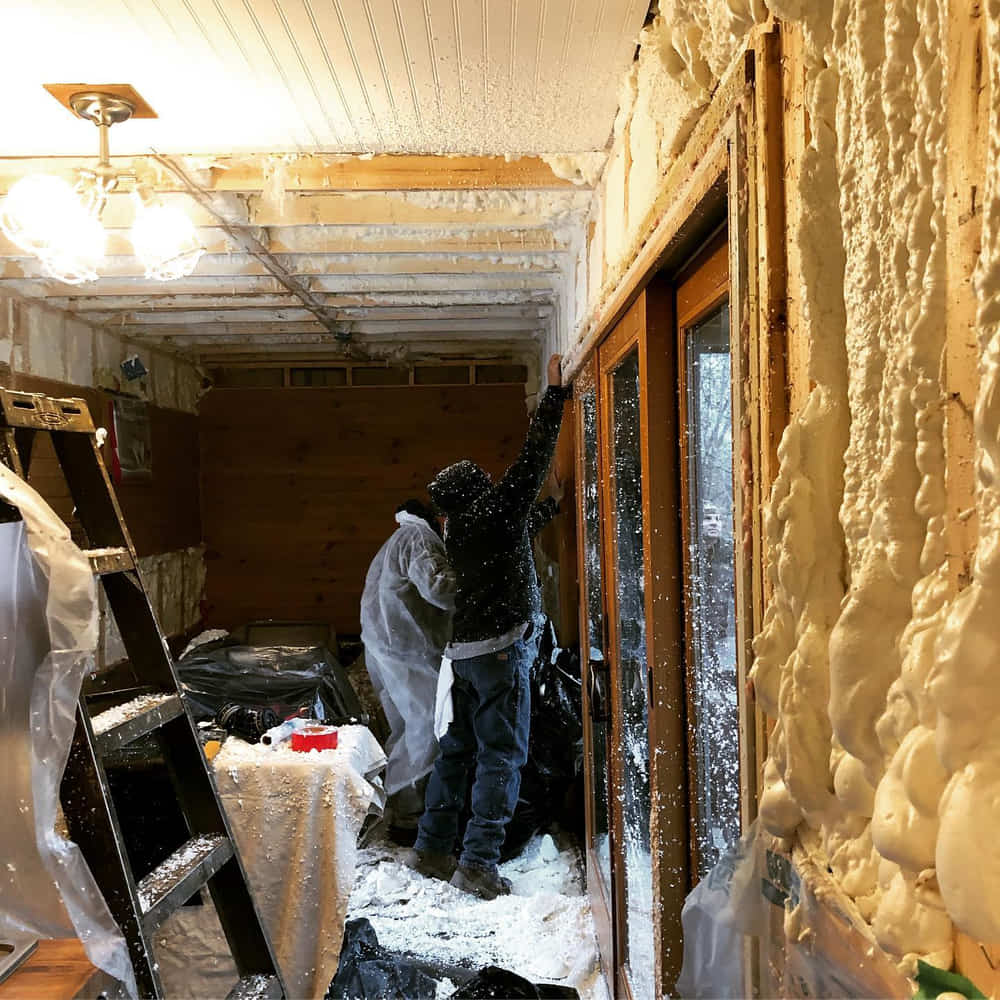
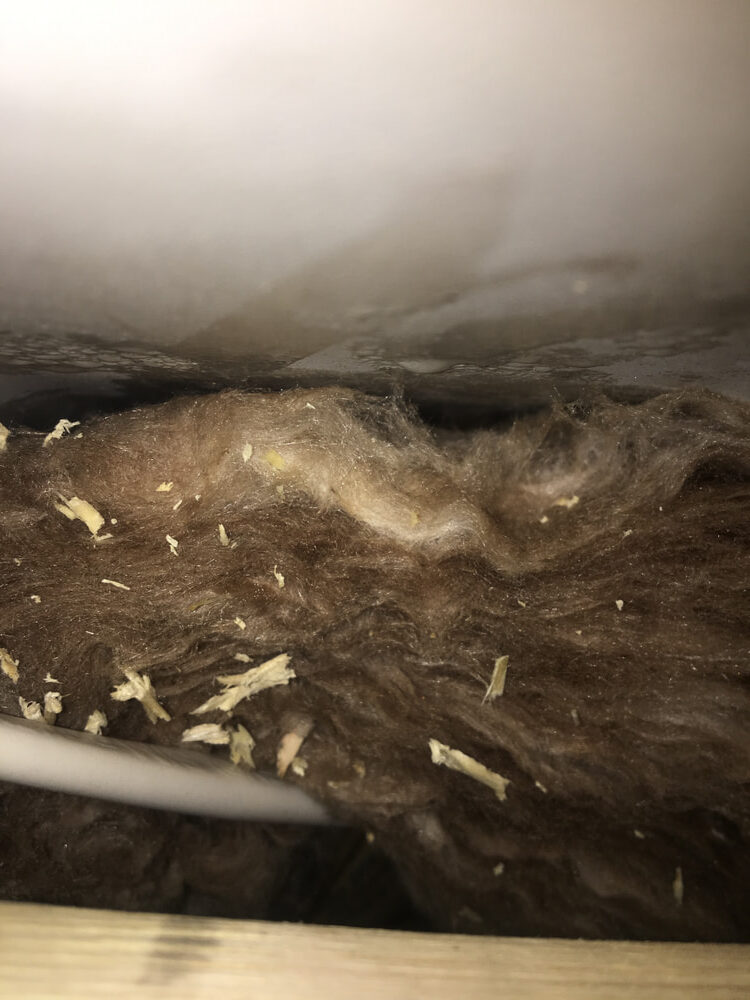
We did make a couple of mistakes in the design that are worth noting for anyone thinking of building their own container home. The first is related to insulation. We originally used fiberglass batt insulation, which we later learned can contribute to condensation problems in cold environments like ours. Sure enough, we got water damage in the bathroom and kitchen from condensation.
I ended up having to take down the MDF beadboard ceiling in the bathroom, remove the old insulation and replace it with closed-cell spray polyurethane foam, and finally use acrylic beadboard to replace the ceiling finish. We also installed another, high powered exhaust fan to help with ventilation. Eventually, we’ll also need to redo the kitchen ceiling as it is covered with drip marks. For now, I think we have stopped or at least slowed the problem. In hindsight though, I wish we had chosen to use closed-cell spray polyurethane foam for the entire container at the beginning.
The second design mistake we made was not adding enough kitchen outlets. We have five high-powered kitchen appliances: a microwave, refrigerator, toaster oven, coffee maker and hot plate. They draw a lot of current, especially when used simultaneously, and we seem to be tripping a circuit breaker almost weekly. We also used 15 amp circuit breakers when we probably should have used 20’s.
I already owned the beautiful property which included a previously installed water well and septic system. Therefore, my first step was working to secure financing. My plan from the beginning was to use the container home as a short term rental, so I created a Limited Liability Corporation (LLC )in order to remove personal liability and create some separation between me and the rental business.
Next, I made some sketches of the home design and combined them with a business plan I’d created. I brought these materials to a local bank and was able to get a $20k business loan, which was almost exactly what I ended up spending on the project. The process of getting the loan was tricky for a couple of reasons. First, the idea of using a shipping container house as a short term rental was a bit out of the ordinary for my small town bank and required some convincing. Second, I’m a woman and the loan officer was a man, so I faced some questions related to my competence to handle the construction that I found slightly offensive. However, I didn’t let any of that stop me, and eventually got the funding I needed to get started.
I’m lucky to live in a township that doesn’t heavily regulate building projects, so the construction was able to commence quickly. We broke ground on May 22nd, prepping the building site ourselves with some rented equipment. Our work was made easier by the fact that a mobile home had previously been located at the building site. After placing our six concrete footers (each approximately five feet deep and two feet in diameter) we were ready for the container.
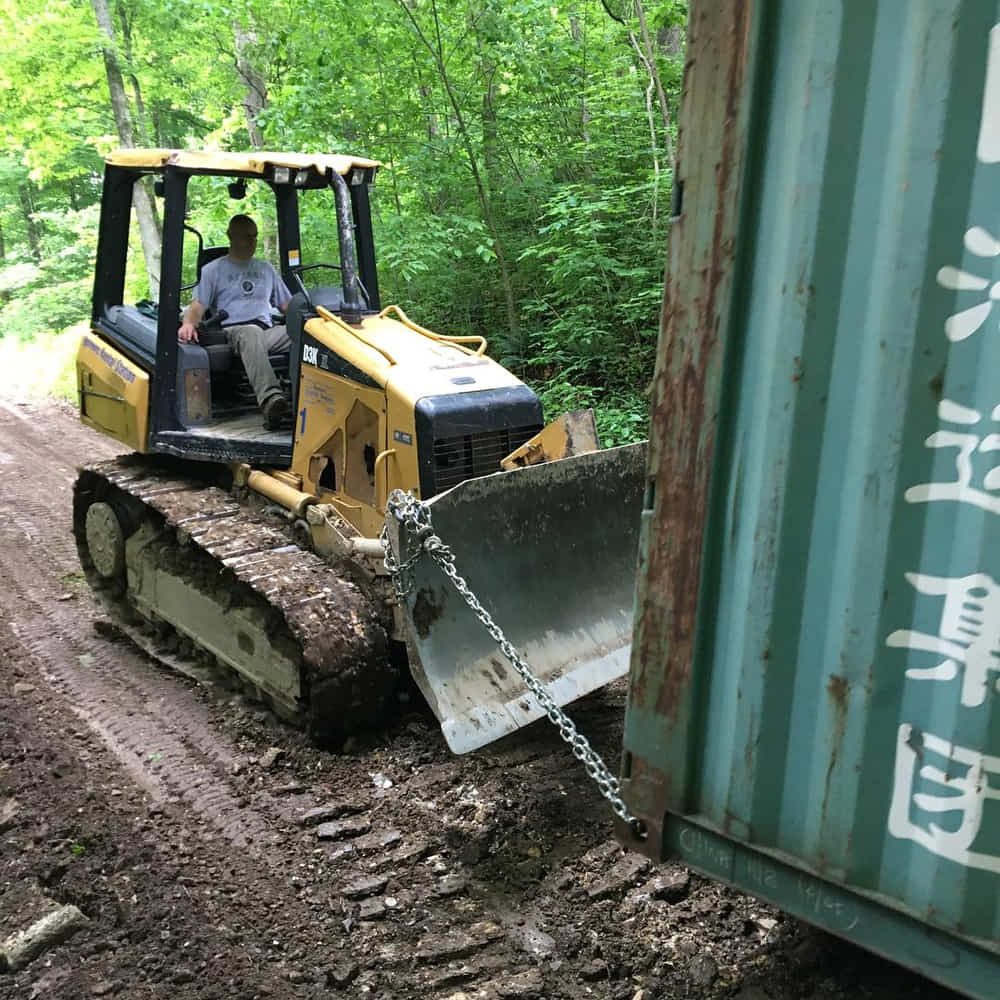
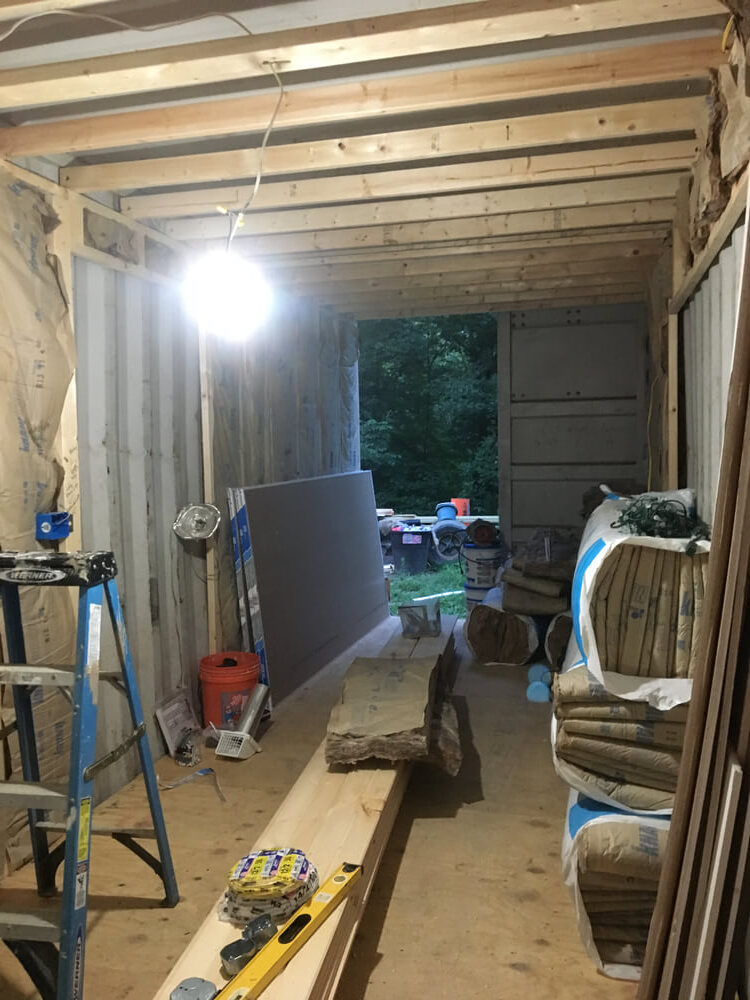
On June 1st, the empty container that I bought from Craigslist arrived. However, our driveway has an almost 90-degree turn in it, with nowhere for a long truck to turn around. So, we had the container dropped off on the ground, and used a bulldozer to drag it up the 400ft driveway. Luckily we thought about this beforehand and built it into our plan by having the bulldozer ready and by not adding gravel until afterward.
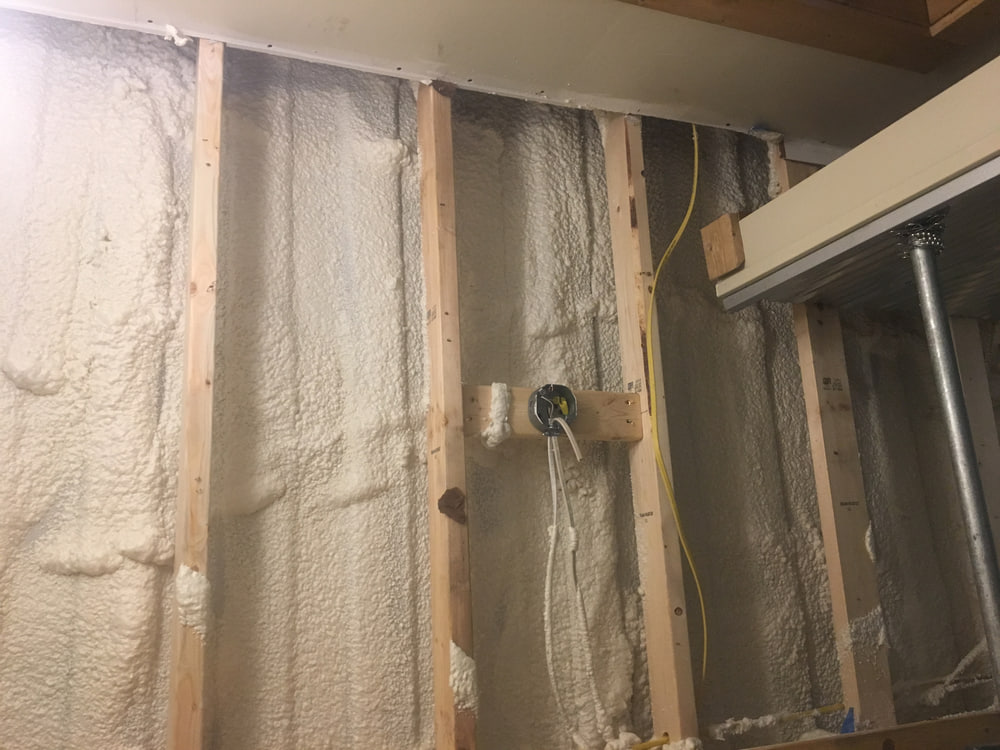
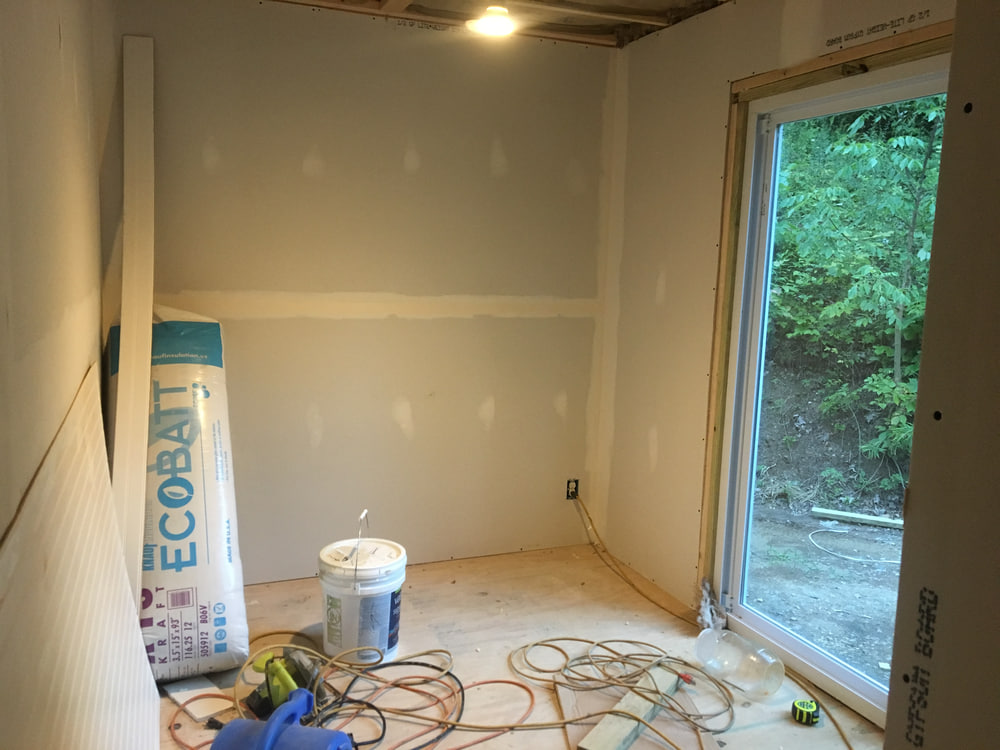
Getting the container up the driveway was only half the battle. We then had to use the bulldozer, the skid steer loader, and a lot of patience to move the container on top of the footers. With it firmly in place and leveled, we started building from the inside. We used 2″x4″ wooden studs and fiberglass batt insulation in the walls, ceiling, and floors.
We left the existing container plywood floor in place but added new plywood on top of the wooden floor joists for our finished floor.
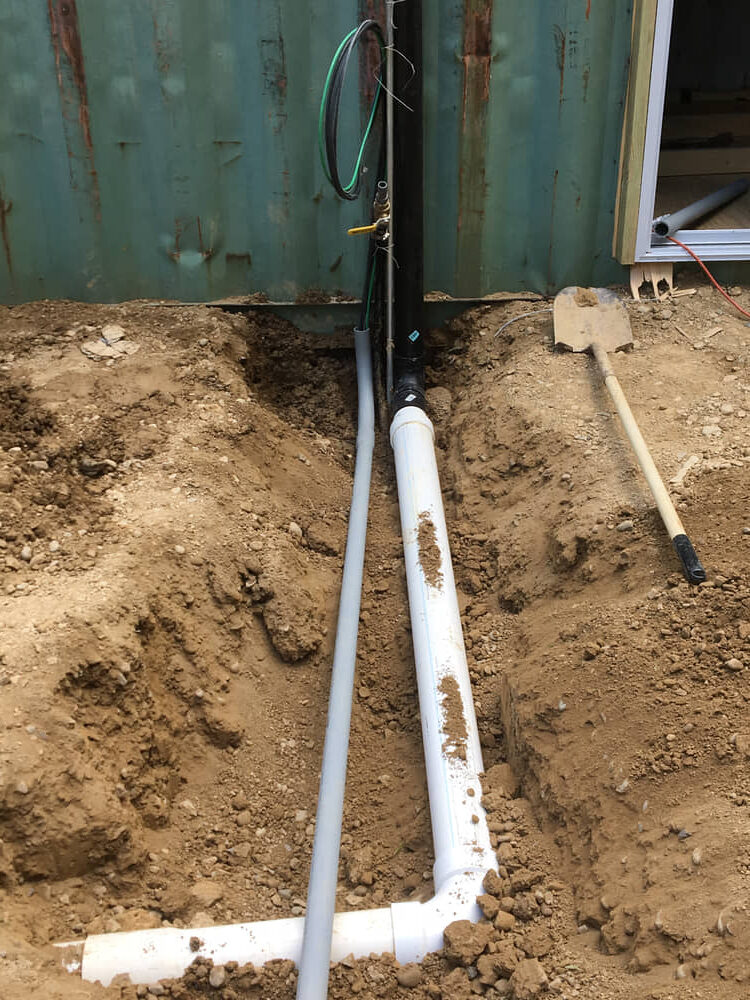
Indoor electrical and plumbing were run in the interior wall cavities as is typical. Outside, we used a chase system to run the electrical and plumbing from an underground trench and into the container at a single point.
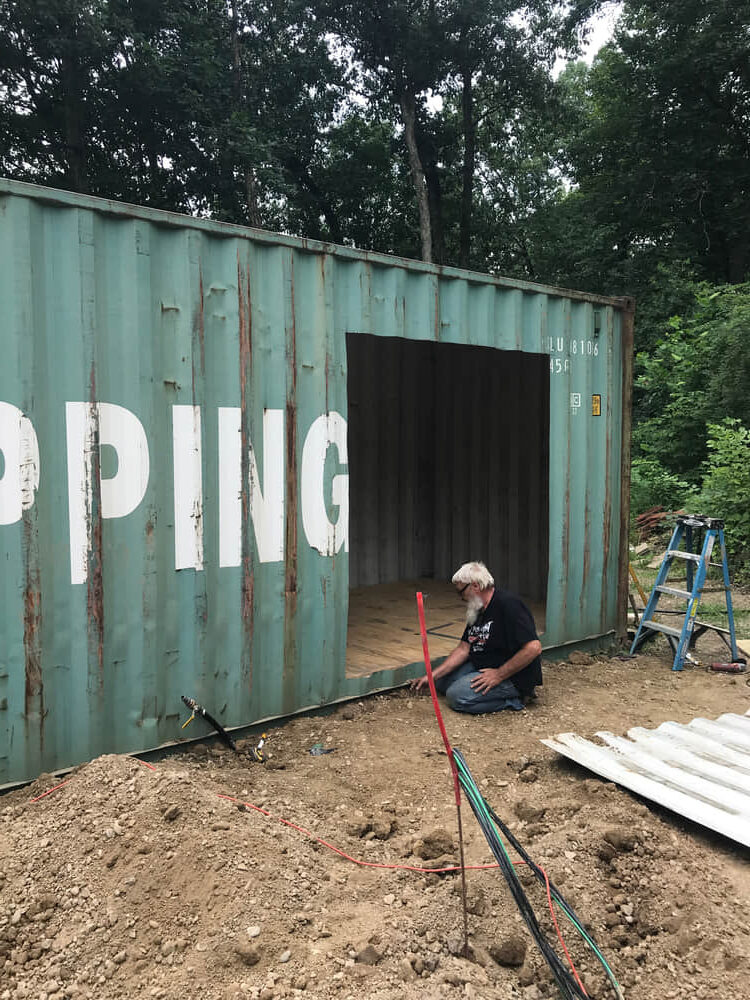
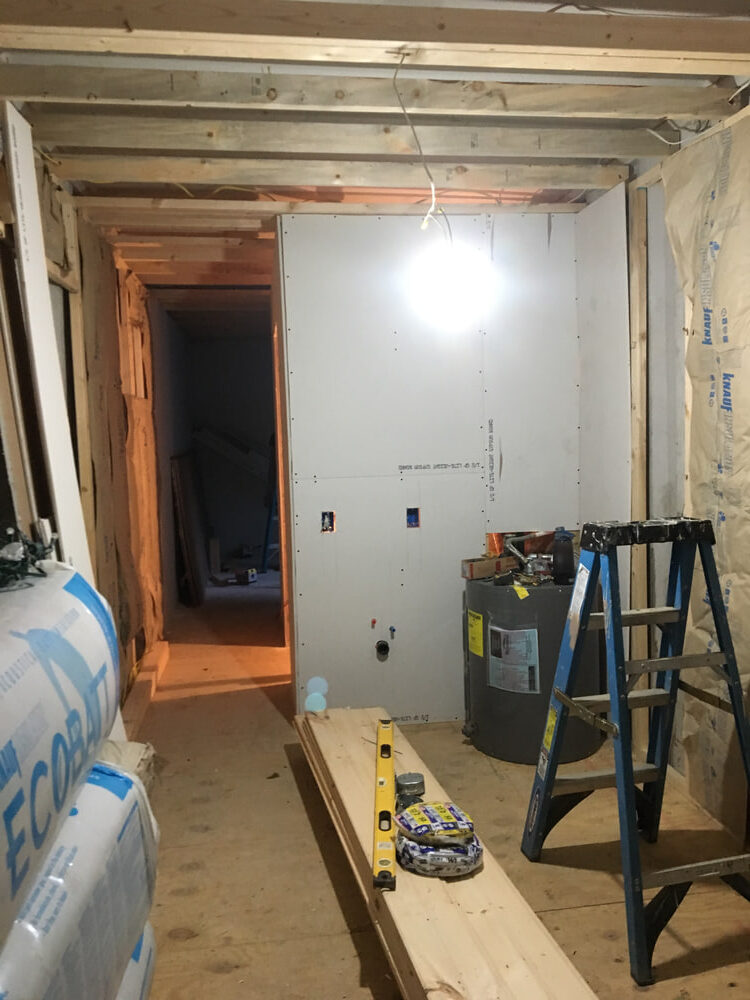
Before making the major container wall penetrations for things like doors, we closed in most of the interior walls with drywall, tongue and groove siding, and corrugated metal in the bathroom.
To cut the container walls, we used an angle grinder and a ton of abrasive cut off disks. We worked in series, not parallel: cutting the container for a door and then installing that door, repeating this for a total of three doors. This kept us from having the inside of the container open to the outdoors for very long. We installed the two wall air conditioners in the same manner. Later, we used some of the metal we cut out for interior features like shelves. It’s great to incorporate these left-over pieces back into the home.
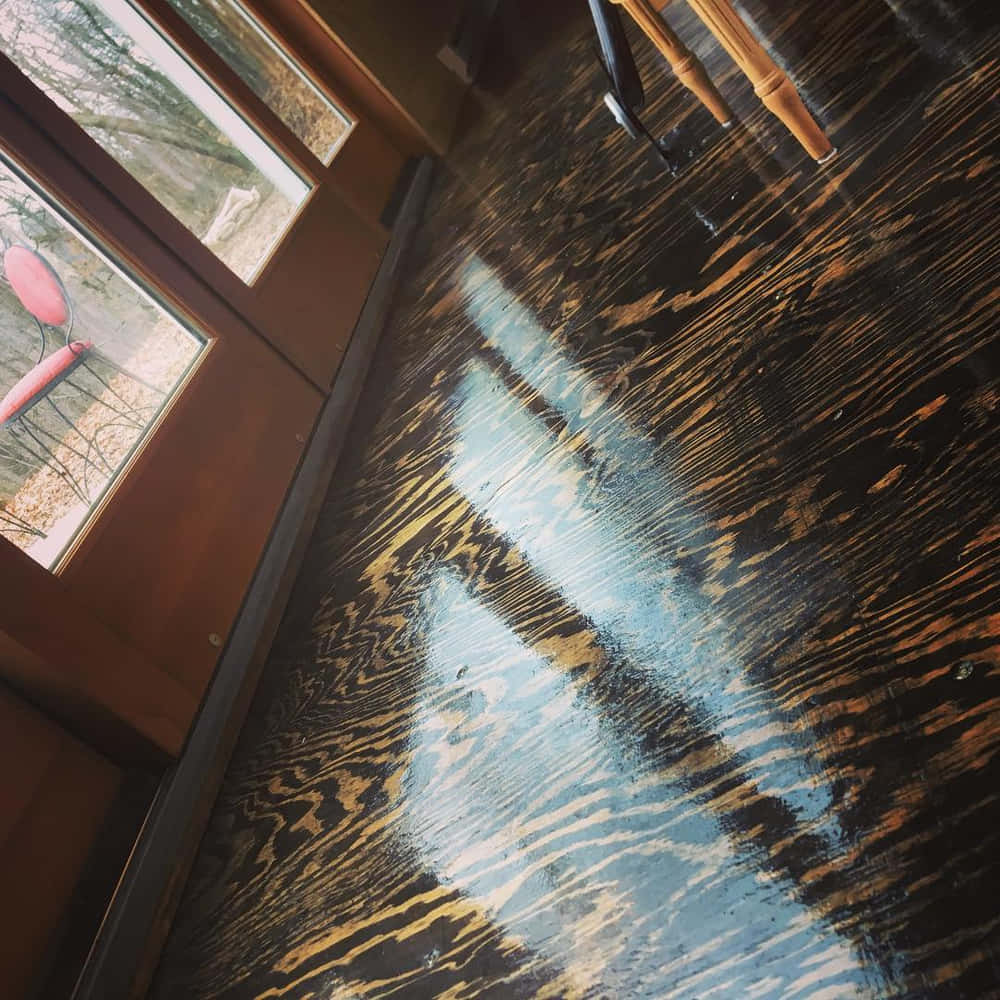
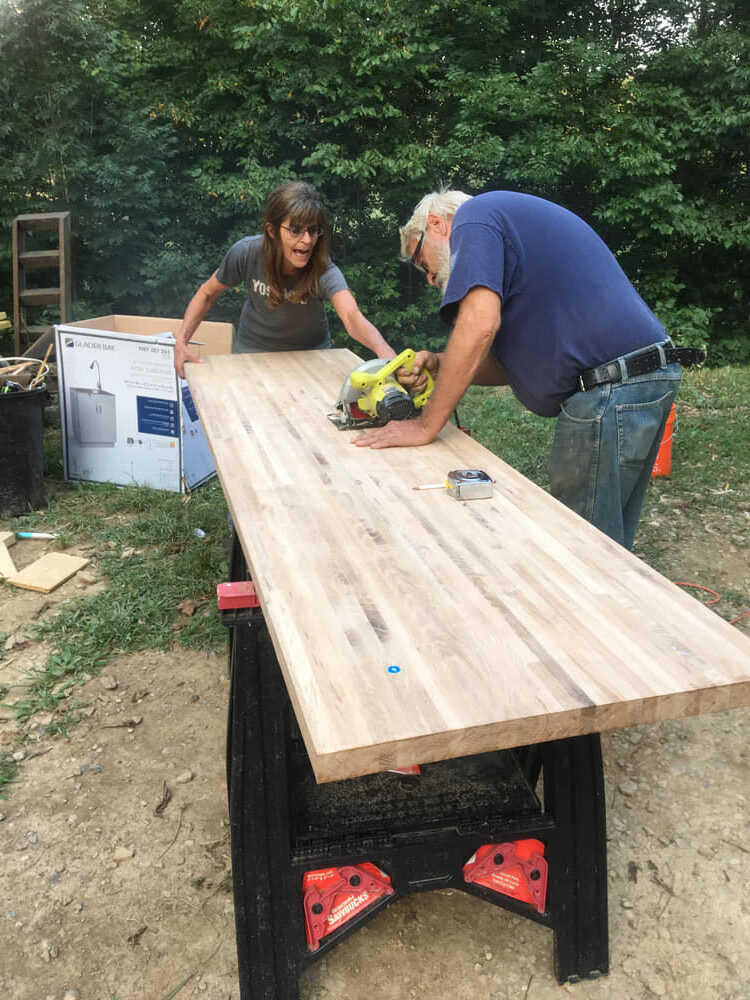
Once the doors and air conditioners were in place, we completed the interior finish out with beadboard ceilings throughout, trim placed around everything, and paint for the walls. For our finished floor, we sanded and stained the new plywood we had installed then applied six heavy coats of polyurethane. Last were all the finishing touches like cabinets, shelves, and decorations.
By October 20th the project was complete and we hosted our first guests. Not long after, I sent a ton of pictures to the bank’s loan officer showing the finished project and included several of our first guest reviews to demonstrate how well things were going with the business. He’s been pleasantly surprised with how well it has been doing!
In total, we spent about $22k on the container home. As previously mentioned, the land (which included a septic system and a water well) was already paid for.
- $2k for the container itself from Craigslist
- $2k to reimburse family members for food, fuel, tools, etc.
- $2k for land preparation (bulldozer rental, gravel, etc.)
- $16k for building supplies and furnishings
I get a chance to hear from most of my guests either in person, via a guestbook we leave in the container, or via their online reviews. Many of them chose to stay with us specifically because our home is built from a shipping container. Out of about 35 guests we’ve hosted so far, five of them have stated that they plan to build their own container home.
Although I don’t offer Wifi or TV (and cell service is spotty), I do have a good amount of amenities. It is really an entire home for the same price as a hotel. It also offers people a chance to reconnect with each other and get away from the hustle and bustle of life, something that seems to be appreciated by past guests.
We’ve had 17 consecutive weekends with bookings since opening, and we’re currently listed on Airbnb, VRBO, HomeAway, and TripAdvisor. I priced it based on a few other local tiny houses, but those are typically the miniature barn-style houses I mentioned previously, and to me, they aren’t as unique. Right now I have just a one-night minimum, but that will likely change to a two-night minimum in the summer to benefit my family needs. As far as platforms, Airbnb has by far been the best, with VRBO in a very distant second, and the others not generating any bookings yet.
Overall, I’m confident that it will be a worthwhile investment, especially given that the land was sitting vacant and unused prior to building the container home. It’s already performing better than expected or forecast in my business plan, and I’ve thought about making another similar rental in the future.
We really enjoyed building this container home together as a family. I can look back on it now and have great memories of us working on it together. And who knows, someday, I may even use it as a house for my older parents to live in.
Make no mistake though, it was hard work, and hard to find the time to do that hard work. I was taking care of my own family at the same time, after all. And it required putting in a lot of hours after work well into the night as well as many full weekends.
Overall, I am very pleased with how the project turned out. It is a beautiful home on a beautiful property, and I could certainly live there if the situation was different and we weren’t renting it out. Every time I clean it, I look around and say to myself, “I made this.” It’s a great feeling.
Ryann and her family have really shown us how far some determination and teamwork can take you. We’re hoping she gets the chance to do another container build soon and incorporate those lessons learned while getting some extra income! Let us know what you think of her container home below.
Interested in Container Homes? You need our FREE cheat sheets to help decide if containers are right for you!