
Elements
Size
Age
Levels
Note: Map location may not be exact. Click to open in Google Maps.

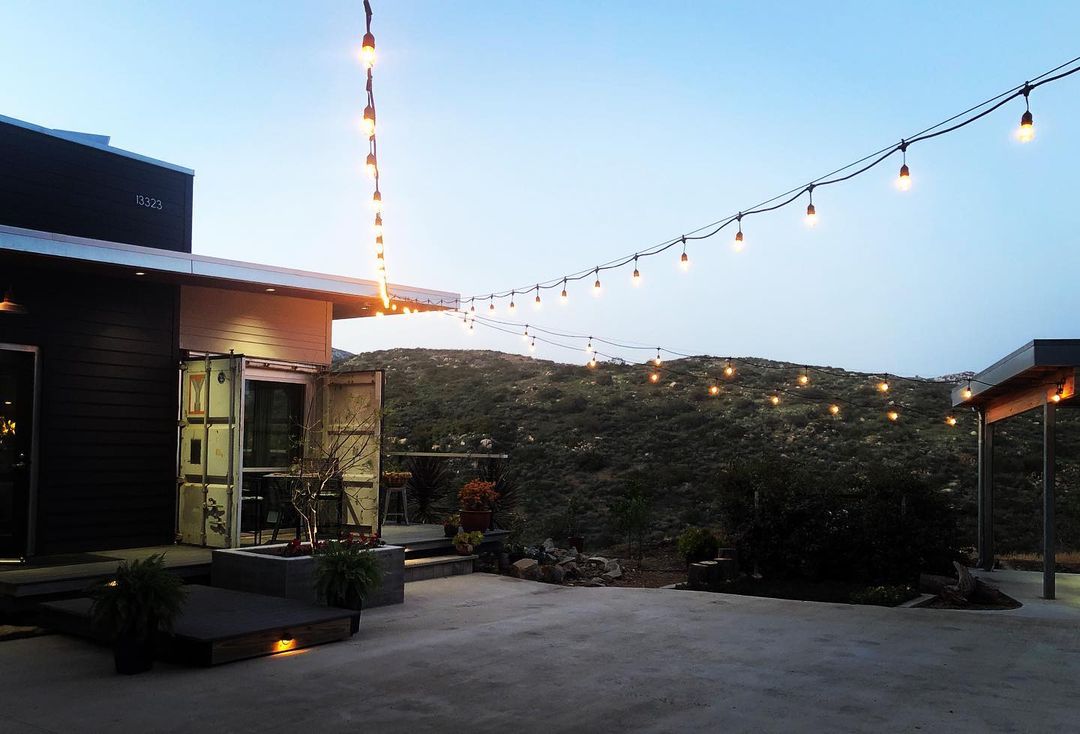
The McConkey Container Home is a DIY container house that’s small but takes maximum advantage of it’s size. And, thanks to a very unique building site, it really embraces outdoor living to expand the home’s area beyond the building footprint.
To some degree, all owners and builders of container homes are trailblazers. They step boldly into the unknown and build something that is unfamiliar to them and their community. The challenges are many: technical, design, construction, financial, and regulatory.
Mike and his wife, the owners of the home, are examples of what can be accomplished when those challenges are faced and overcome. Their beautiful southern California container home was a labor of love that offers several great examples to learn from for the rest of us!
Thanks to the help of a professional designer and careful execution, the resulting container home has gained quite a following. It was featured in the 2017 San Diego Green Building Council Green Homes Tour, and since then has been featured on the local news and several major websites. It was even featured in a YouTube review of a Ford Maverick truck by well-known YouTube car enthusiast, Doug DeMuro.
I developed an interest in building things from a young age, starting with Legos, Tinker-Toys, and an Erector Set. It became a dream of mine to one day build my own home.
When I came across the concept of building with shipping containers, it was a natural fit for me. I liked that it wasn’t mainstream and there was a level of difficulty that I saw as a challenge. My wife and I were excited at the prospect of having a home that would be unlike any others.
I first dipped my toe in the water on containers by building a fruit stand out of a container. It was a fun and successful project, and the architect I worked with is the one that I hired to do my container home as well!
While I briefly entertained traditional framing techniques, seeing homes in Europe constructed with containers convinced me to take a unique approach. I felt confident in the concept of shipping container architecture and decided that was going to be the way our home was going to be built.
I have a background in construction with an Architectural Engineering degree and I work as a Superintendent for a large General Contractor, so it was natural that we would do as much of the work ourselves as we could.
Also, doing the work ourselves meant we had a larger budget for custom features that we would have not otherwise been able to afford. We got more house for the same money, plus there is pride that comes with doing it yourself.
We did get help from friends and contractors for the large tasks such as framing, concrete, welding, drywall, interior painting and plumbing. My relationships in the industry helped with sourcing all of our construction materials.
Let me start off by sharing the larger vision we’ve developed. Initially, this home was the planned first step in a grand master plan. Our current home was to eventually become our guest home and a place for my parents to stay. The ultimate goal is building a much larger main house that is also made of containers.
Over the course of the construction, we learned how hard it is to secure financing for building projects utilizing shipping containers. Due to this financing issue, we’ve put the next step of that grand plan on hold for now, and we’re currently living in what will later become the guest house.
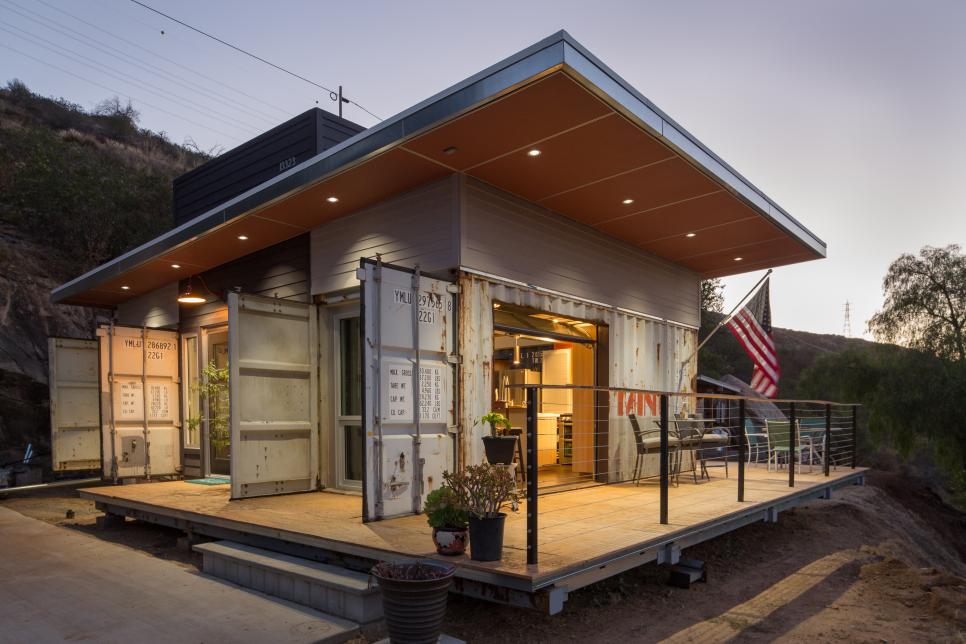
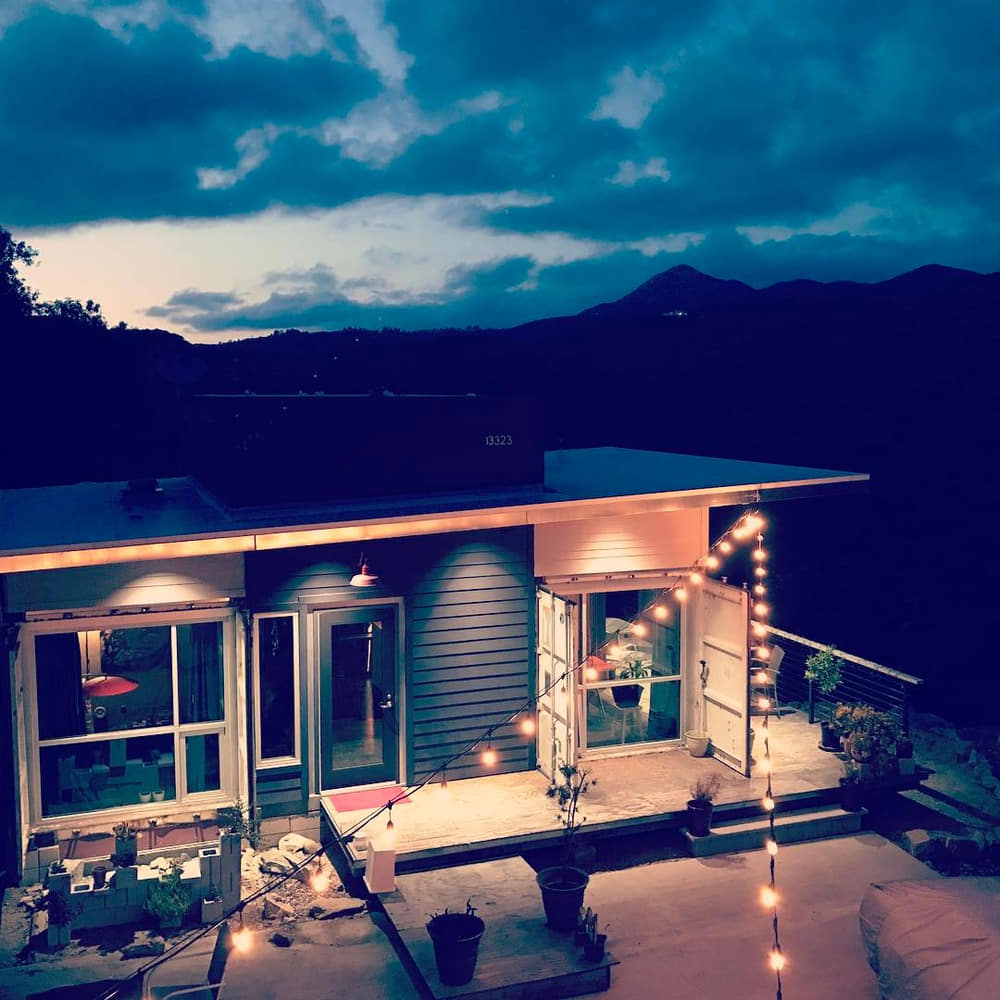
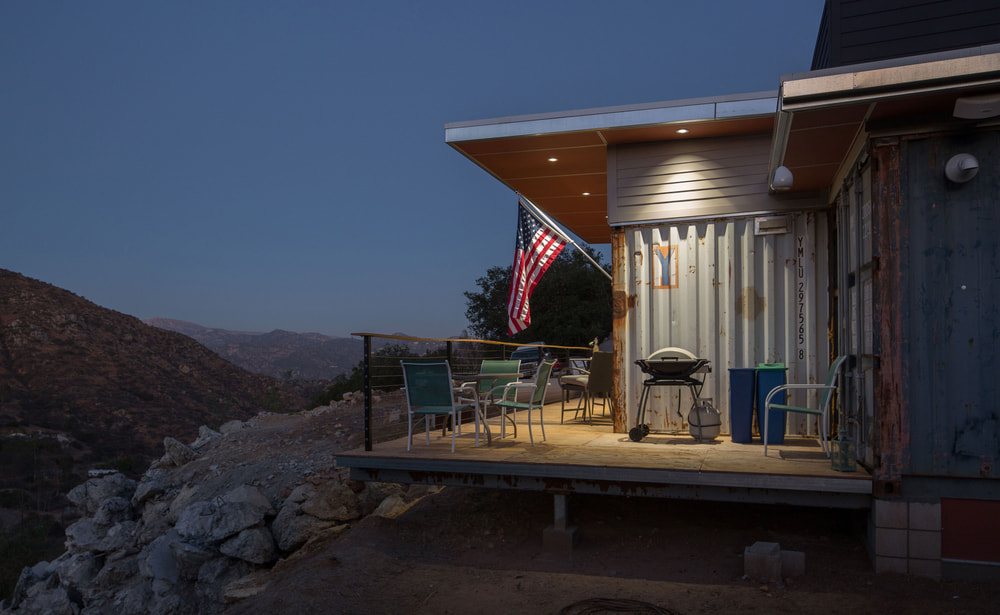
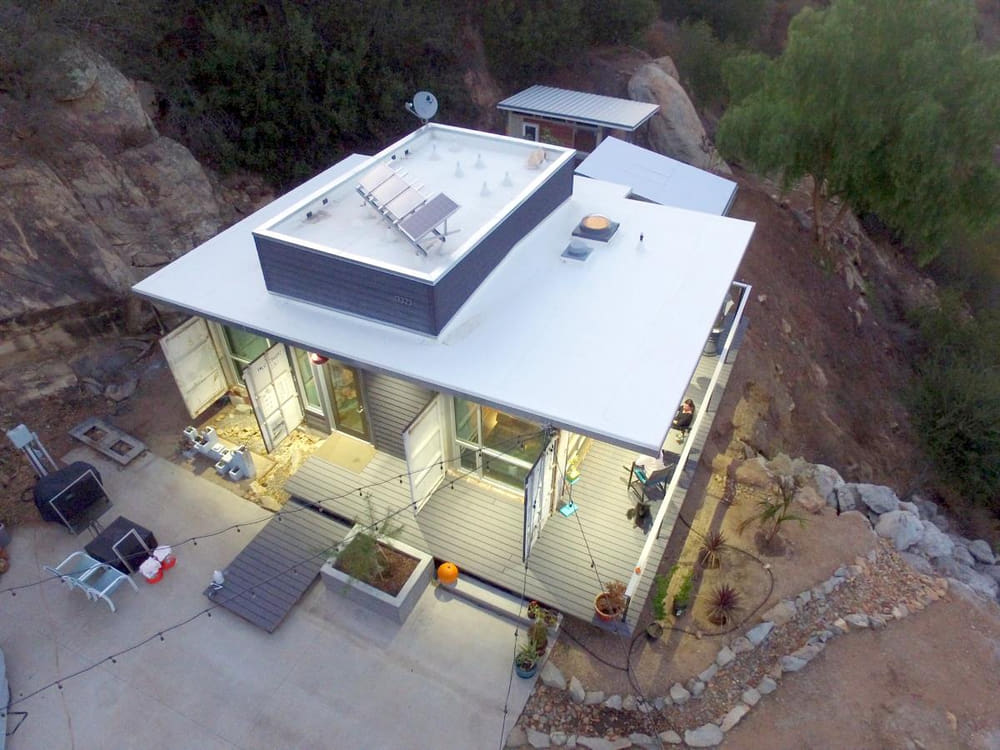
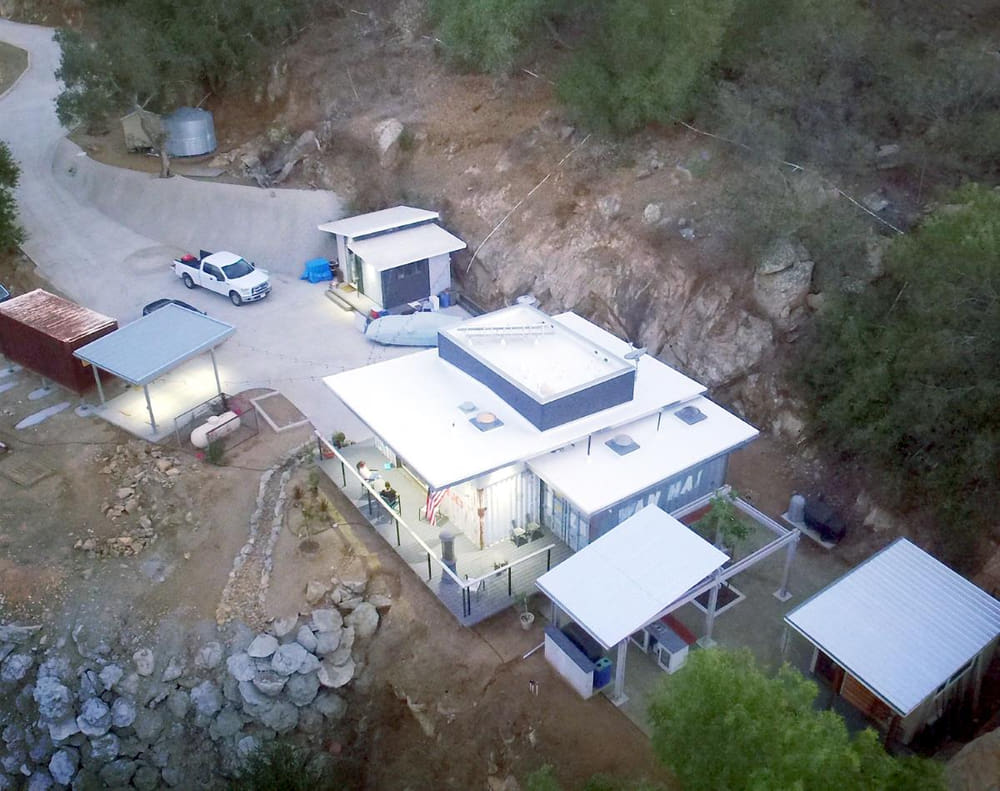
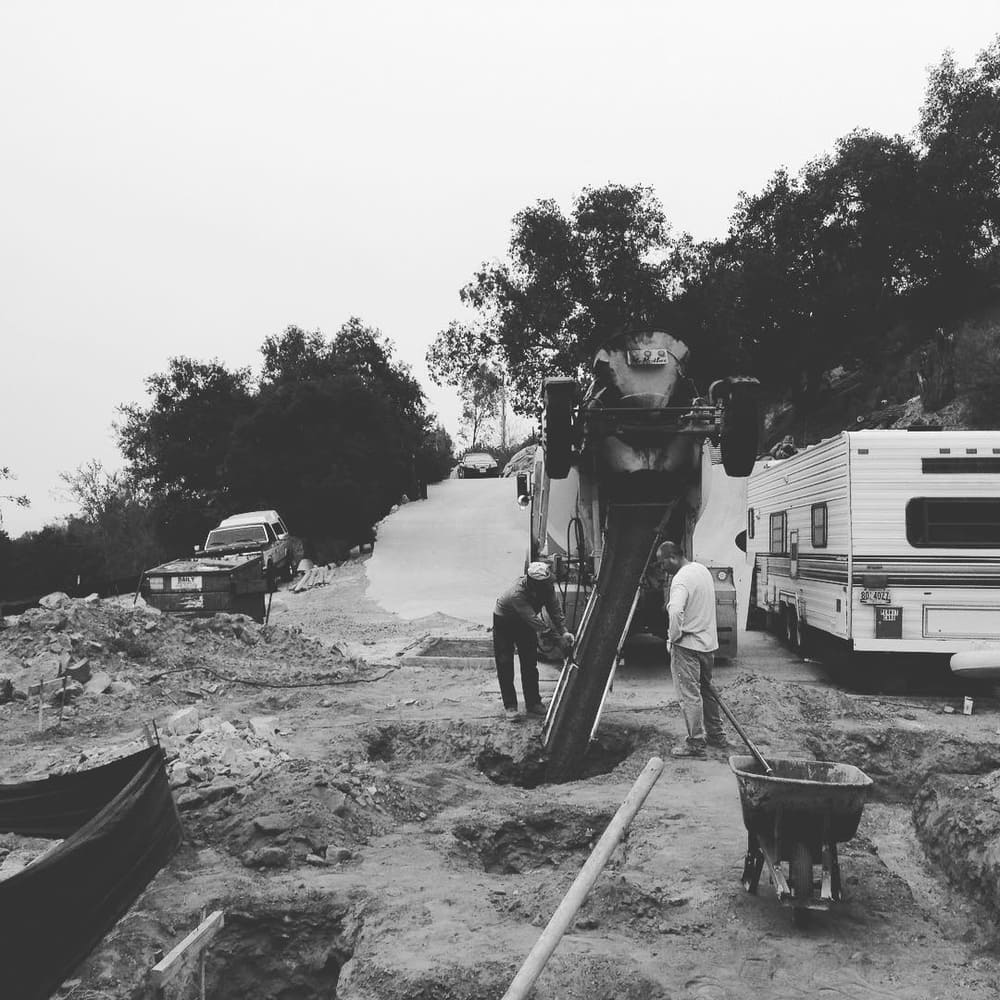
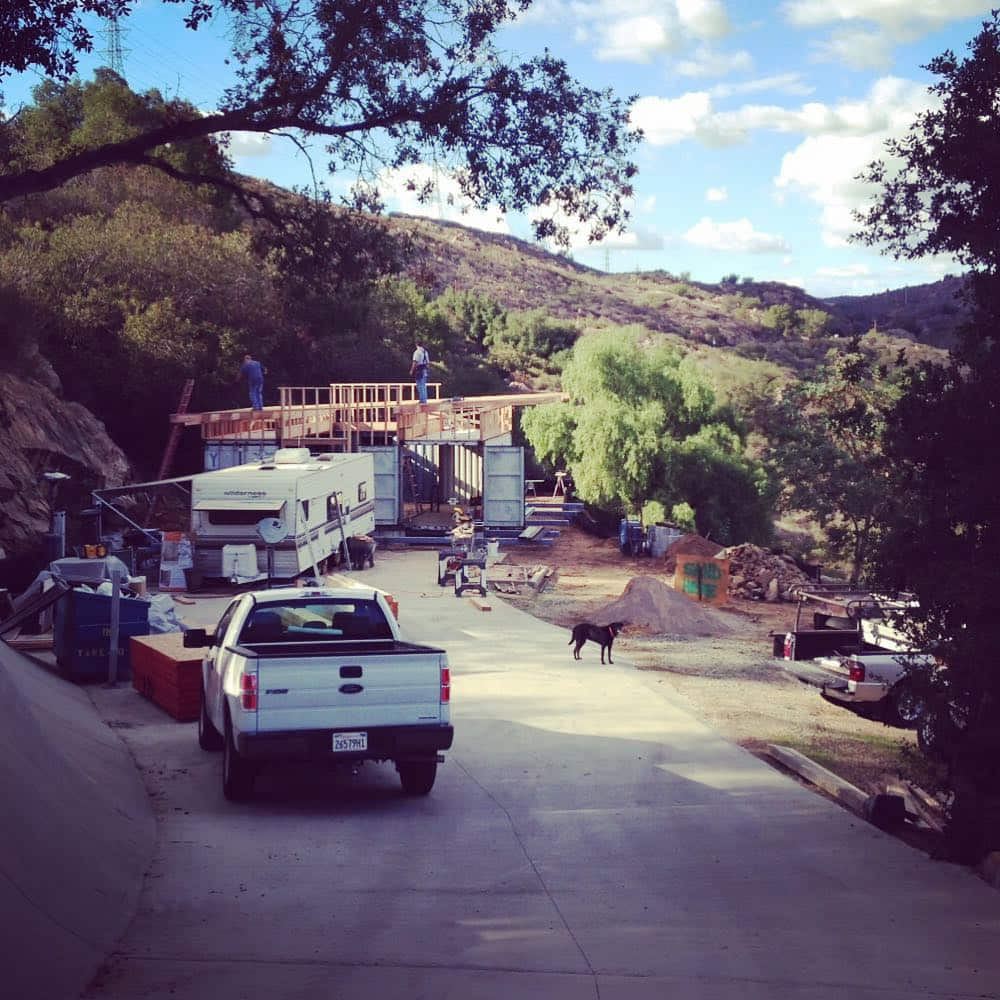
We own an amazing six-acre property near the rim of a canyon with amazing views. The land actually came with a modular home that we disassembled and moved, but we were able to take advantage of the concrete pad, water well, septic tank and electrical service that remained.
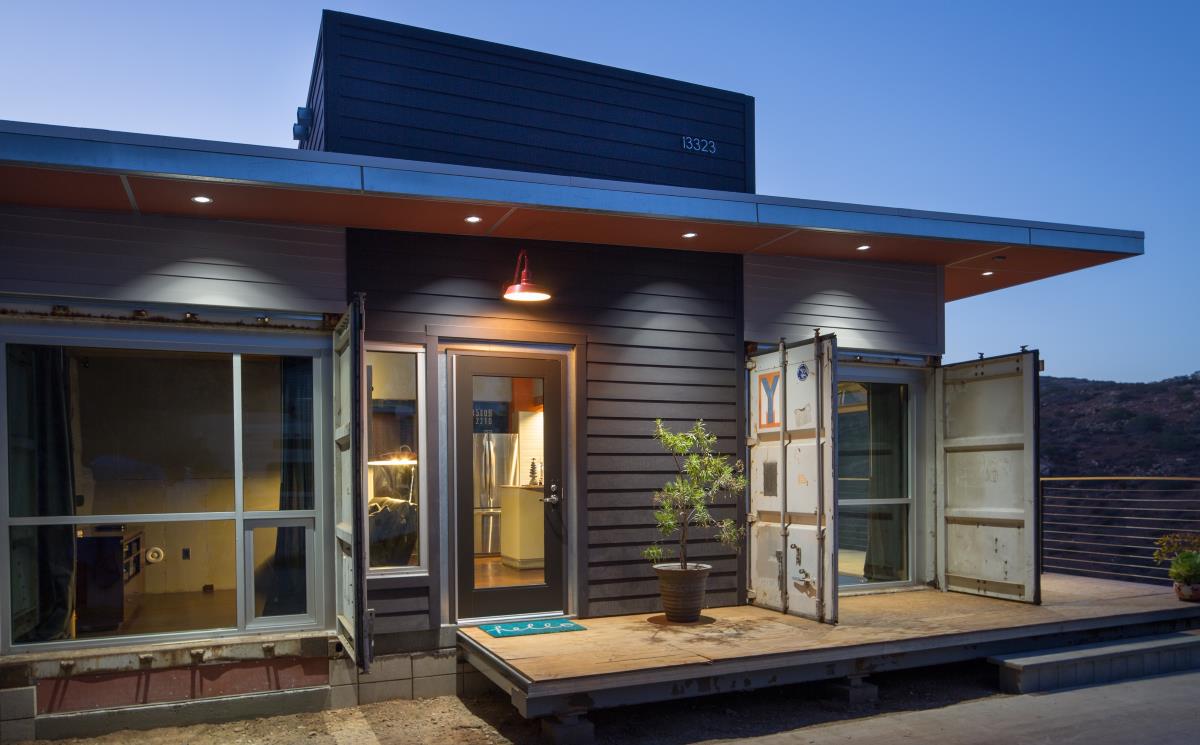
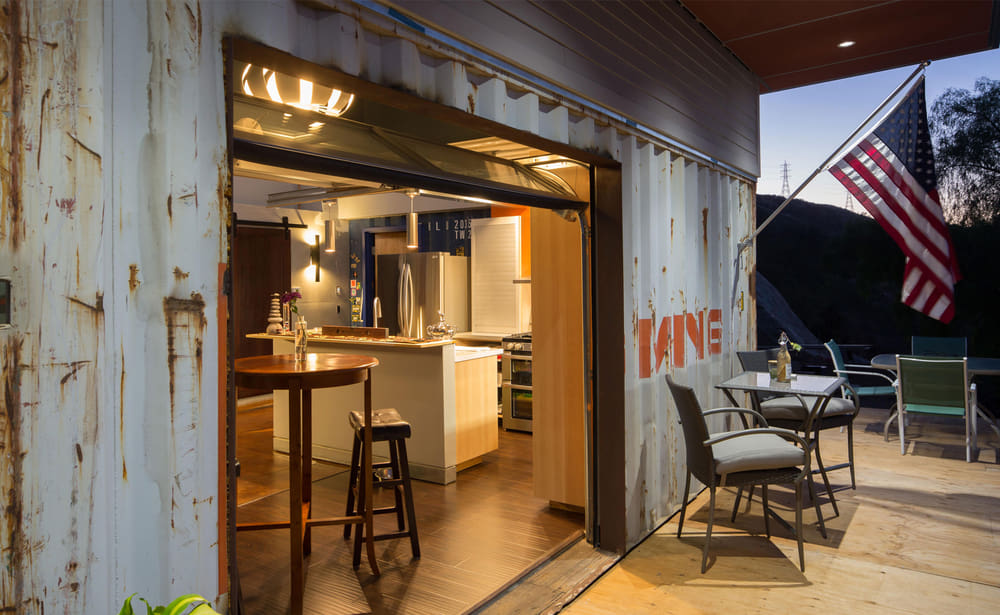
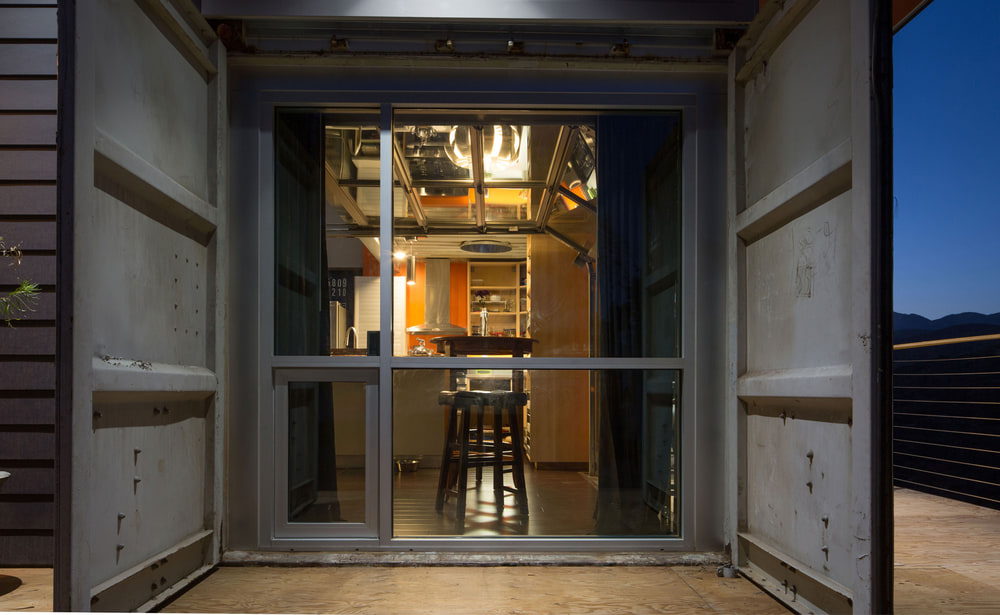
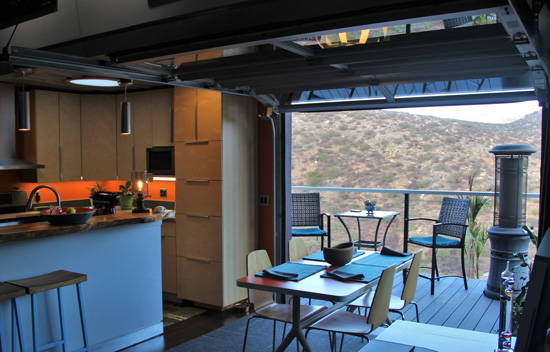
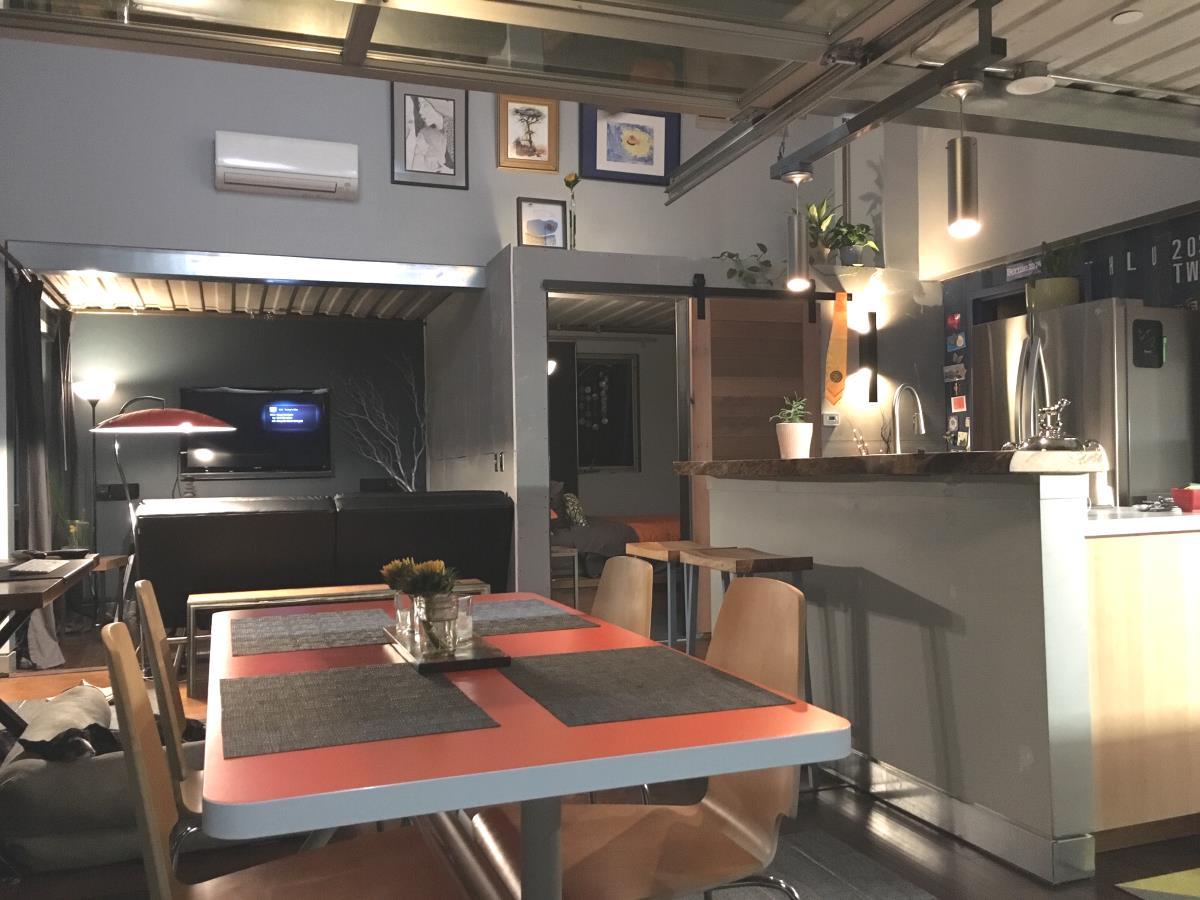
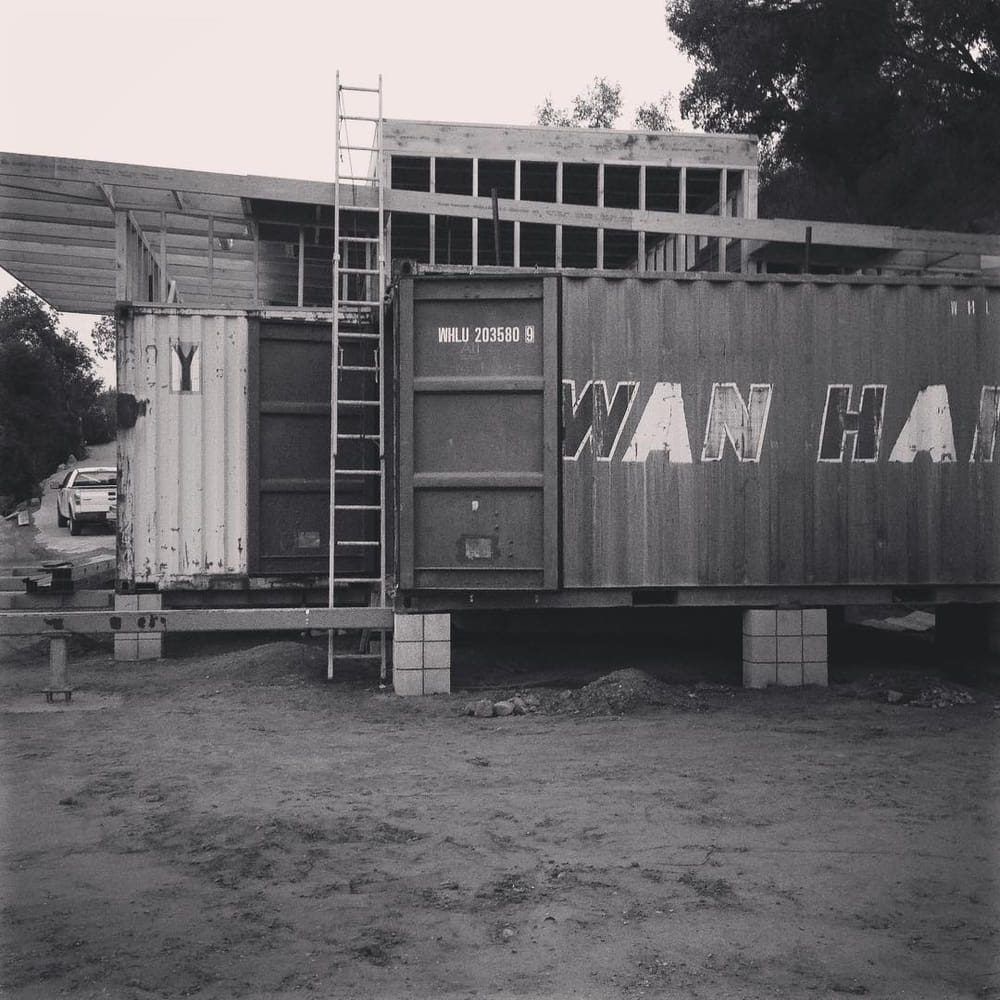
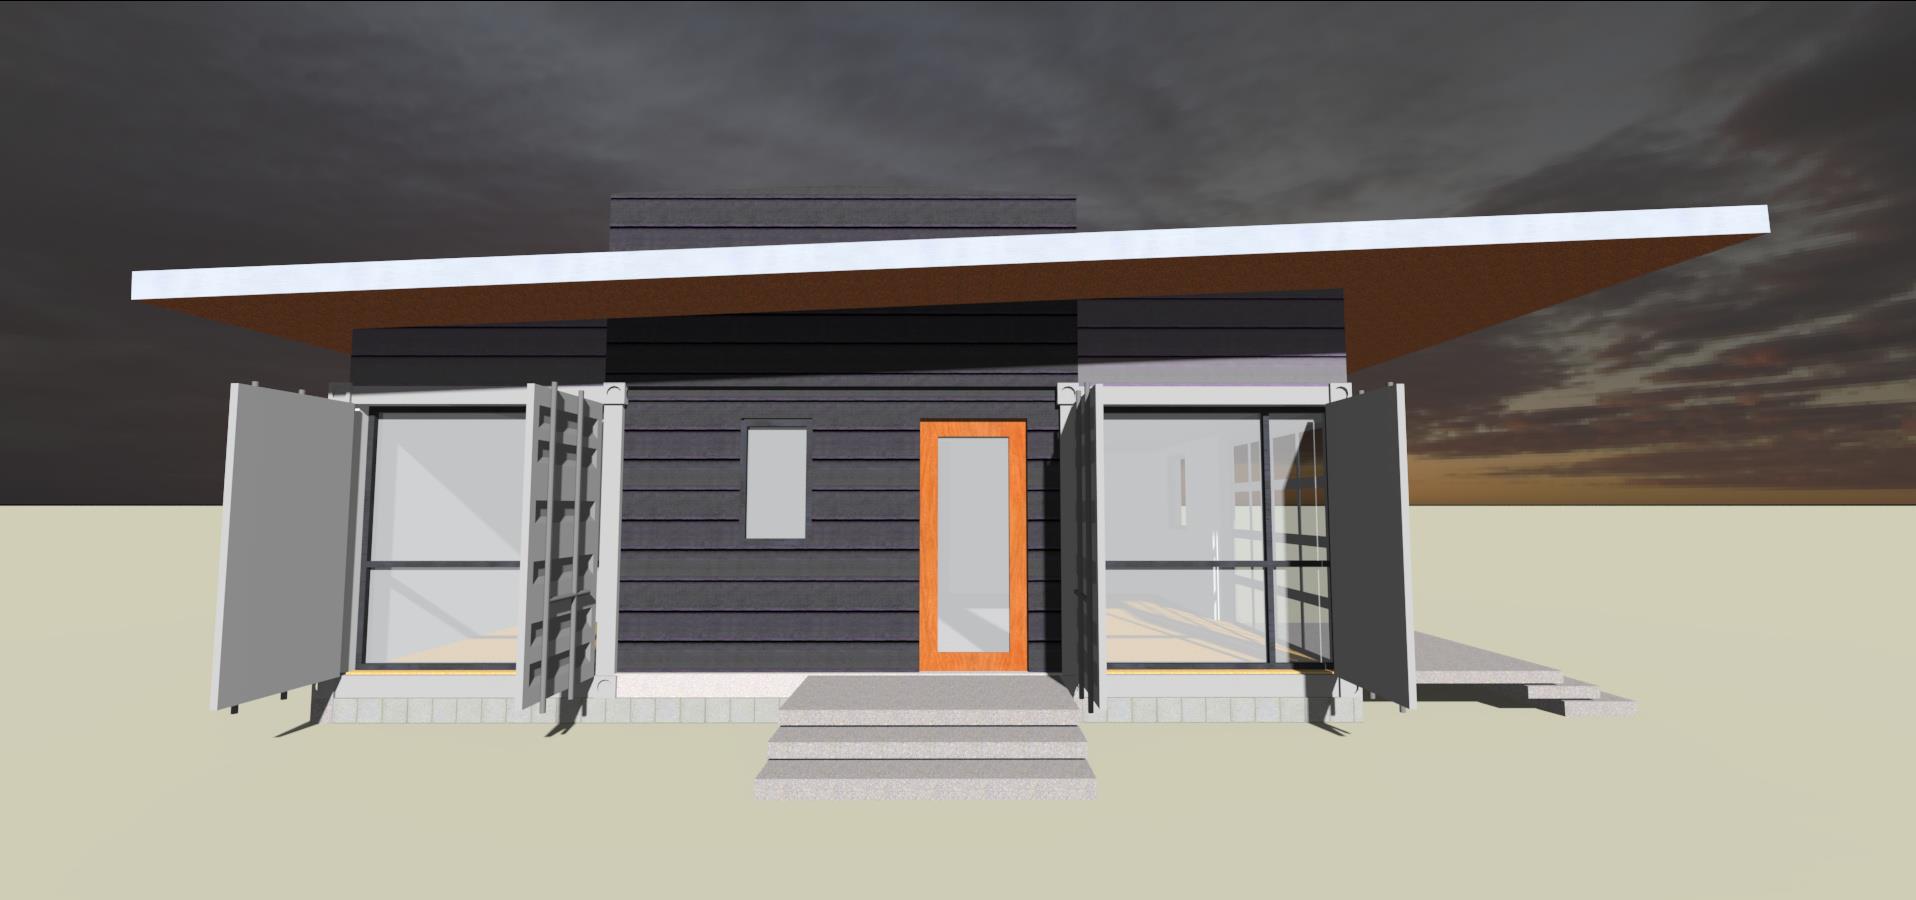
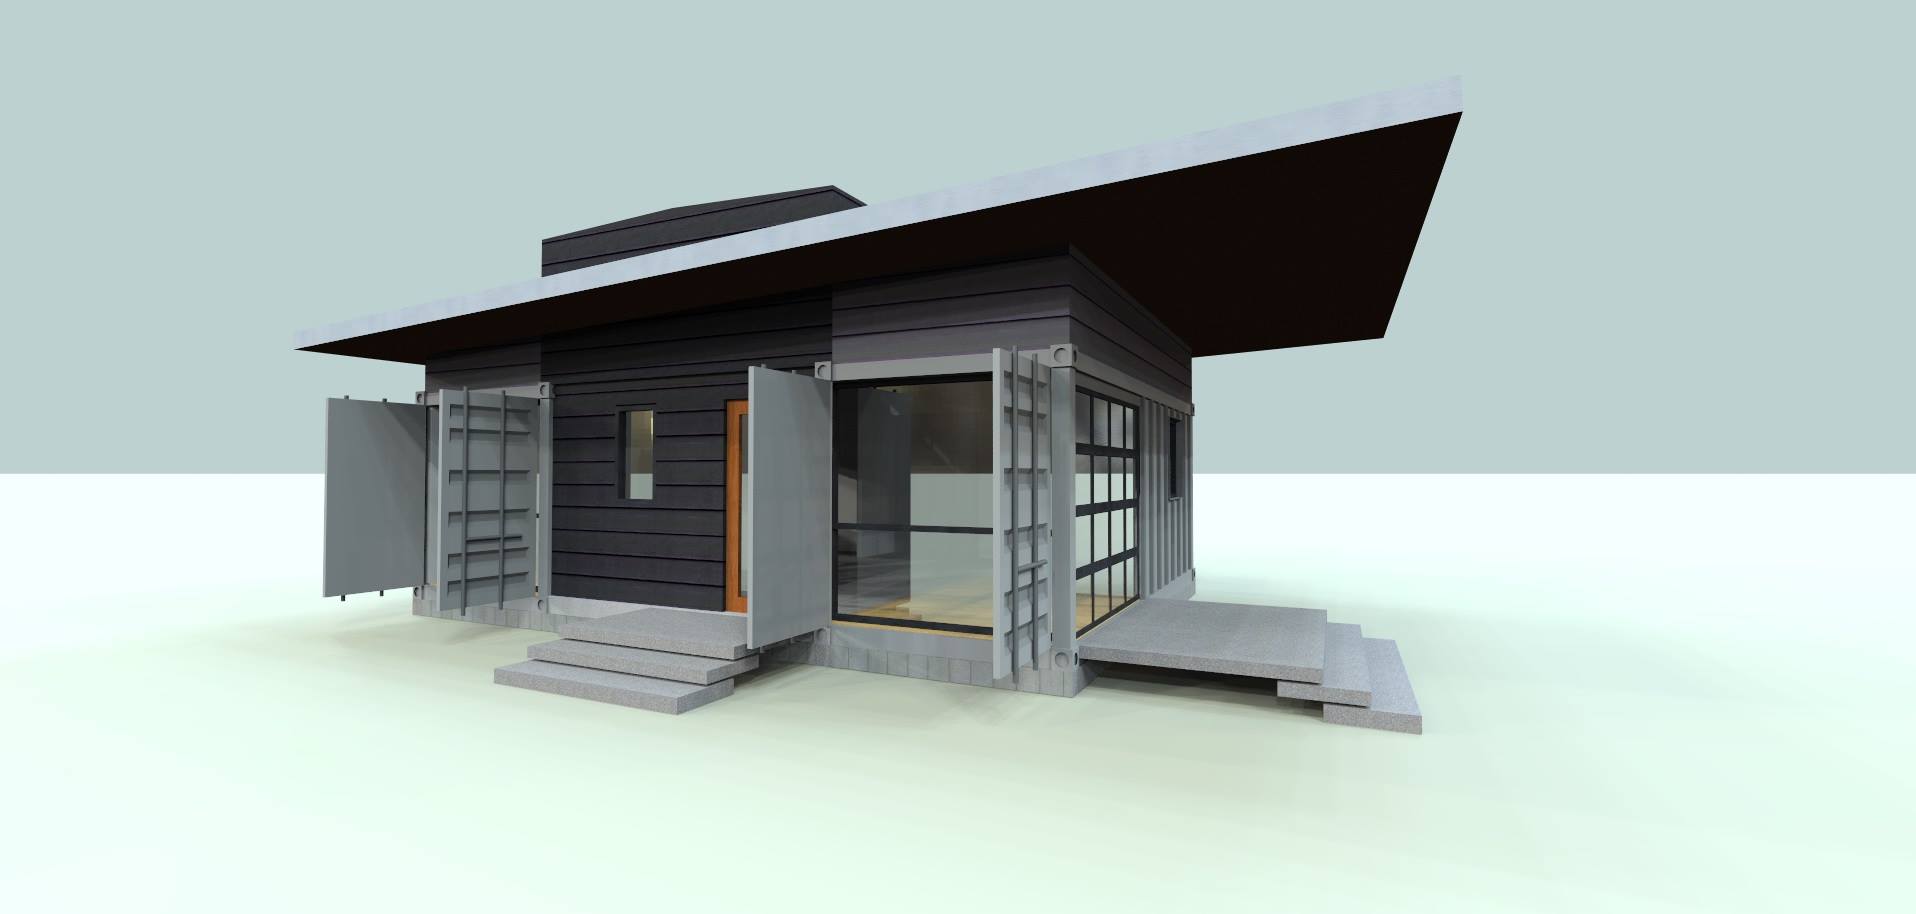
Our container home utilizes three, 20-foot containers in a ‘U’ shape along with additional interior space between the containers which results in a total floor area of around 800 square feet. That space between the containers is 12 feet wide with a 13 feet high ceiling, formed with wood framing above the containers and making the home feel much larger than it is.
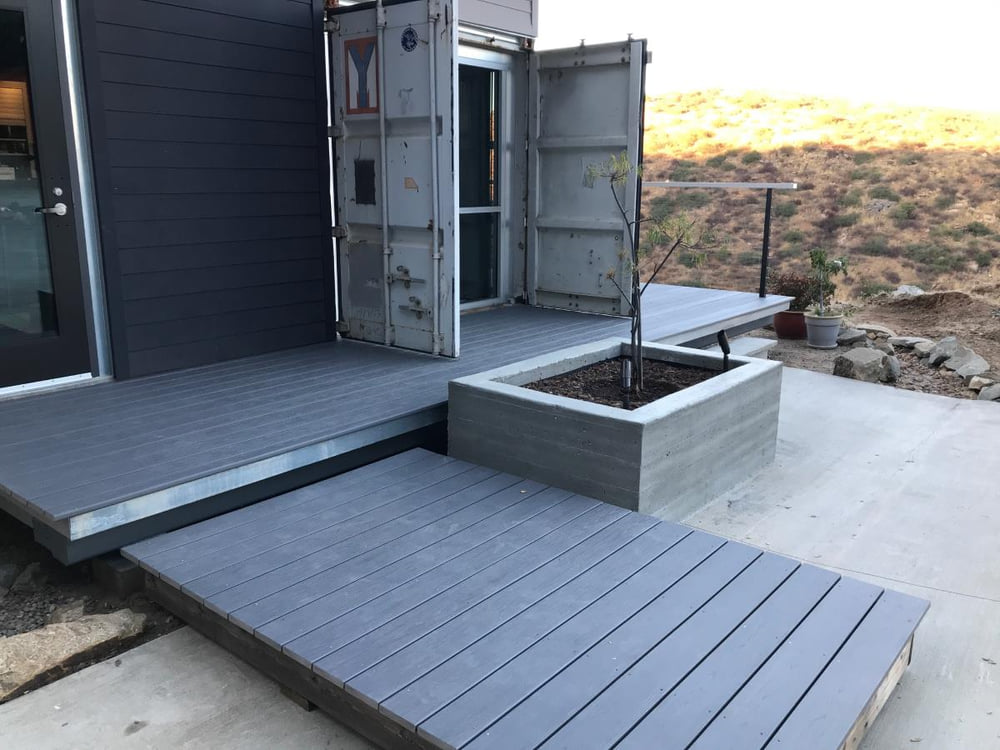
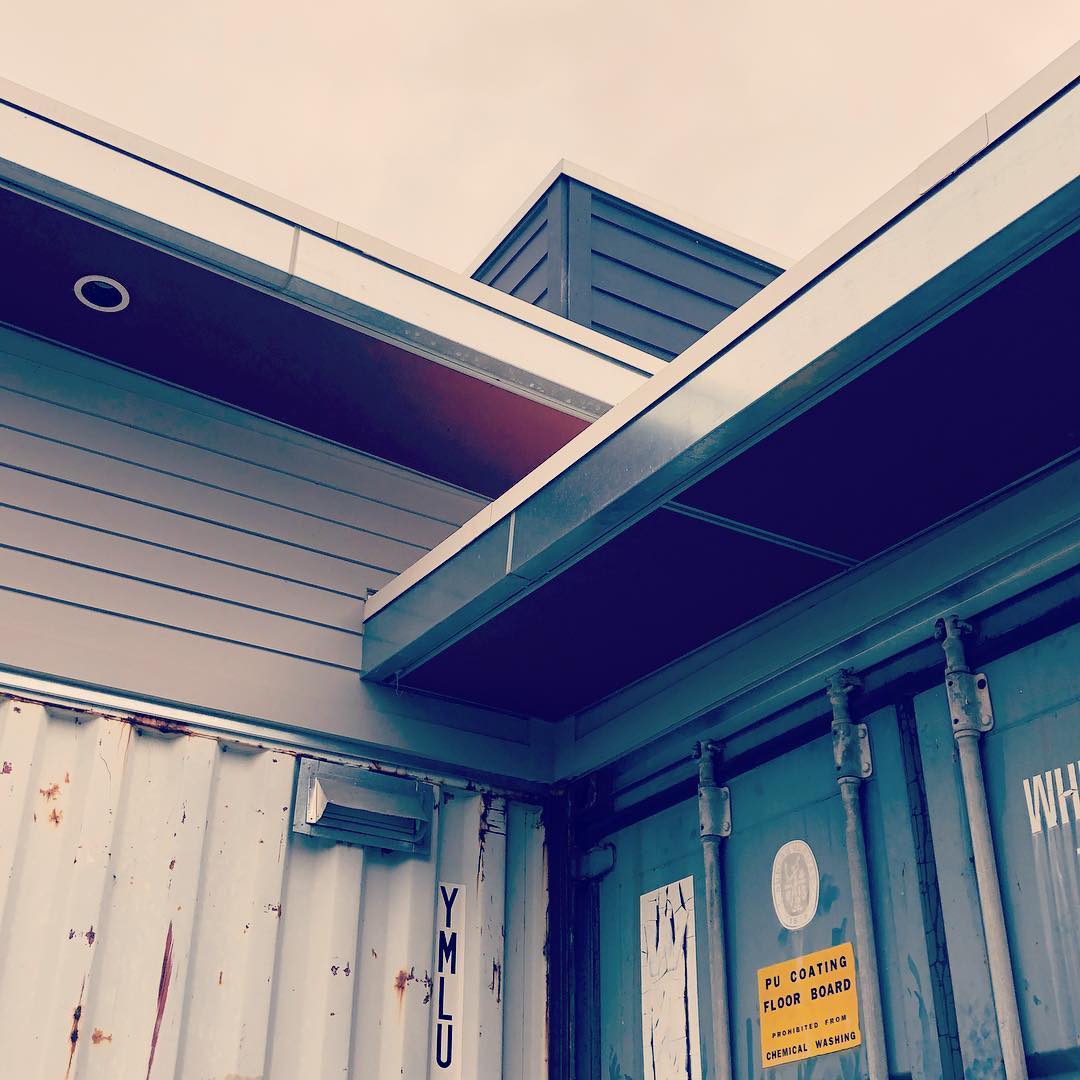
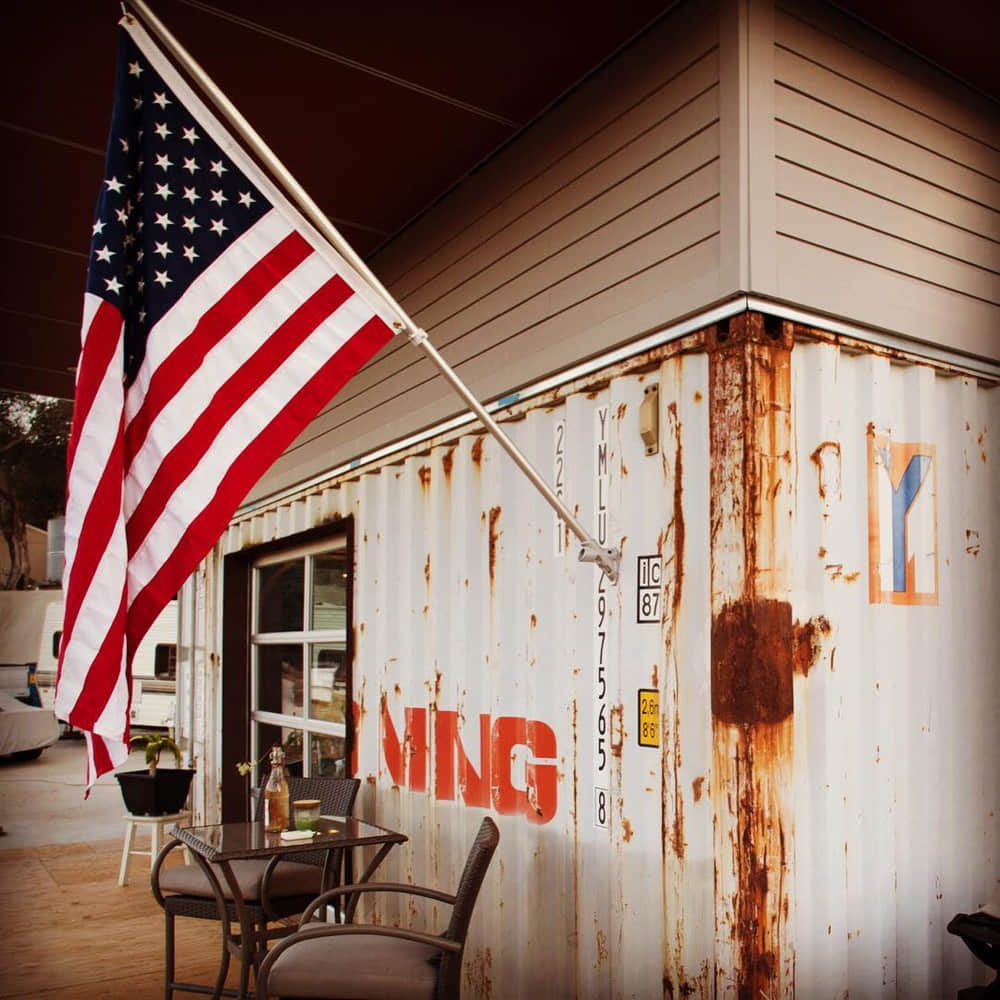
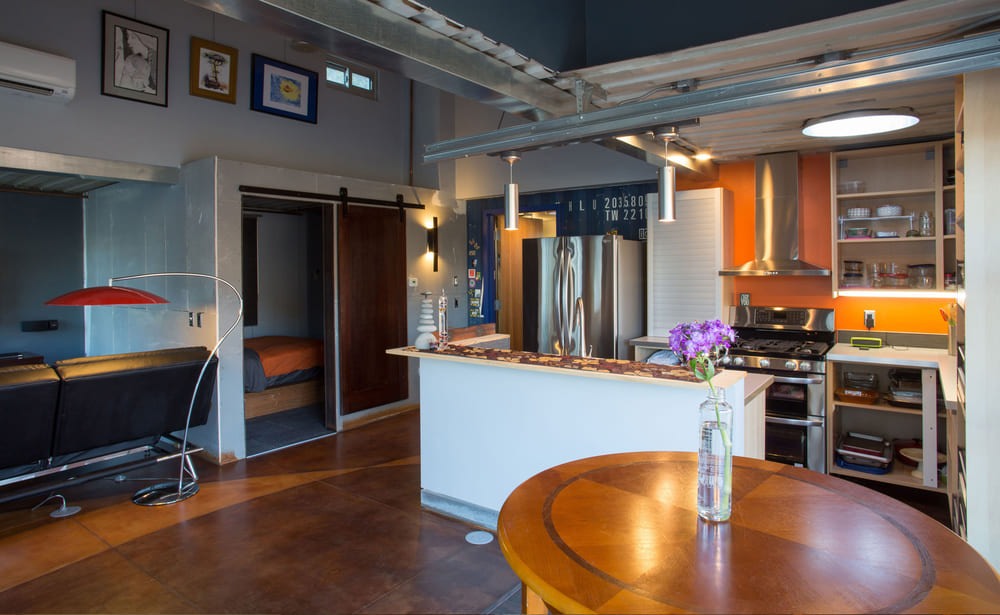
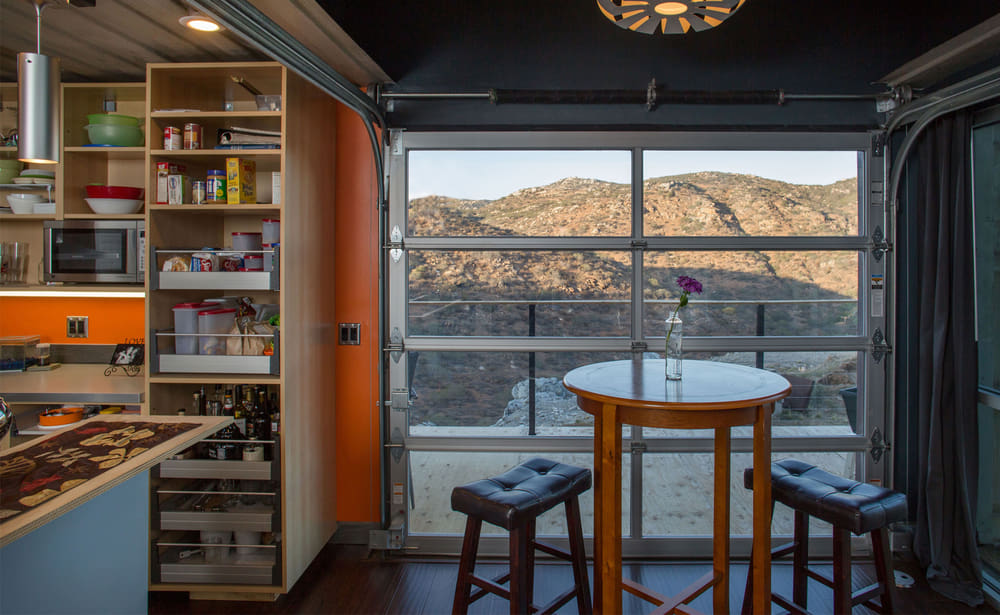
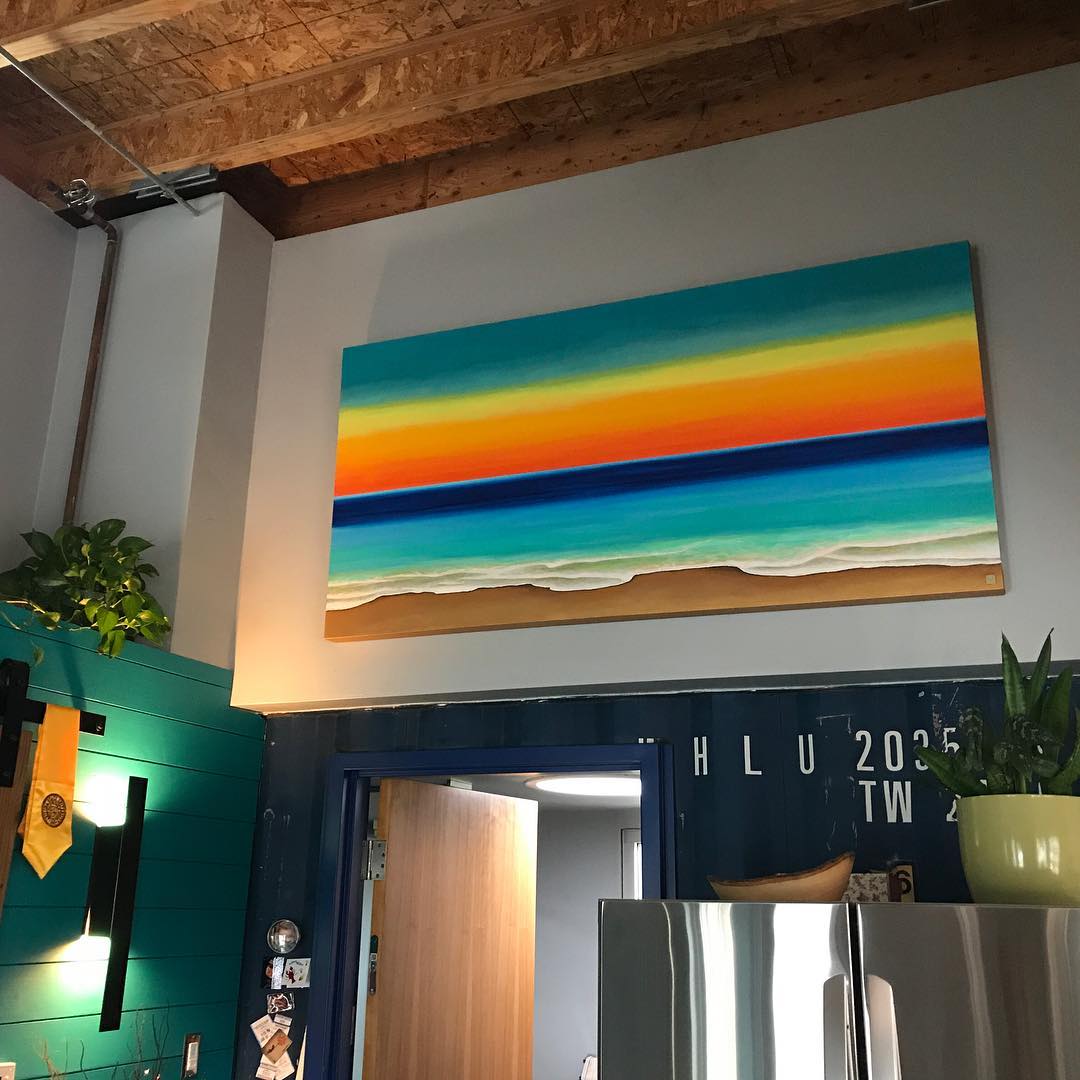
We continued the “loft” theme for our home with concrete floors and exposed utilities and structural members. The glass roll-up garage door we added helps with the industrial flair and provides an amazing view to the east over our deck. We also left the exterior of the containers intentionally “raw” so you can see the bumps and bruises from their lifetime of transporting consumer goods.
The exterior structural framing was made out of wood so that a regular framing inspector from the county could do the inspection, instead of the specialized welding inspector required for structural metal. However, metal studs were used for the non-structural interior framing. Due to local fire codes, all of the exterior elements had to be non-combustible, so we used cement board siding and soffit panels, metal framing for the exterior deck, sheet metal clad eaves, a class A roof system, and dual-paned tempered glass in our aluminum window system. The fire code also required us to have fire sprinklers.
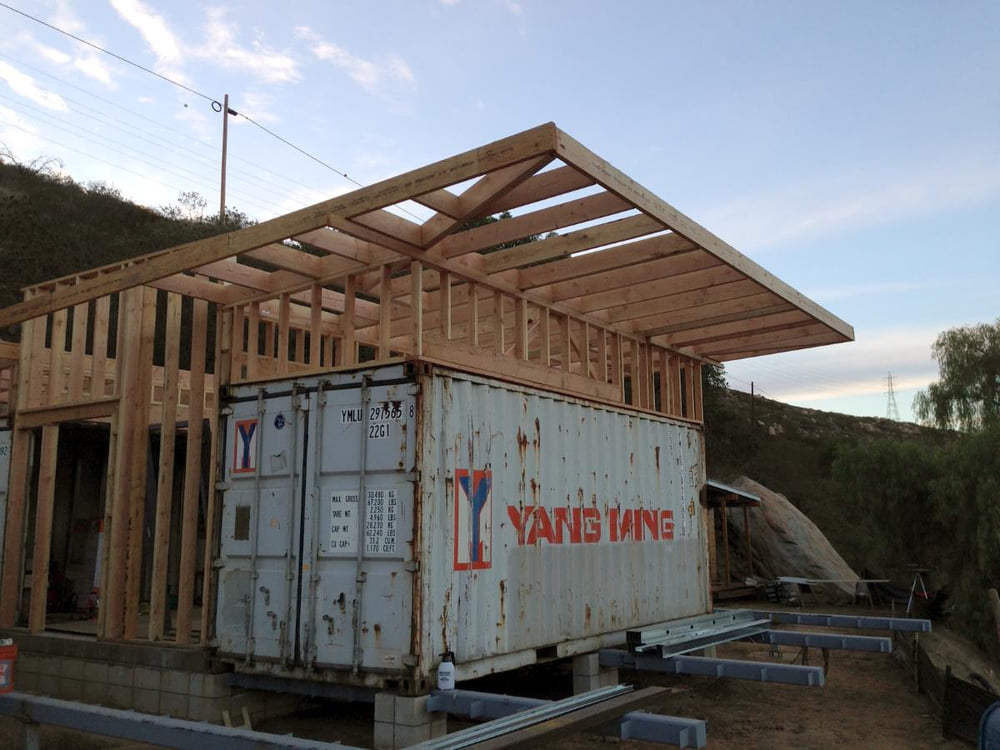
An entire side from two of the containers was removed to increase the open interior space, which meant that we needed to add structural reinforcement. We ended up choosing to use large wooden beams run above the top side rails of each container so as not to reduce the ceiling height. These wooden beams are what support the roof structure overhead, taking the load from the container top rails.
For insulation, we used closed-cell spray polyurethane foam (ccSPF) in the walls and the floors. In the ceiling above the three containers, we used fiberglass batts. The entirety of the roof is insulated with 4 foot by 8 foot polyisocyanurate (polyiso) foam sheeting layered between plywood and fiberglass-mat-faced gypsum panels. The roof material itself is single-ply thermoplastic polyolefin (TPO) sheeting. Taken together, this system gave us the class A fire rating we needed to meet fire code.
We had to hire an Architect and a Structural Engineer to help us through the design and permitting process. We believe we were the first permitted shipping container dwelling in San Diego County, so there was a learning curve for the planning department. The county decided to review the project as it would for any other project using steel as the primary building material so that there was nothing specifically helping or hurting us just because we chose to use containers.
Our architect helped to make the most out of our small space while keeping our overall design theme intact. Our engineer helped prove the containers wouldn’t fail from having pieces or entire sides removed, as well as designing the footings holding up the container corners.
The design-development process unfolded over several years, most of which was me overthinking details as I thought into the future about the construction process. Our architect was involved from the beginning with the design of the initial concept which we refined over time. The final drawing development took around three months followed by the permit process that took another six months.
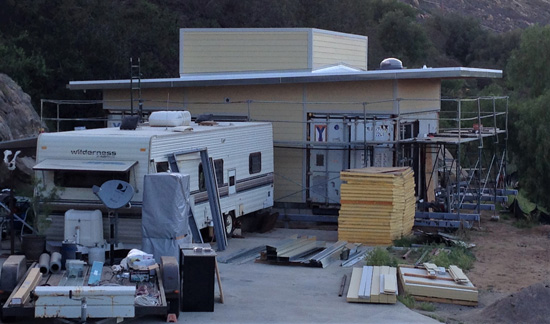
Construction took around 18 months of nights after work and weekends since my wife and I had full-time jobs. My wife and I lived in a 28 foot RV trailer during this period. If I’m thinking positively, it helped us acclimate to living in a smaller space. Luckily, there was minimal time and expense needed for infrastructure since our land previously had a house on it.
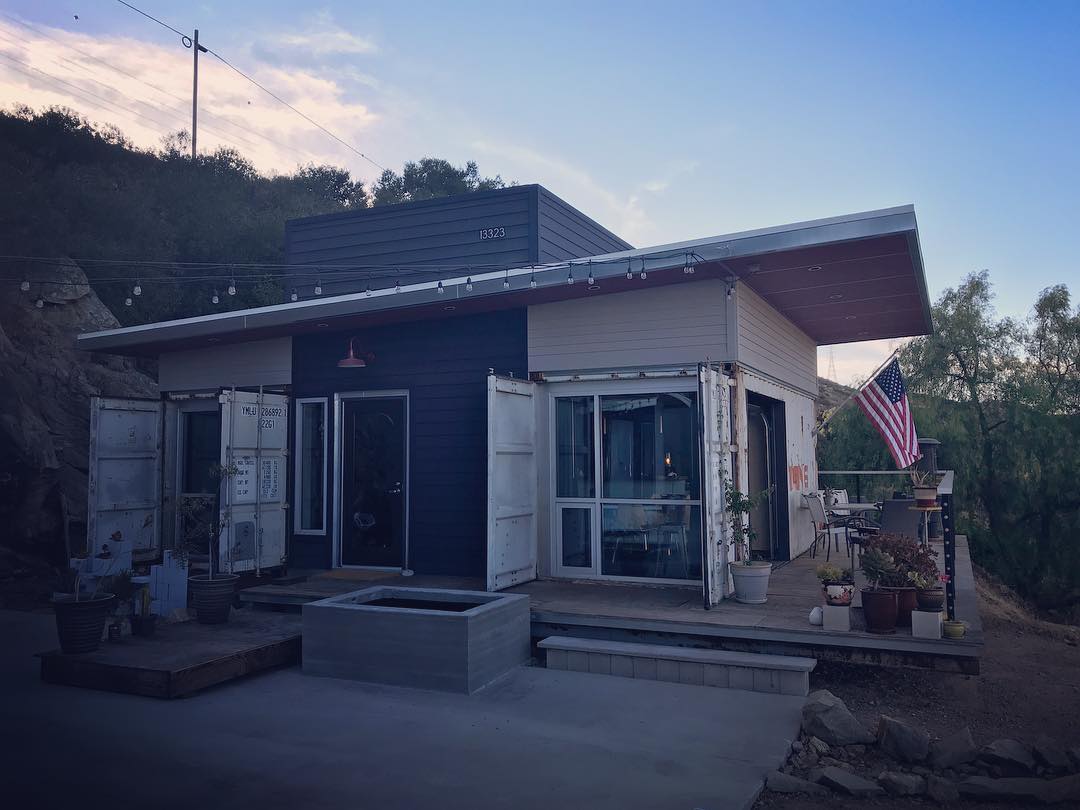
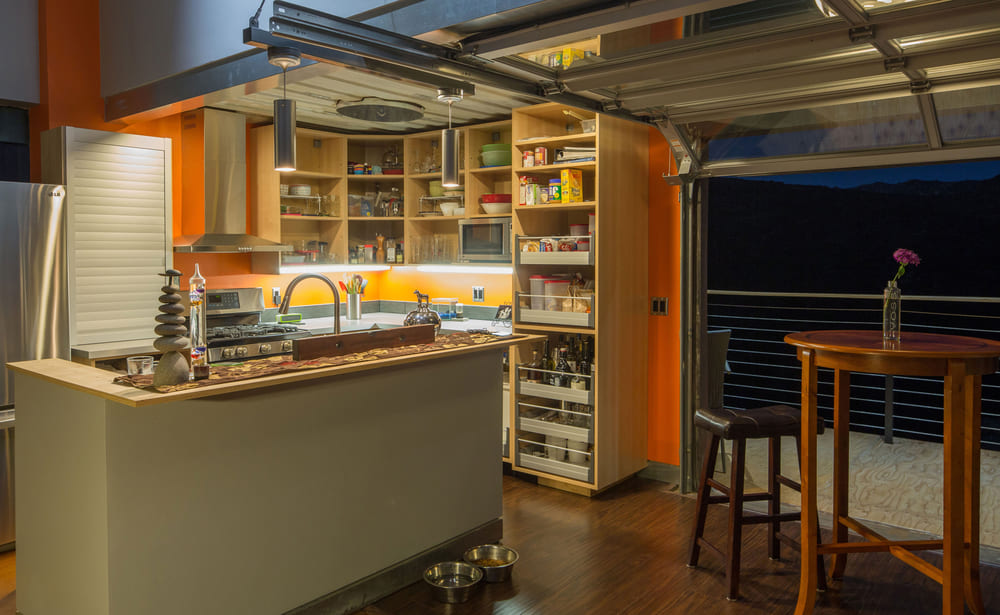
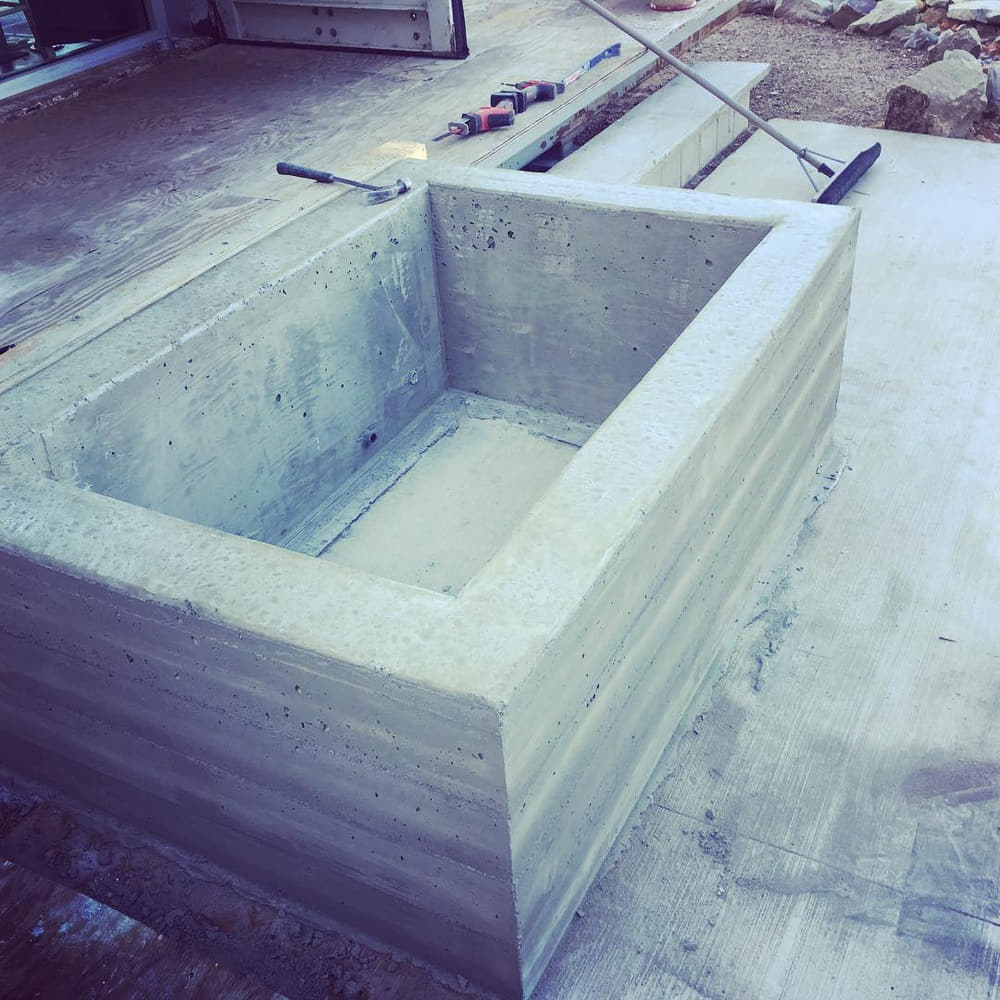
We were able to get a certificate of occupancy prior to having the house completely finished, enabling us to get out of the trailer a bit sooner. For example, we had to complete a few wall finishes and install cabinet doors and counter-tops in the kitchen. It wasn’t that much of an inconvenience living in the house as we worked on it, and we were able to complete projects as we had the available cash. We have also started working on an outdoor kitchen area.
Total costs at move-in for design, permitting, and construction was $160,000.
- Design costs (architect/structural engineer, soil engineer, civil engineer) were approximately $15,000
- Special inspections required by county were around $5,000
- The containers themselves were purchased for around $2,200 each from a broker that I found on Craigslist
We spent an additional $20,000 after move-in on some of the previously mentioned unfinished touches.
I wish we would have discovered the financing woes earlier in the build because I would have revised the design to include another bedroom and a garage unit. I will keep pushing forward though!
We ended up using a combination of savings and credit cards to finish the house, afterward taking a short-term personal loan to pay off the higher interest credit cards. While it is nice not having a mortgage, we had originally planned on getting one. We were ultimately unable to because mortgage appraisers couldn’t come up with any comparables (comps) for our unique home, and thus they were unable to properly value it.
Our thanks again to Mike for sharing the story of building his container home with us. It’s certainly in the top tier of container house examples we’ve seen around the world, made all the better by the fact that he built much of it himself! Let us know your thoughts on his project below!
Interested in Container Homes? You need our FREE cheat sheets to help decide if containers are right for you!


2 Responses
Wow! Looks great. I am going through something very similar. We purchased a beautiful lot on the St. Johns River in Astor Florida. I am in the process of building our container home using two containers and joining them in together by basically building a third container from scratch. each container has 23′ openings in order to get the kitchen living room open concept. I retired two years ago and needed a project. I have never built my own home and my background was in the helicopter rotor blade repair business. I decided to go owner build, not sure that was a good idea but I I’ve always enjoyed challenges and I picked a doozy. Not only didn’t the county have a building code for containers, I was building in a flood zone. In saying this, I had to hire a piling company out of Atlanta Georgia to install 35 helical piles 21′ deep and 50″ above ground level. We will be craning them up on the pilings next week. We will be the first permitted container home in Lake County. It’s been quite the challenge.
Read your build story. Thank you